Receiving Notification of Message Ticket and Non-Message Calls
In a typical script, agents will see the links for Message Ticket and Non-Message Calls in the bottom right corner of the script, which they can click on to save calls that do not fit into available script paths. However, when set up this way, these types of calls don't always trigger a notification. They may be sent directly to your call log. In order to ensure you receive notifications of these calls, we'll need to disable these links and instead have agents access them from your Greeting Logic Step. This will enable you to assign them to specific Profiles.
1
From your SAS Desk portal, click on Scripts from the menu on the left. You will see your Active scripts listed.
2
Click on the script Name that you would like to edit. Then, click the blue Edit your script button in the top right corner of the screen. This will open the Call Script Builder in a new window.

3
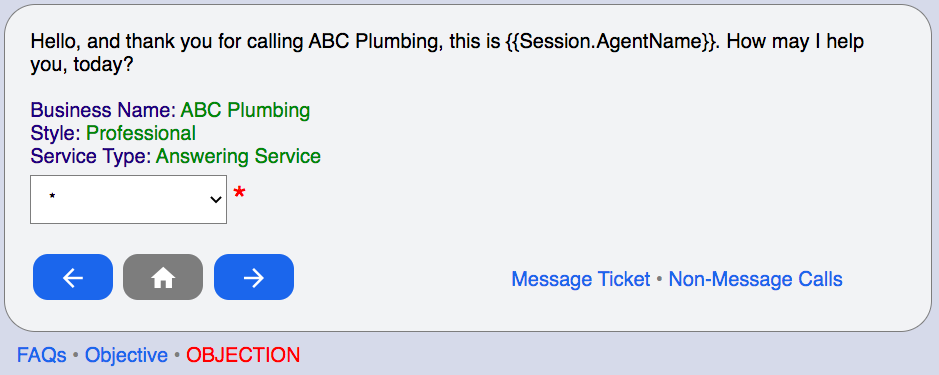
In Edit your script mode, you’ll see a Message icon in the upper left corner of the script home screen.
Note: The links for Message Ticket and Non-Message Calls are only visible in See your script mode.
4
To edit the script opening or initial path options, click the gray Message icon next to the greeting.
5
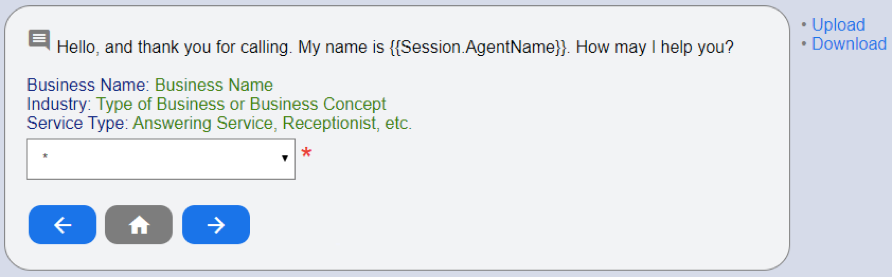
Once open, your screen will look similar to the picture below.
6
Now we'll need to add 2 new drop down options for Message Tickets and Non-Message Calls. Click the blue + button and type in the new options accordingly.
NOTE: The path names must be entered to exactly match the links, which will then be grayed out. (E.g., if you type Message Tickets instead of Message Ticket, the link will not gray out.)

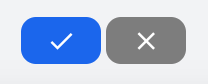
If an agent tries to click a grayed out link, they will see the following alerts, indicating which option to select:
7
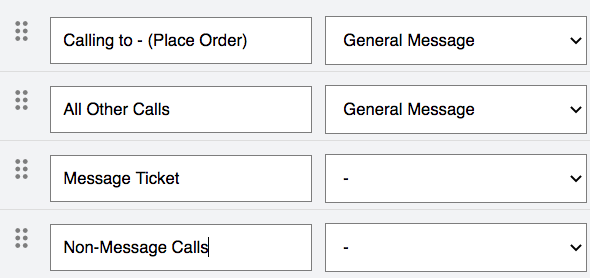
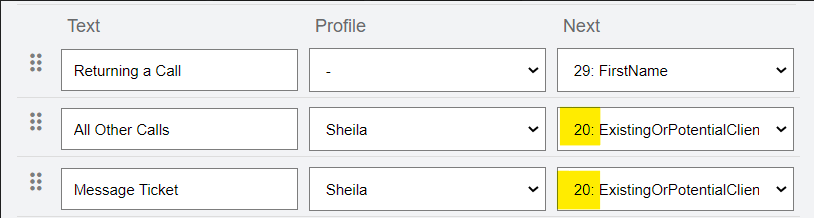
Once you've added Message Ticket and Non-Message Calls options to the drop down, you'll need to finish configuring the paths accordingly. Message Ticket can be assigned to the same next step as All Calls / All Other Calls, for example.
NOTE: You'll also want to make sure to select a Profile from the Profile dropdown associated with your newly created paths. This will ensure you receive notification of these types of calls.
8
For Non-Message Calls, we'll need to configure all of the standard options. Within the Greeting Logic, choose the Profile you want messages to go to, and select New Input as your next step. Then click the blue checkmark to continue.

9
Now, from the main Greeting page, choose your new path from the drop down, and click the blue arrow forward.
10
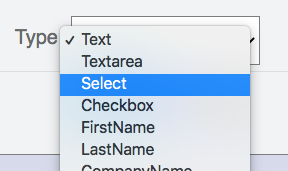
On the next page, select the Select option from the drop down. Then click the blue checkmark.
11
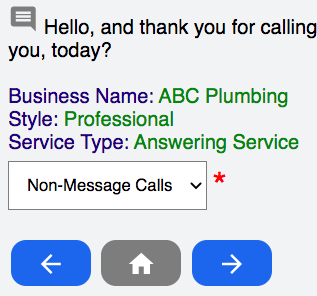
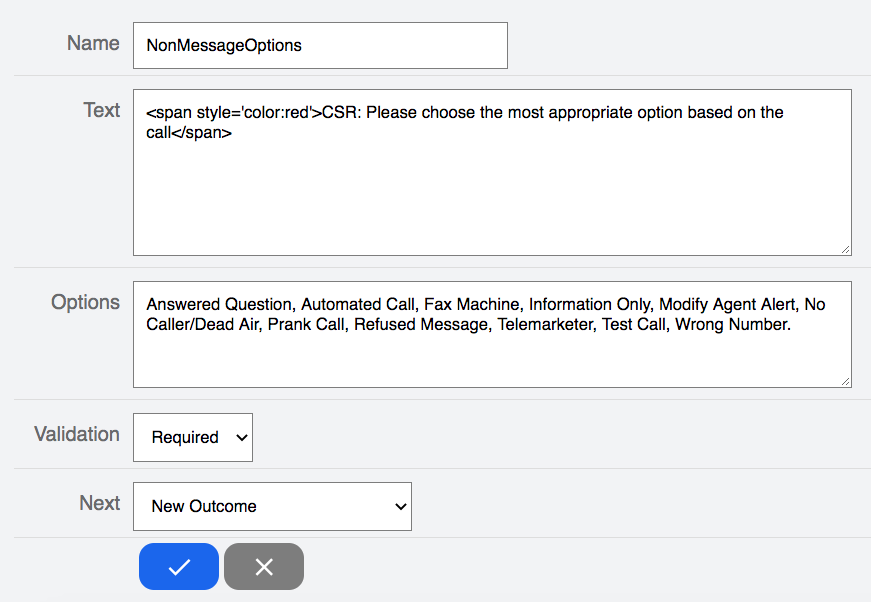
On the next page, name your step NonMessageOptions, input your Operator text as shown below, and then copy and paste the following options within the Options
text box: Answered Question, Automated Call, Fax Machine, Information Only, Modify Agent Alert, No Caller/Dead Air, Prank Call, Refused Message, Telemarketer, Test Call, Wrong Number.
For your Next step, choose New Outcome.
12
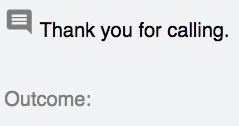
On the next screen, click the gray Message icon to edit the Outcome step.
13
Update your text to match what is shown in the picture below.

14
Once you have built out your new paths, click Publish Changes on the right to save your changes. Note that if you close out the script editor without clicking Publish Changes, you will lose all updates.


