Using the Dynamic Note Features in Script Blocks
While handling your calls, agents will follow your script and input data based on the information that the caller provides. However, sometimes agents may choose one script path over another by mistake. With Dynamic Notes, you can add specific keywords that once entered by an agent will display the note to them.
For example, if an agent takes the All Other Calls path instead of the Emergency path, you can add the word "emergency" as a keyword. Once the agent types the word "emergency", a note will appear for them to take the Emergency path instead. The keywords and notes can be fully customizable to your needs.
In this article we'll discuss:
In this article we'll be showing you how to edit script blocks that have already been created. If you haven't yet created the necessary script blocks, check out this article for instructions.
Using the Dynamic Note feature within a Greeting (Compound) block
1
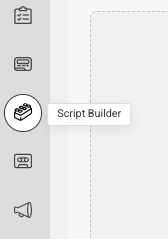
Select the Script Builder icon on the left-hand navigation menu.
2
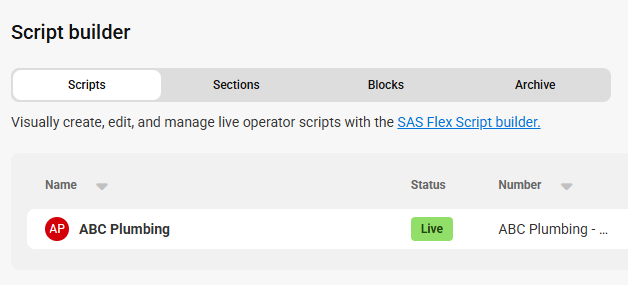
From the main Scripts page, select the script you would like to update.
3
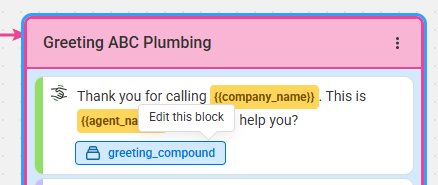
On the next page, locate the Greeting (Compound) block you would like to update and click on the highlighted greeting_compound field as shown below.
4
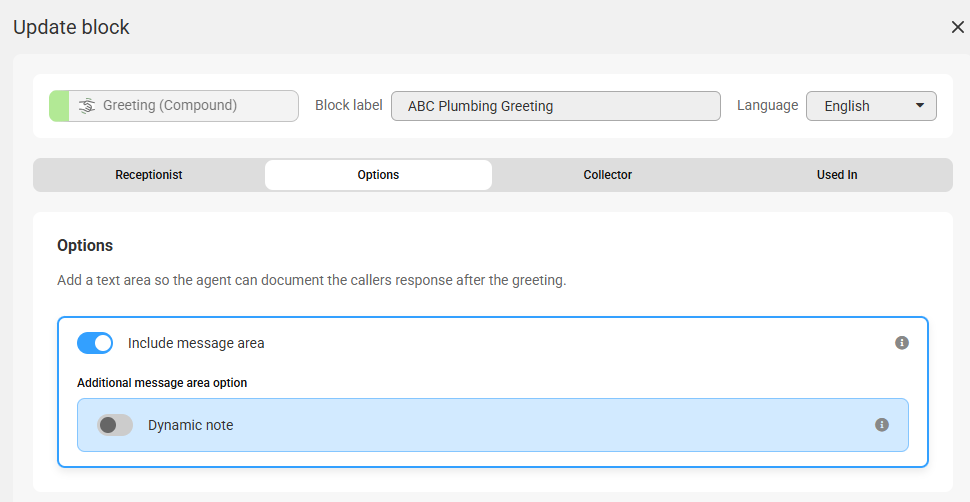
Under the Options tab, check the Include Message Area box (if it isn't already checked), then check the Dynamic note box to activate.
5
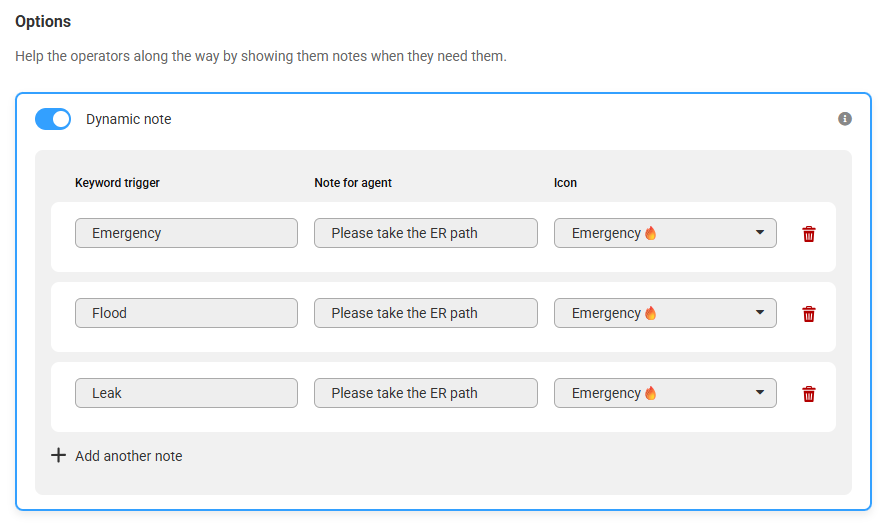
Begin adding your keywords, notes and icons. In our example, we will add some keywords that an agent may type while taking calls for a plumber. In the Note section, we will add our applicable instruction.
6
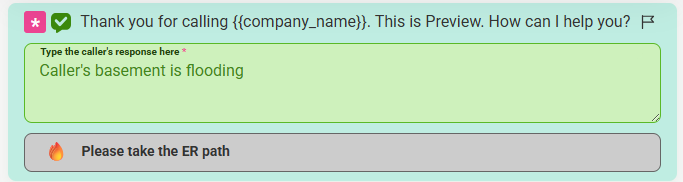
Once you are finished customizing your dynamic note, click Save. When an agent types in any of the above keywords, they'll see the following message:
Using the Dynamic Note feature within a Message block
1
Select the Script Builder icon on the left-hand navigation menu.
2
From the main Scripts page, select the script you would like to update.
3
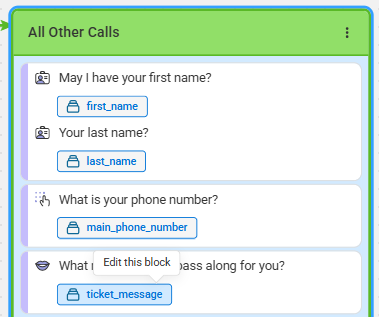
On the next page, locate the Message block you would like to update and click on the highlighted ticket_message field as shown below. Depending on how many Message blocks you're using in your script, you'll need to repeat these steps for each applicable block.
4
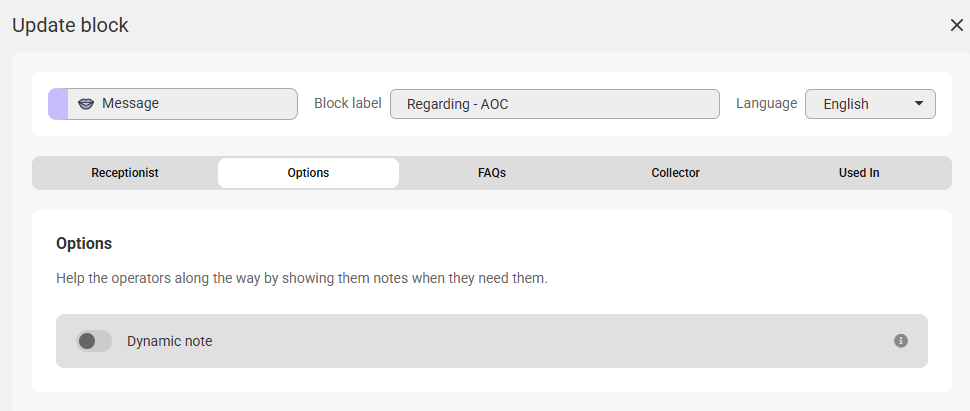
Under the Options tab, toggle on Dynamic note to activate.
5
Begin adding your keywords, notes and icons. In our example, we will add some keywords that an agent may type while taking calls for a plumber. In the Note section, we will add our applicable instruction.
6
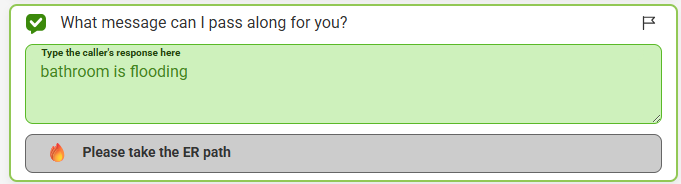
Once you are finished customizing your dynamic note, click Save. When an agent types in any of the above keywords, they'll see the following message:
Using the Dynamic Note feature within a Company block
1
Select the Script Builder icon on the left-hand navigation menu.
2
From the main Scripts page, select the script you would like to update.
3
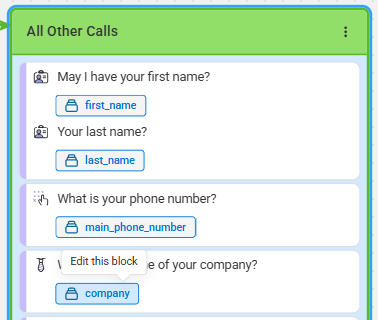
On the next page, locate the Company block you would like to update and click on the highlighted company field as shown below. Depending on how many Company blocks you're using in your script, you'll need to repeat these steps for each applicable block.
4
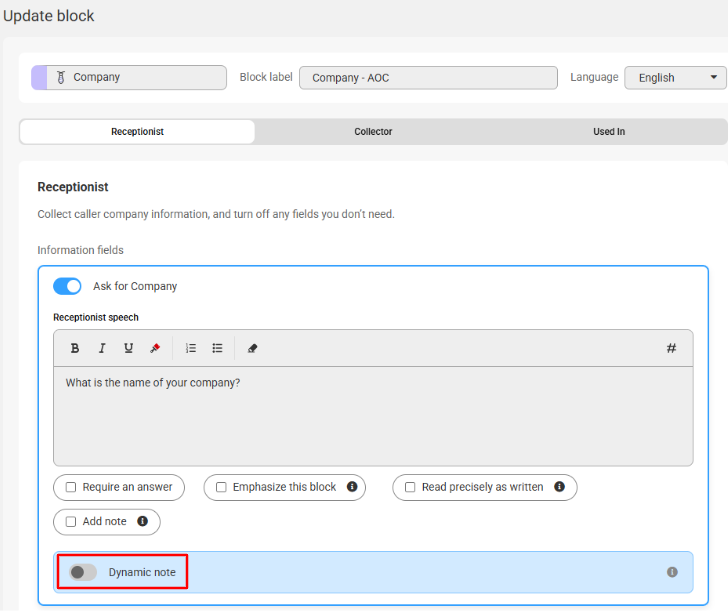
Under the Receptionist tab, use the toggle next to Ask for Company. Then use the toggle to enable the Dynamic Note feature.
5
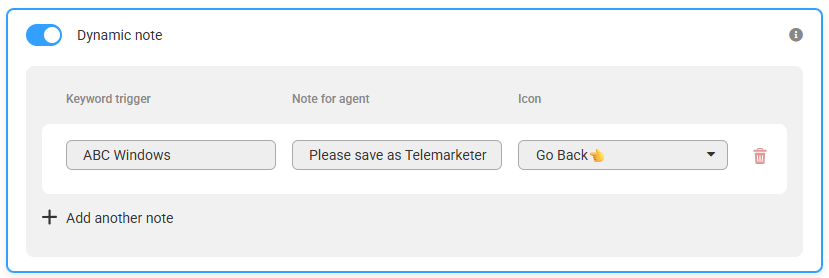
Being adding your keywords, notes and icons. In our example, we'll add the name of a company and instruct the agent to save the call as a Telemarketer via the Non-Message Calls option.
6
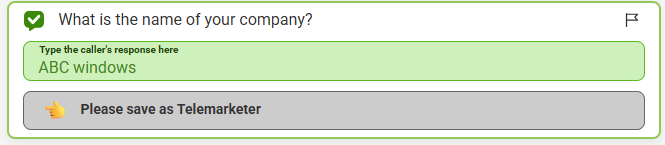
Once you are finished customizing your dynamic note, click Save. When an agent types in any of the above keywords, they'll see the following message:
Using the Dynamic Note feature within an Email block
1
Select the Script Builder icon on the left-hand navigation menu.
2
From the main Scripts page, select the script you would like to update.
3
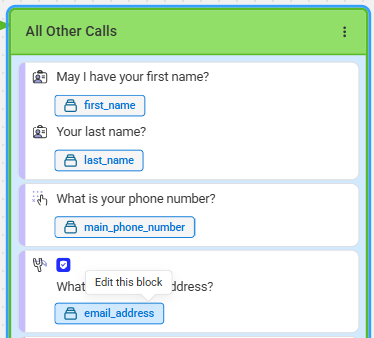
On the next page, locate the Email block you would like to update and click on the highlited email_address field as shown below. Depending on how many Email blocks you're using in your script, you'll need to repeat these steps for each applicable block.
4
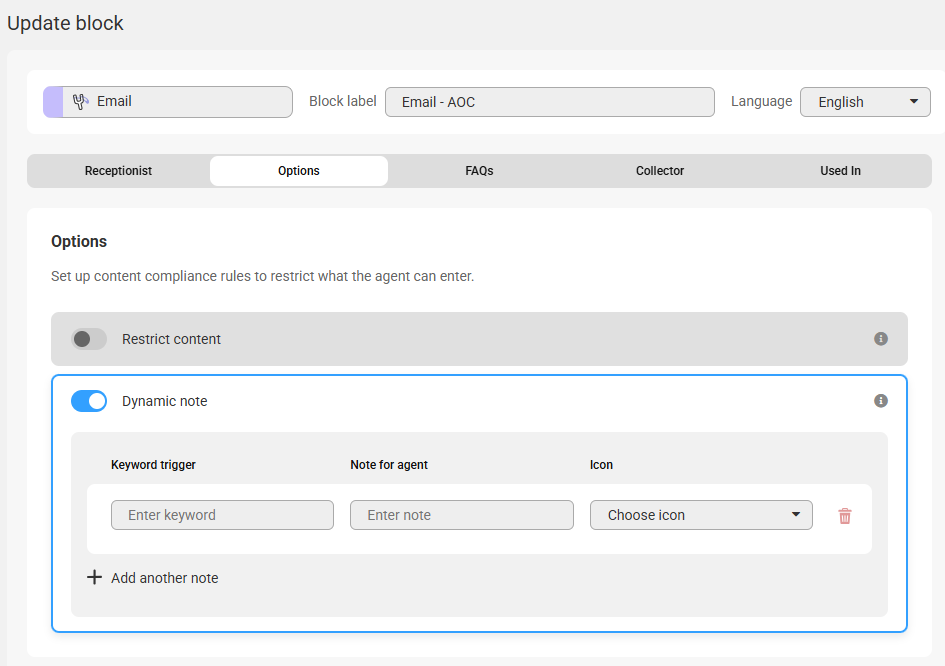
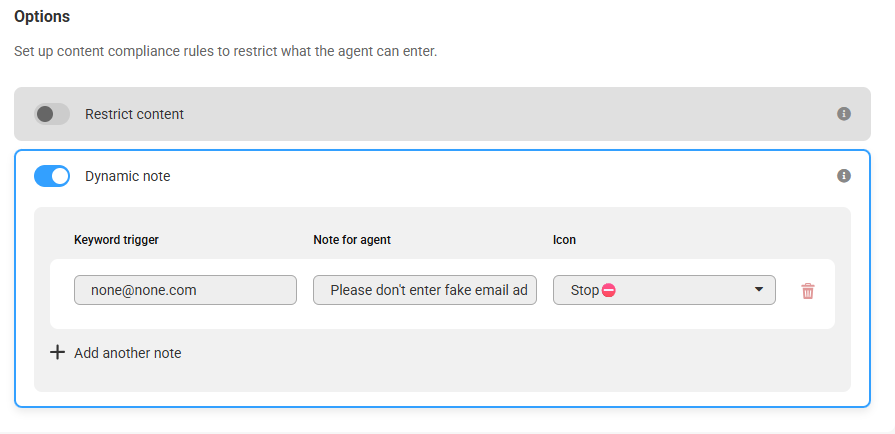
Under the Options tab, use the toggle next to Dynamic Note to enable this feature.
5
Begin adding your keywords, notes and icons. In our example, we'll add a common fake email address and instruct the agent not to enter fake email addresses.
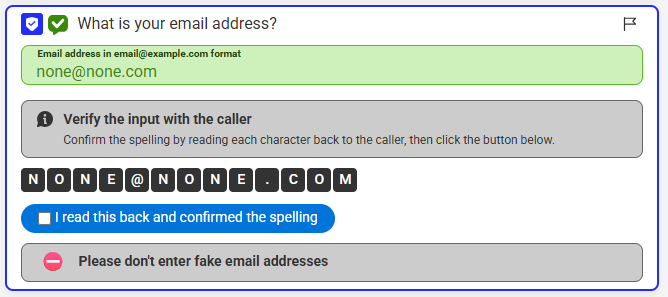
6
Once you are finished customizing your Dynamic Notes, click Save. When an agent types in any of the keywords you've added, they'll see the following message:
Using the Dynamic Note feature within a Name block
1
Select the Script Builder icon on the left-hand navigation menu.
2
From the main Scripts page, select the script you would like to update.
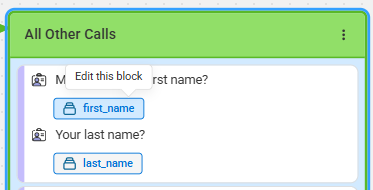
3
On the next page, locate the Name block you would like to update and click on the highlighted first_name field as shown below. Depending on how many Name blocks you're using in your script, you'll need to repeat these steps for each applicable block.
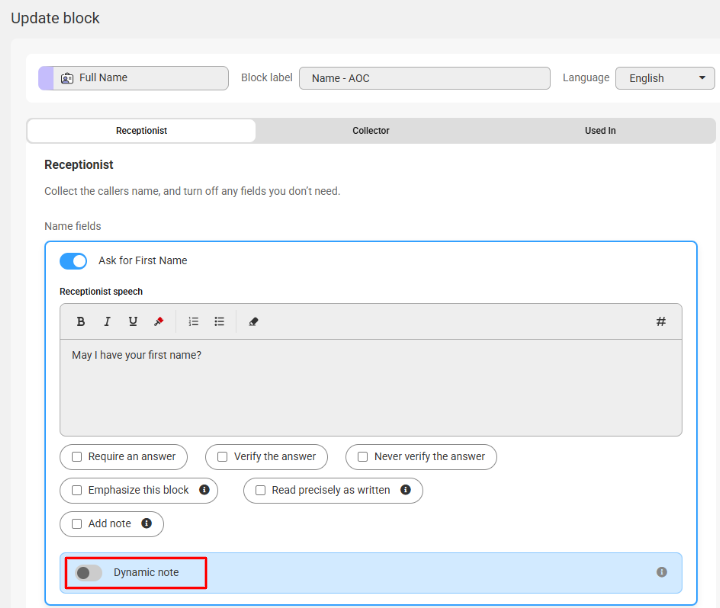
4
Under the Receptionist tab, use the toggle next to Dynamic Note to enable this feature.
5
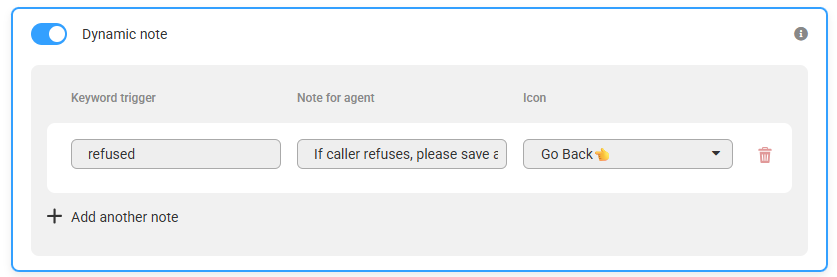
Begin adding your keywords, notes and icon. In our example, we'll add the word "refused" and instruct the agent to save the call as a Telemarketer if the caller refuses to provide their name. We'll also add an icon to better assist agents with next steps.
6
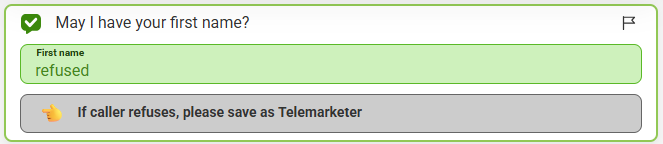
Once you are finishing customizing your Dynamic Note, click Save. When an agent types in any of the keywords you've added, they'll see the following message:
Using the Dynamic Note feature within a Free Text block
1
Select the Script Builder icon on the left-hand navigation menu.
2
From the main Scripts page, select the script you would like to update.
3
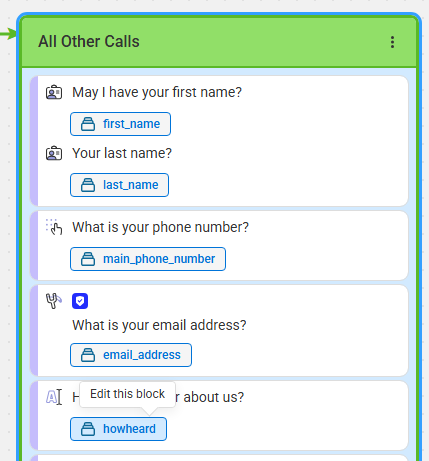
On the next page, locate the Free Text block you would like to update and click on the highlighted field as shown below.
The specific block label will change depending on how you named your block. In our case, our Free Text field is named How Heard.
4
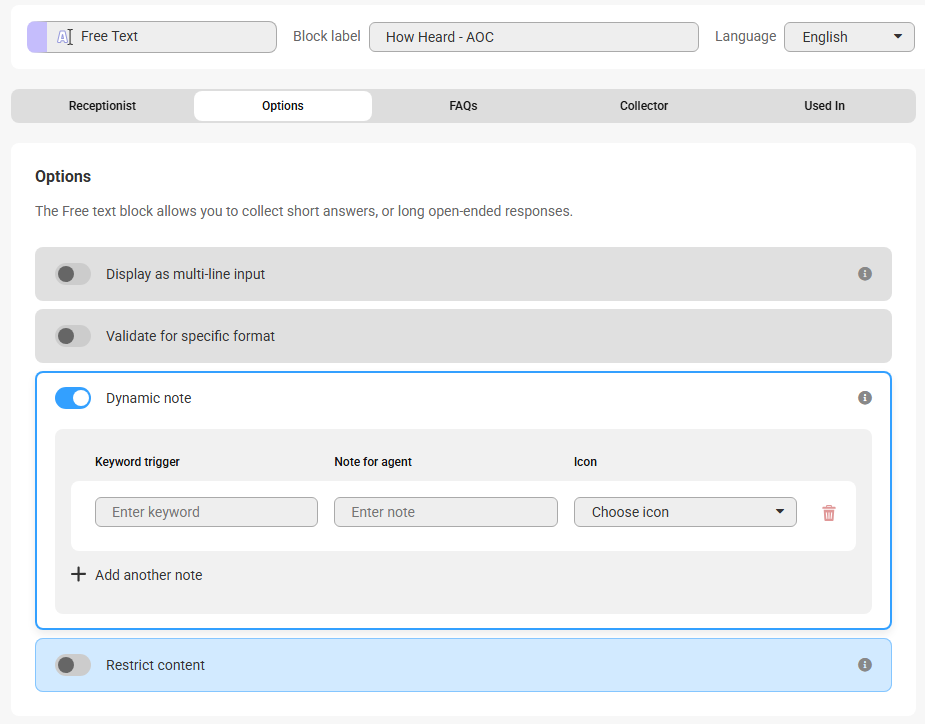
Under the Options tab, use the Dynamic Note toggle to activate.
5
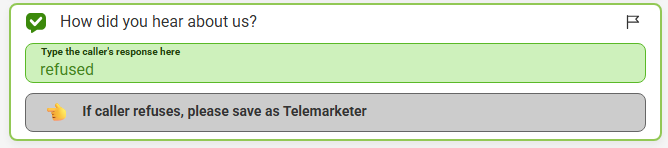
Begin adding your keywords, notes and icon. In our example, we'll add the word "refused" and instruct the agent to save the call as a Telemarketer if the caller refuses to provide how they heard about the company. We'll also add an icon to better assist agents with next steps.
6
Once you are finishing customizing your Dynamic Note, click Save. When an agent types in any of the keywords you've added, they'll see the following message: