How to configure the SAS Email App
The SAS Email App is a great way to send documents to your customers following a call or email your colleagues call details in a specific format for fast follow-up. This can be especially useful when it comes to providing product and pricing information, sending new patient forms after appointment scheduling, emailing frequently asked questions, and more. It will also allow you to add a distinct subject line and call variables to customize emails for people in your organization.
When information is disseminated at the close of a call, it eliminates the need for you to do double the work by sending paperwork to your new leads or individually forwarding call details to different departments. The email app is designed to make your life easier, and it can be quickly configured and integrated into any path in your call script.
In this article we'll discuss:
Looking at Your Script Variables
1
Before you can configure the Email App, you'll need to determine which script variables to use in your email template.
Each script path will have custom step labels and default variables, such as [FirstName], [PhoneNumber], [Email], etc. If you have multiple paths in your script, they will each have a different set of variables. So, you'll need to access the call script builder to determine the step labels in the specific path you are mapping.
Keep in mind that you can build a separate integration for every script path, each with their corresponding step labels.
2
Write down the step labels. This is what allows the app to push the correct data to your spreadsheet.
1
Now that you've documented the step labels, it's time to connect the app. Click Apps from the left side menu.
2
Under the SAS Email Templates logo, click Configure.
This will bring you to the configuration screen.
Basic Template Details
1
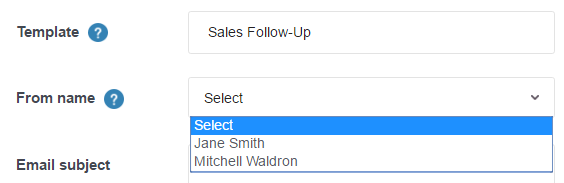
Scroll down to add a Template title, and select the From name (this is the name that will appear in the recipient's email inbox). If there are no options in the From name dropdown list, then you'll need to configure an outbound mailbox.
2
Next, add your customized Email subject (this will be the subject line in the recipient's email inbox), and select the Script where you'd like to include email sending.
Note that you can create a different email template for each Script on your account, as well as any path within your call script.

3
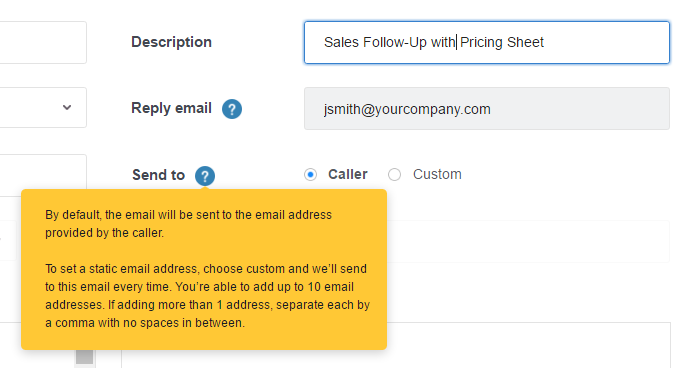
To the right of the Template title, include a brief Description that will indicate the purpose of the email being sent. You'll notice that the Reply email has been auto-populated based on the From name you selected.
4
Before building your email template, choose a Send to option.
- If you'd like to send information to your customers, select Caller.
- If you'll be emailing call details to your staff, select Custom, and then type in each email address separated by a comma. You can include a maximum of 10 email addresses.
Create the Email Template
1
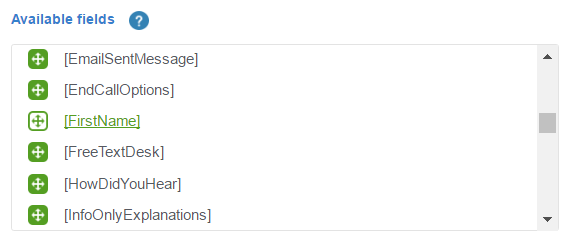
Now, use the Available fields to create your email. Left click on any field, and drag it to the Email template box on the right.
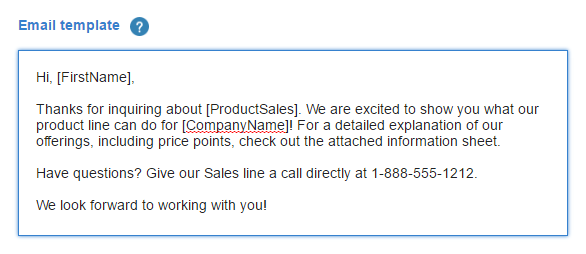
When sending messages to your callers, you'll need to format the text just as if you were typing an email. If you're emailing call details to your colleagues, you can simply drag and drop your preferred fields and separate details with a hard return or comma.
In the example below, we've constructed a follow-up email to new sales leads.
2
If you'll be adding attachments, click on the Attach file button on the left below the Available fields list. Browse to find and attach your file(s). You'll see any attachments listed below File name.
- The following file types can be sent using the email app: .DOC, .XLS, .CSV, .PPT, and .PDF
- Each attachment must be 3 MB or less.
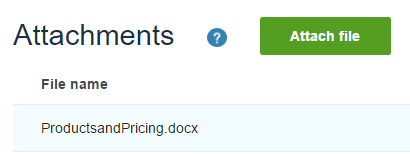
If you'd like to view an attachment, click the View button to the far right of the File name, and your attachment will be saved to your Downloads folder.

Send a Test Email
1
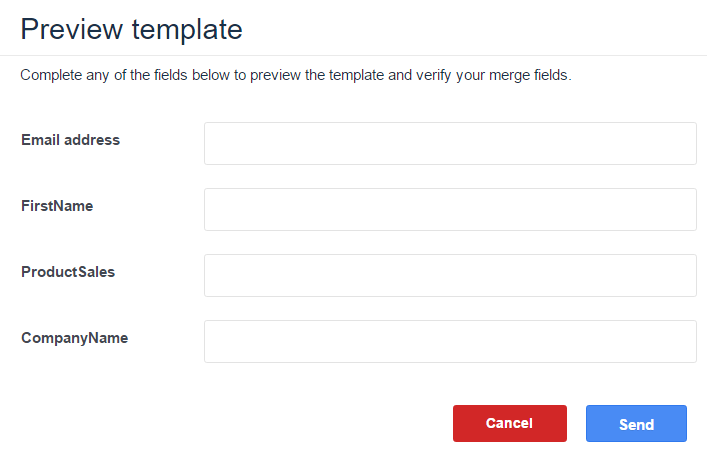
After you've entered all necessary information, you can check to see how the recipient will receive the call information by clicking Send test.

2
The Preview template pop-up will open containing all of the message fields you've entered. Add the recipient's Email address and include your test data.
3
Then, click the Send button in the bottom right corner of the pop-up.
Save and Edit the Template
1
Once you are satisfied with the app setup, click the Save button at the bottom right of the template. Any entries you create will be listed under Saved templates.
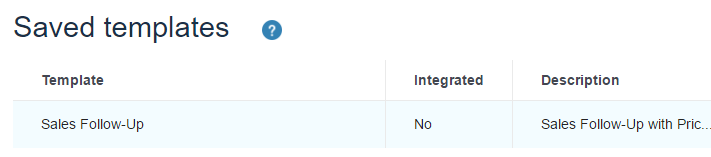
2
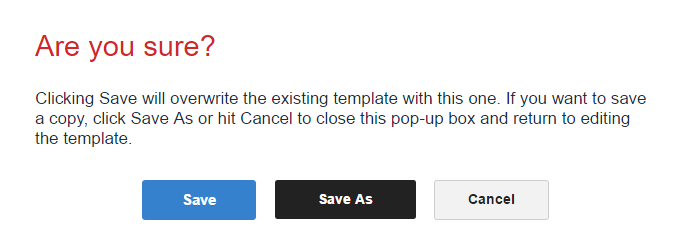
To edit your setup, click the Edit button to the far right of the template name. Make your changes, and then click Save. You'll see a pop-up asking if you'd like to overwrite the existing data or save a copy of the template.
You can edit the email app configuration at any time. However, if the app has already been integrated into your script, you will need to reintegrate the link after saving your changes.
Integrate Email Sending into Your Script
With all of your integration settings complete, you'll need to add the integration into your SAS script.
1
Click the Integrate button to the right of the Saved template.

2
A pop-up will open containing the integration link. Right click to copy the link text, or highlight the link with your cursor and press CTRL+C. Then, click OK.
3
To complete the integration, follow the web pop instructions in this article. Keep in mind that you'll want to create the web pop step at the end of the script path and before the closing.
NOTE: Some integrations and access to external websites are restricted to designated operator distribution groups. If you are adding either to your script, please reach out so we can make sure your account is assigned to the proper distribution.


