How to add appointment setting to an existing path
The following tutorial will show you how to add an Appointment Setting option using Google Calendar to an existing path in your call script. Before you create the script path to integrate Google Calendar, please complete our tutorial on configuring your SAS Google Calendar app.
In this article we'll discuss:
Adding a Web Pop Step
1
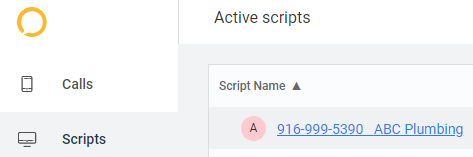
Within SAS Desk, click the Scripts tab on the left-hand navigation panel. Then select the script you wish to update.
2
In the upper right-hand corner, click Edit your script. This will open your script in a pop-up window.

3
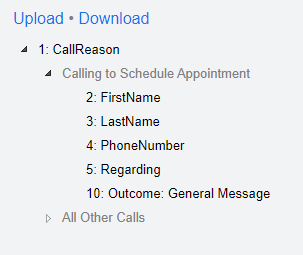
Within your script, find the path you wish to add Appointment Scheduling to.
4
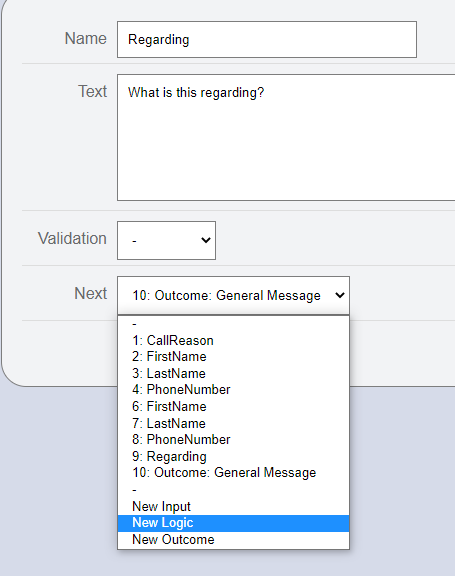
Now, you'll click the step prior to the Closing. That is where we'll be adding the Google Calendar integration. In our example, the last step before the Outcome is the Regarding step. Click Regarding to edit this step. In the next window, choose New Logic from the Next drop down, as shown below.
5
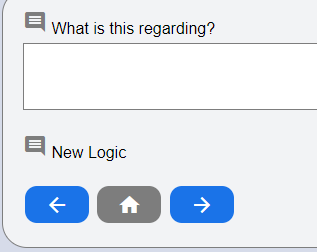
Your path will repopulate showing your New Logic step. Click the gray Message icon to finish configuring this step.
6
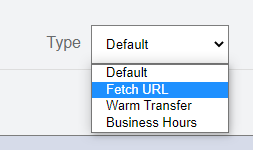
From the Type drop down, select Fetch URL. This will tell our system that we will be accessing a URL to schedule.
7
Click the blue checkmark to continue. You will then see a blank step like the image below.

8
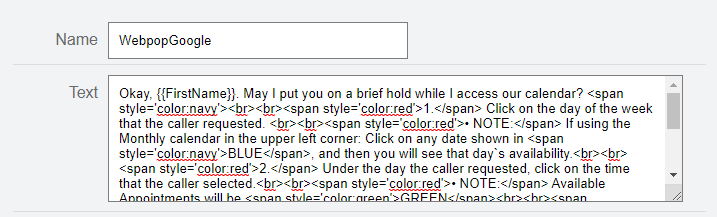
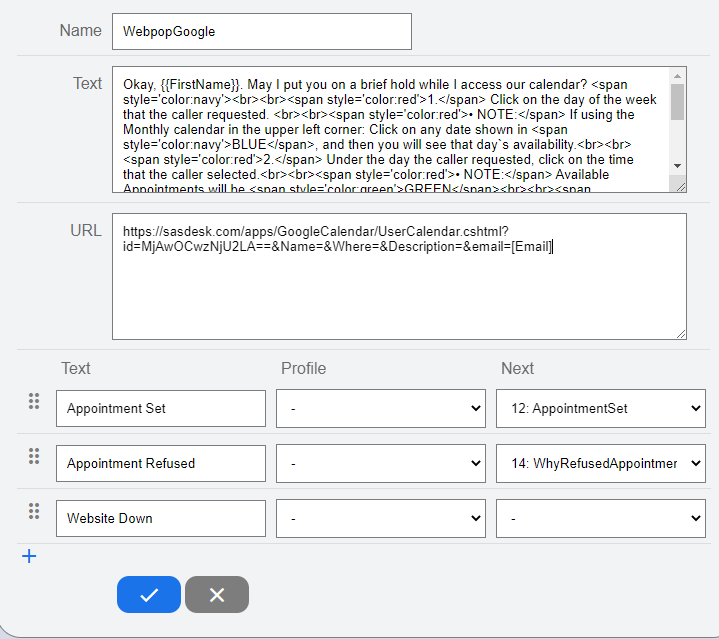
Fill in the Name box with the words WebPopGoogle. Then, copy and paste the instructions below into the Text section, making sure to enter it exactly, as it contains coding that will display the script a certain way:
Okay, {{FirstName}}. May I put you on a brief hold while I access our calendar? <span style='color:navy'><br><br><span style='color:red'>1.</span> Click on the day of the week that the caller requested. <br><br><span style='color:red'>• NOTE:</span> If using the Monthly calendar in the upper left corner: Click on any date shown in <span style='color:navy'>BLUE</span>, and then you will see that day`s availability.<br><br><span style='color:red'>2.</span> Under the day the caller requested, click on the time that the caller selected.<br><br><span style='color:red'>• NOTE:</span> Available Appointments will be <span style='color:green'>GREEN</span><br><br><span style='color:red'>3.</span> IF APPLICABLE, from the drop down, select the Service (or Services) that the caller requested, and click <span style='color:red'>ADD APPOINTMENT.</span><br><br><span style='color:red'>4.</span> A Box will come up pre-filled with all caller data. Please confirm:<br><br><span style='color:green'>• {{FirstName}} {{LastName}}<br>• {{PhoneNumber}}<br><br><span style='color:red'>5.</span> To save the appointment, click on <span style='color:red'>ADD APPOINTMENT</span><br><br><span style='color:red'>• NOTE:</span> The appointment date and time have been automatically copied to your clipboard. You will paste that into the next step.</span>
9
For now, leave the URL blank. You will return to the URL section later to integrate your Google Calendar. Click the blue checkmark to continue.
Building a Logic Option
A Logic Option step is pre-built into the Web Pop step. We'll use the Logic Option to give the operators choices on how to close the call.
1
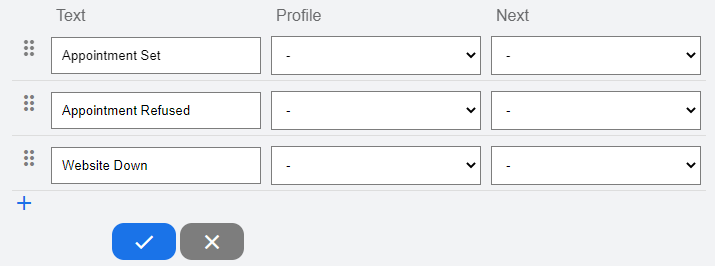
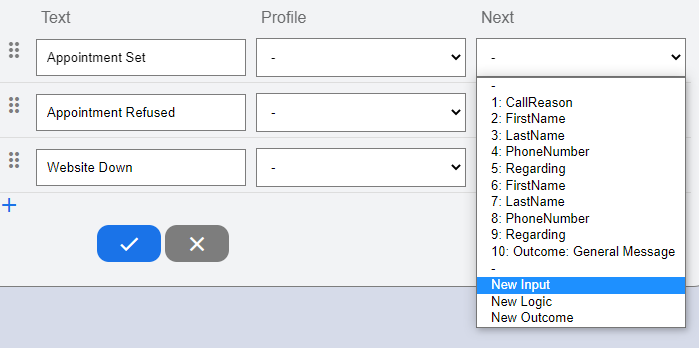
In the menu on the bottom of the Webpop step, expand the + icon again to begin adding your Next Steps. Here you will need to add 3 options: Appointment Set, Appointment Refused, and Website Down.
2
Click the blue checkmark to continue.
Building Out Web Pop Options
1
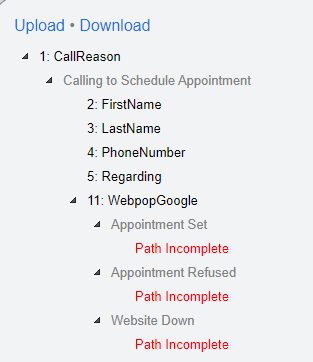
Expand the arrow icons next to Appointment Set, Appointment Refused, and Website Down. Below each, you will see a red Path Incomplete message next to it.
2
Back in the Webpop step, expand the Next drop down menu and choose New Input. then click the blue checkmark and page forward in your script until you get to the New Input step.
3
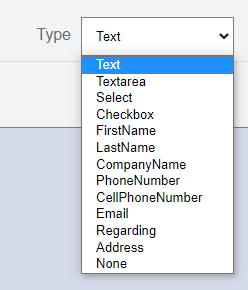
Click on the gray Message icon next to New Input. Then from the Type drop down, select Text. This will allow us to add a space for the operators to document the appointment. Click the blue checkmark to continue.

4
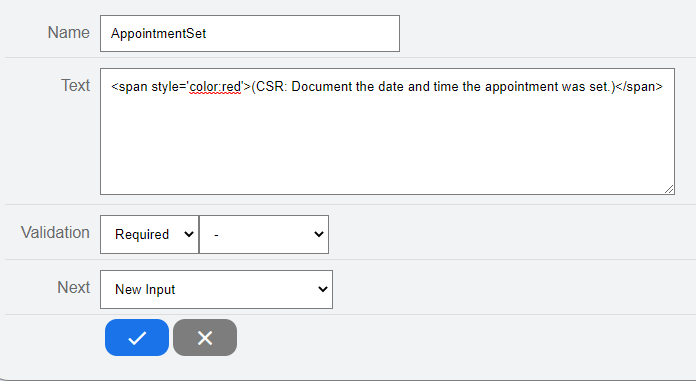
Now you'll see the blank Free Text step. Fill in the Name with AppointmentSet. Then, copy the text below, and paste it into the Text box.
<span style='color:red'>(CSR: Document the date and time the appointment was set.)</span>
5
Click the check box next to Validation and choose Required. The operators will have to include the caller's appointment information in this step before they can continue with the call.
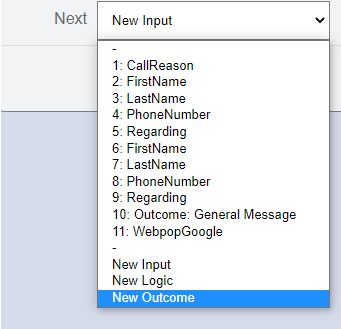
6
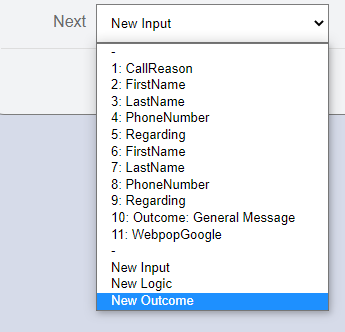
Now, we'll need to add an Outcome step. From the Next drop down, select New Outcome. Then click the blue check mark to continue and page forward until you get to your new Outcome step.
7
Click the gray Message icon to begin editing your new Outcome step.
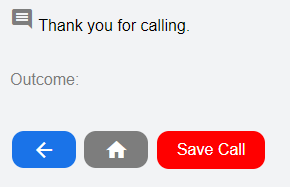
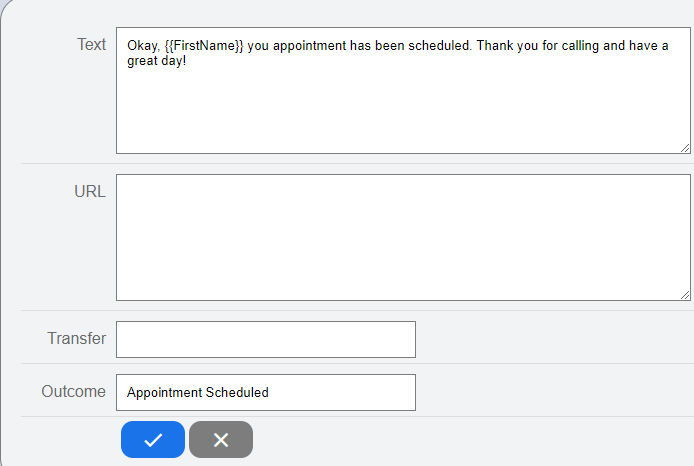
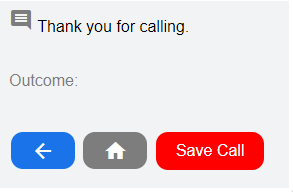
8
Fill in the operator text and change Outcome to something that will let you know an appointment has been scheduled, e.g. “Appointment Scheduled.” Here, you can also modify the text to make it more personal.
9
Click the blue checkmark to continue.
10
Now, you'll need to complete the other paths. Below Appointment Refused, click on New Input, then select Text from the Type dropdown menu. We'll add a space for the operators to document why the caller refused the appointment.
11
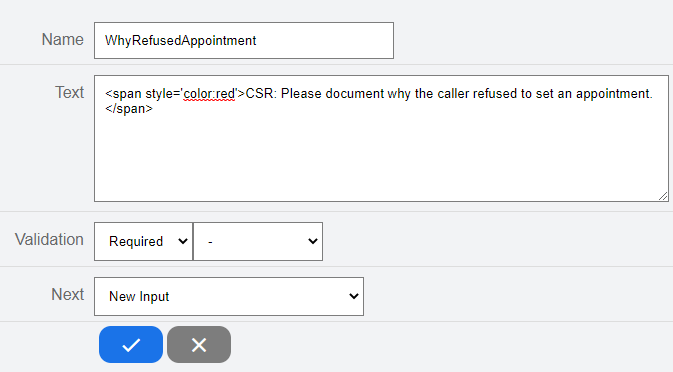
Click the blue check mark to continue, then locate your new step to finish configuring it. In the new step, fill in the Name with WhyRefusedAppointment. Then, copy the text below, and paste it into the Text box.
<span style='color:red'>CSR: Please document why the caller refused to set an appointment.</span>
12
Click the check box next to Validation and choose Required. The operators will have to include the caller's appointment information in this step before they can continue with the call.
13
Now, we'll need to add an Outcome step. From the Next drop down, select New Outcome. Then click the blue check mark to continue and page forward until you get to your new Outcome step.
14
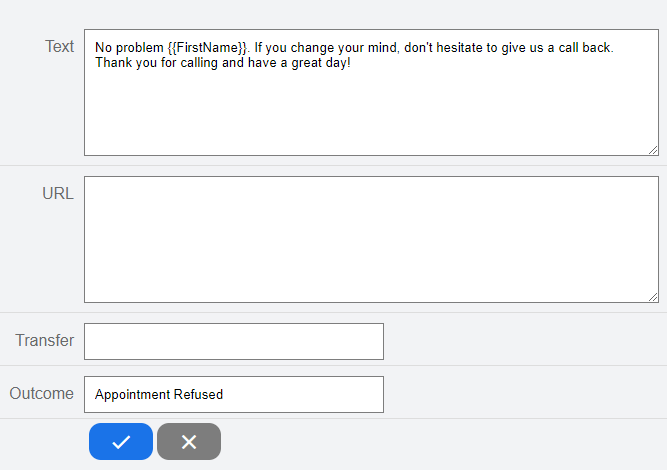
Click the gray Message icon to begin editing your new Outcome step.
15
Fill in the operator text and change Outcome to something that will let you know an appointment has been scheduled, e.g. “Appointment Refused.” Here, you can also modify the text to make it more personal.
16
Click the blue checkmark to continue.
17
The Website Down path will be handled much the same as the above, but you will be adding two Free Text steps instead of one.
For the first Free Text step, fill in the Name with WhyWebDown. Again, you'll need to choose Required from the Validation drop down. Copy the text below and paste it into the Text box. Then, click the blue checkmark to continue.
<span style='color:red'>CSR: Document the error received below.</span>
For the second Free Text step, fill in the Name with PreferredDateTime. Include text here letting the caller know that we were unable to access the calendar, and document the preferred date and time for their appointment. For example:
I`m sorry, {{FirstName}}. I was unable to access our calendar, but I will have the office contact you to get you scheduled.<br><br>What is your preferred date and time for an appointment?
Click the blue checkmark to continue. Only one more thing to do - add an Outcome step to the Website Down path.
Below Preferred Date Time, expand the Next drop down and select New Outcome. Click the blue checkmark and continue forward.
Fill in the operator text and change the Outcome to something that will let you know the operator was not able to access the website, e.g. “Schedule - Website Down.” Click the blue checkmark, then click Publish Changes.
For now, you have everything set to integrate Google Calendar. Close the scripting window by clicking on the X in the upper right corner.
Completing the Integration
1
To complete integration, you will need to generate a link from the SAS Google Calendar integration in your portal and enter it in the URL field of the Web Pop step you created above. If you haven't already done so, please link SAS to your Google Calendar with this tutorial so you can generate the Integration link.
2
Once your script comes up, expand the arrow icon next to the name of the path you created for scheduling, and click on the WebPopGoogle step. Paste the link that was created into this box and click the blue checkmark. Then click Publish Changes.
Congratulations! Your Google Calendar has been integrated into your script. The operators can now begin scheduling appointments for you based on your calendar setup.
NOTE: Some integrations and access to external websites are restricted to designated operator distribution groups. If you are adding either to your script, please reach out so we can make sure your account is assigned to the proper distribution.


