How to Add Appointment Setting with Google Calendar to Your Script
The following tutorial will show you how to add an Appointment Setting option using Google Calendar as a new section in your script. Before you create the script section to integrate Google Calendar, please complete our tutorial on configuring your SAS Google Calendar app.
In this article we'll discuss:
How to add a script block for scheduling new appointments
1
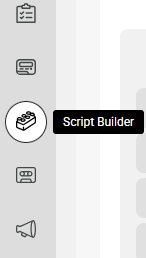
Select the Script Builder icon on the left-hand navigation menu.
2
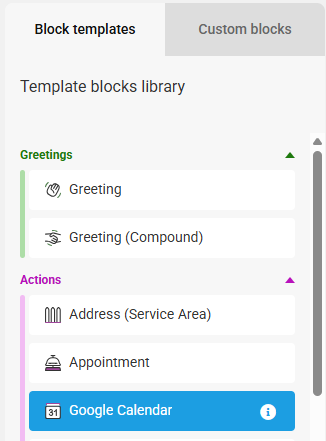
On the next page, click the Block Library tab, then select Add new block. From the Blocks list under Block Templates, locate and select the Google Calendar block.

3
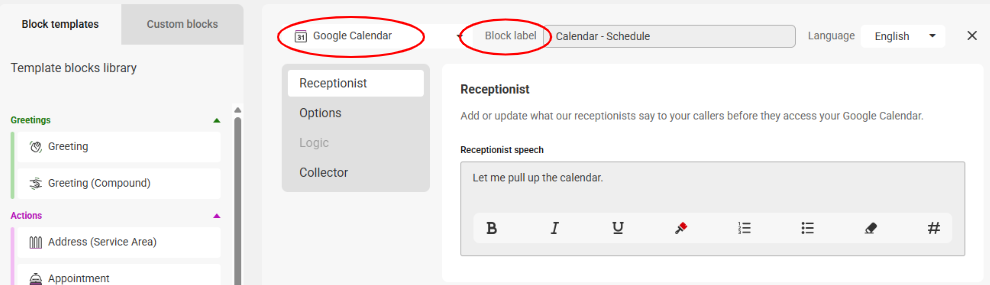
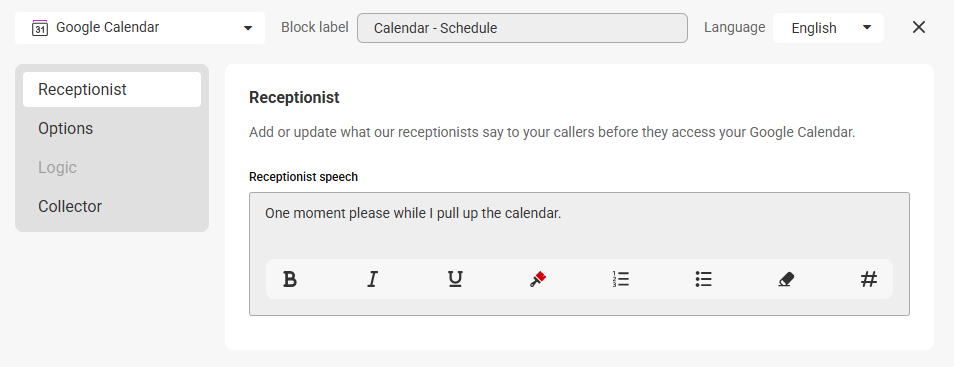
Once the block populates on your screen, you'll see the Block Type along the top of the block, and a space to add a Block Label next to it. Block Labels will help us identify the block within the system later on. We named ours Calendar - Schedule.
4
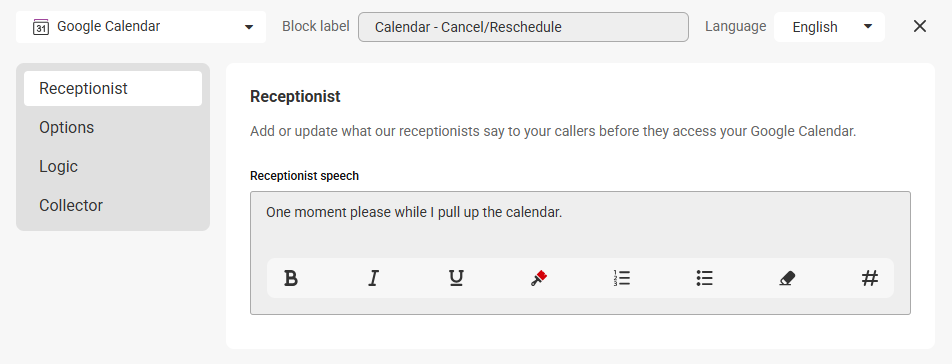
Now under the Receptionist tab, fill in the operator text, or what you want the operators to say to your callers.
5
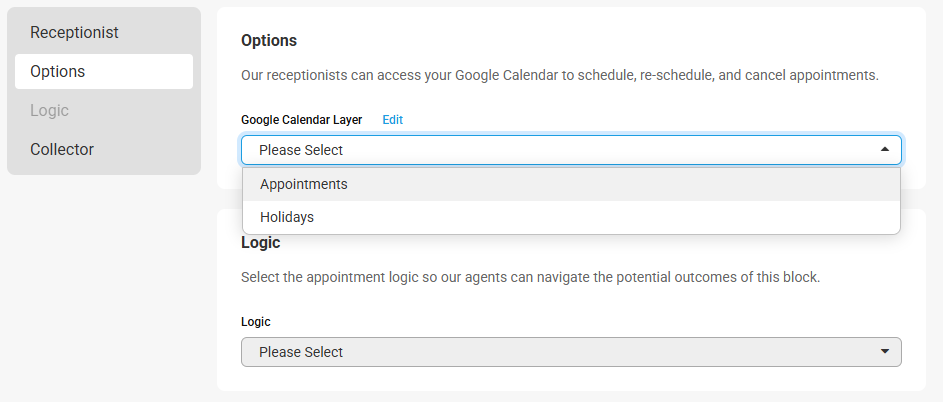
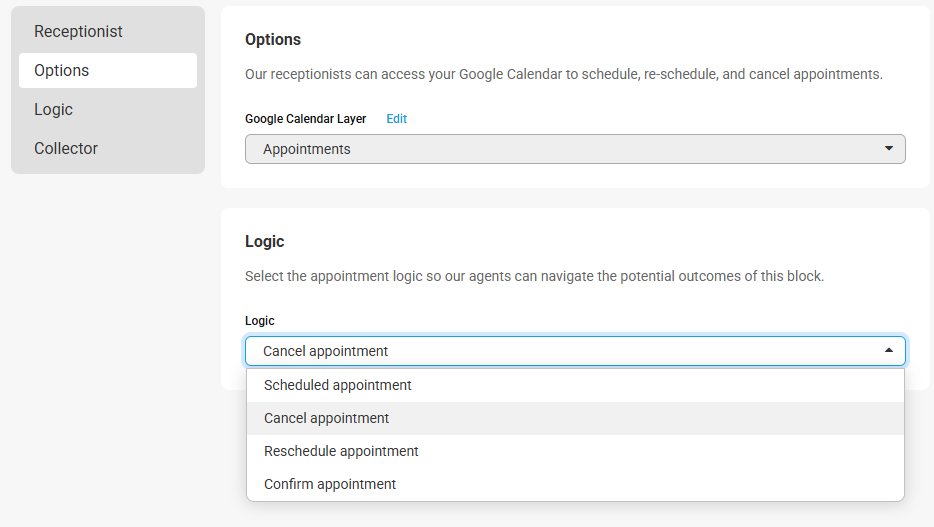
Under the Options tab, you will need to select which calendar layer you want the operators to view via the Google Calendar Layer drop-down.
Calendar layers are something you need to create on your side through your actual Google Calendar.
6
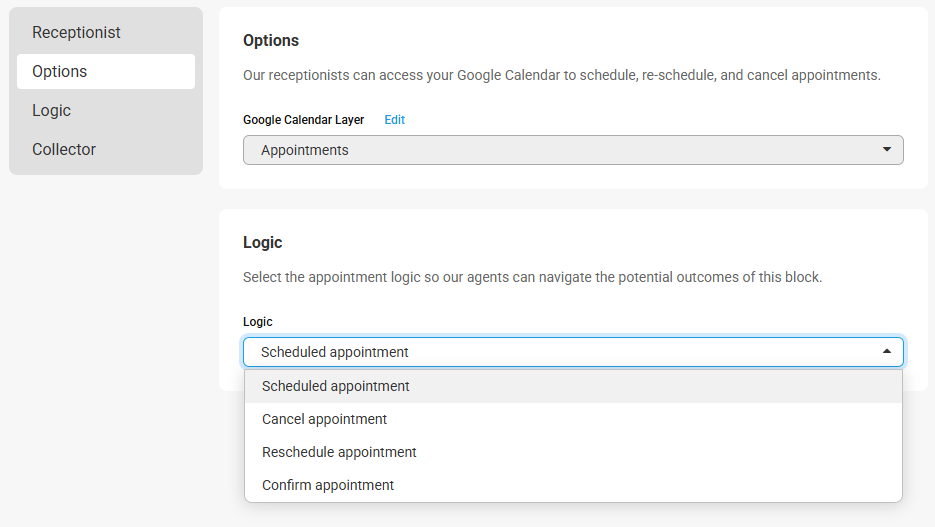
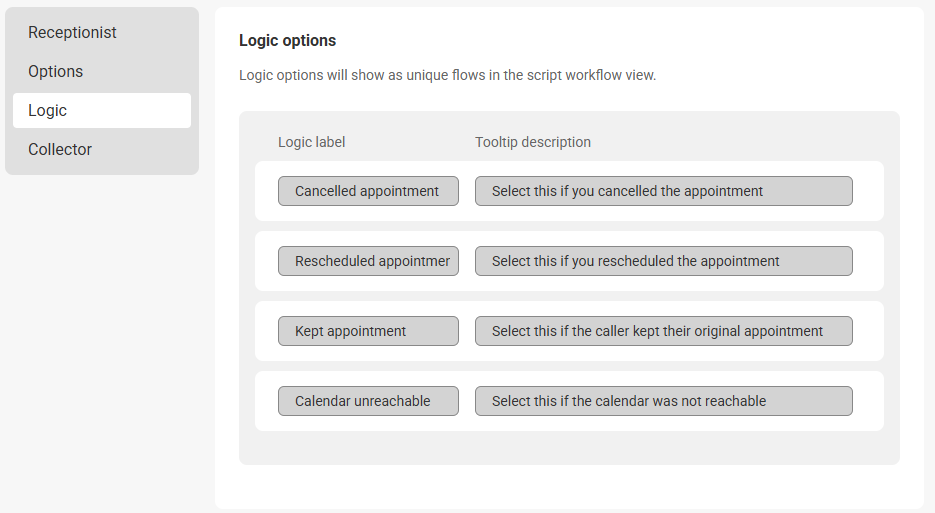
Under the same tab, you will also need to choose the appropriate logic based off the type of block we are creating. In this case, you will select Scheduled Appointment.
Whichever option you choose in this drop-down will dictate what pre-programmed options populate under the Logic tab
7
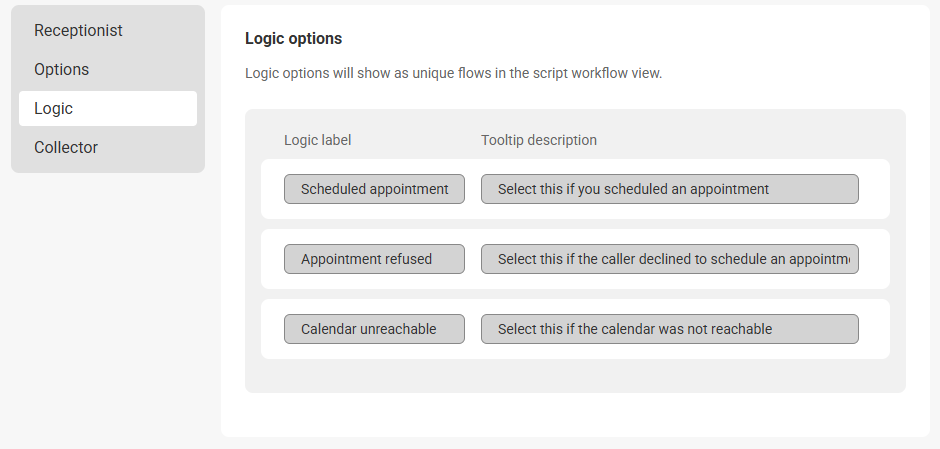
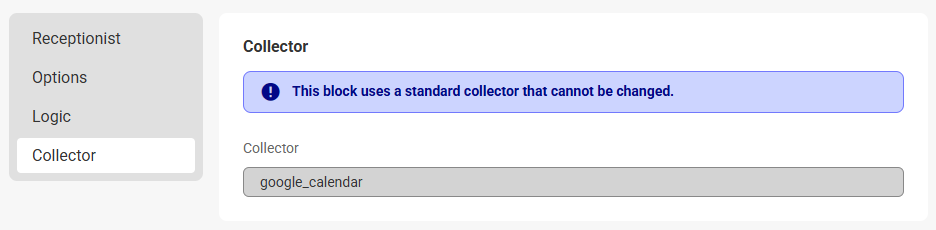
Both the Logic and the Collector tabs have pre-set data that cannot be changed, so you can ignore those two tabs.
8
Once you are done, click Save in the bottom right-hand corner.
If you haven’t already, go back and create the rest of the script blocks you want included within this script section, or path (name, number, email, etc.) Remember to name your blocks consistently with the section you want to attach them to (Name – Schedule, Email – Schedule, etc.). Check out this article for more information on how to create script blocks.
How to add a script block for cancelling or rescheduling appointments
Now that we created our script block for callers looking to schedule, we will learn how to do the same for callers wanting to cancel or reschedule their appointment.
1
Select the Script Builder icon on the left-hand navigation menu.
2
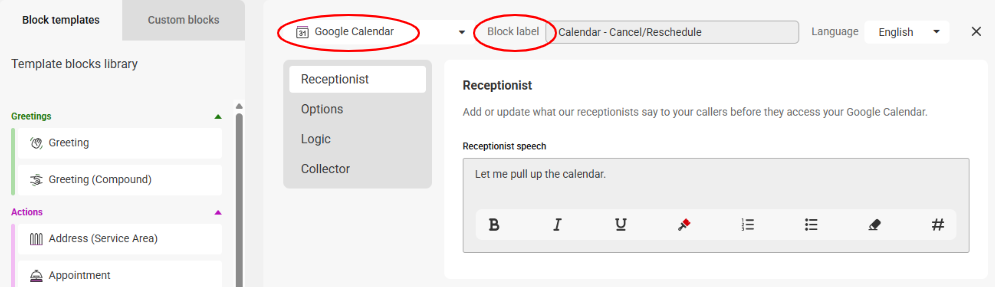
On the next page, click the Block Library tab, then select Add new block. From the Blocks list under Block Templates, locate and select the Google Calendar block.
3
Once the block populates on your screen, you'll see the Block Type along the top of the block, and a space to add a Block Label next to it. Block Labels will help us identify the block within the system later on. We named ours Calendar - Cancel/Reschedule.
4
Now under the Receptionist tab, fill in the operator text, or what you want the operators to say to your callers.
5
Under the Options tab, you will need to select which calendar layer you want the operators to view via the Google Calendar Layer drop-down.
Calendar layers are something you need to create on your side through your actual Google Calendar.
6
Under the same tab, you will also need to choose the appropriate logic based off the type of block we are creating. In this case, you can select either Cancel Appointment OR Rescheduled Appointment. Both of these options will populate the same pre-programmed options in the Logic step.
7
Both the Logic and the Collector tabs have pre-set data that cannot be changed, so you can ignore those two tabs.
8
Once you are done, click Save in the bottom right-hand corner.
If you want to create a separate block for both cancelled and rescheduled appointments you can. Just follow the same steps above but make sure you choose the applicable options depending on the block you are creating.
How to create new script sections based off the caller's query
Now that we've created all of your blocks, we will learn how to group them into their appropriate sections.
1
Select the Script Builder icon on the left-hand navigation menu.
2
On the next page, click on the Section Library tab, then select Add new section.

All of the script blocks you've just created will be listed under the Custom Blocks library under Unassigned blocks. The script blocks that have already been assigned to a section will be located under Assigned Blocks.

3
Decide which section you want to build first (Scheduled vs. Cancel/Reschedule) and start dragging over the corresponding script blocks into the designated box. In our example we started with Scheduled.
Since the Google Calendar script block is a Logic Option, you will not be able to include your Closing script blocks in this section. You will need create separate sections just for the closings.
4
Once you are finished dragging over the appropriate blocks, name your section accordingly. We named ours Calling to Schedule.

5
When you are done with this section, click Save in the bottom right-hand corner.
6
Next, drag over all of the remaining Cancel/Reschedule blocks into a new section (aside from your Cancel/Reschedule Closing Block).
7
Once you are finished, name your section accordingly. Ours is named Calling to Cancel/Reschedule.

8
Create your Closing sections by dragging out each of your Closing Blocks and labeling them accordingly.


9
When you are done, click Save in the bottom right-hand corner.
How to implement new sections into your script
After all of our blocks and sections are created, our final step is to implement them into the script.
1
Select the Script Builder icon on the left-hand navigation menu.
2
On the next screen, select the script you would like to edit. If you haven't already created a script, click Add.

3
Within your Script workflow, click the + sign in the upper left-hand corner to add your new Sections. Locate your newly created Sections and drag them out onto the grid.


4
Your Greeting section will list all of the logic options you created (Calling to Schedule, Calling to Cancel, All Other Calls, etc.). Click on the circle next to one of those options and drag it to the corresponding section so that a gray line appears.

5
Repeat for the rest of your logic options.

6
To complete the flow, we'll now need to add in our Closing sections. From your Script Sections list on the left, drag out both Closing Sections and link them up accordingly.

7
When you are done, click Save in the upper right-hand corner.
How to preview your calendar as an agent
Once your calendar has been created and implemented into your script, you can preview it to see how it looks as an agent. You can either do this by using the Preview feature within the script workflow, or you can preview it through the integration page, which is what we'll show you below.
1
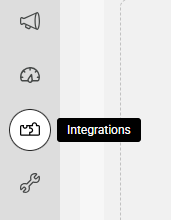
Click the Integrations icon from the left-hand navigation menu.
2
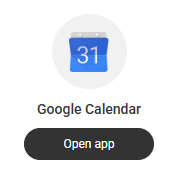
Click Open app next to the Google Calendar app.
3
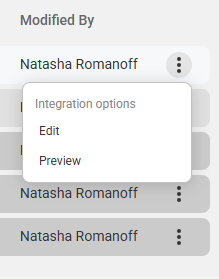
On the right-hand side of your screen, click the 3-dot menu icon adjacent to the calendar you wish to view, and select Preview.
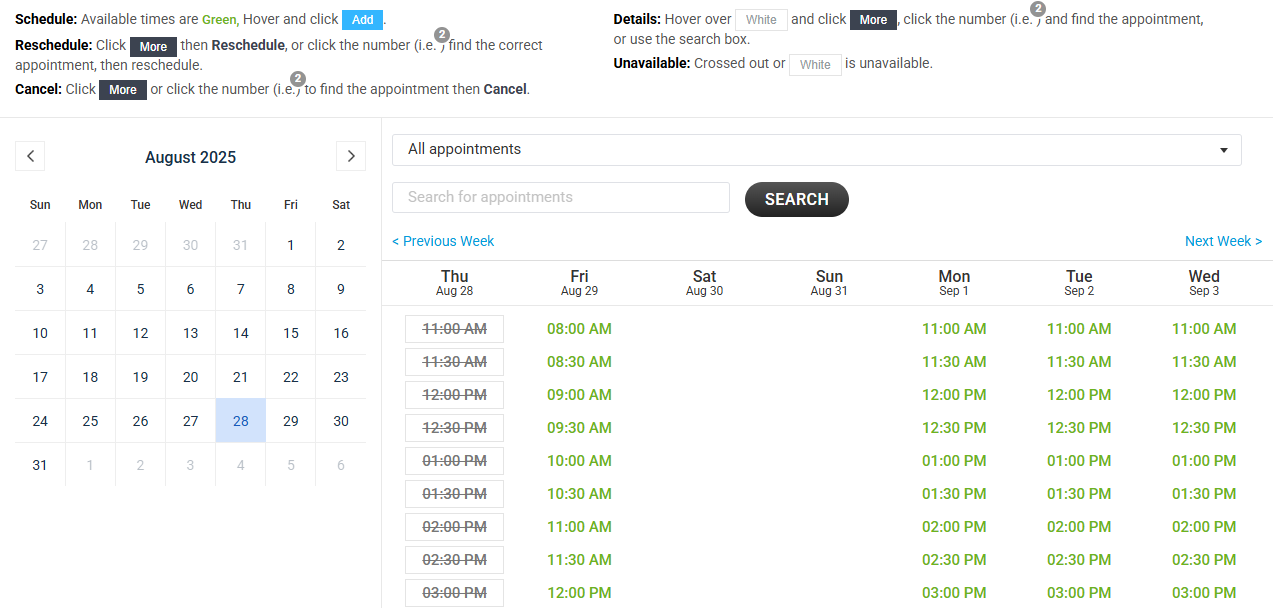
4
A pop-up will appear showing a preview of your calendar. Available appointment slots will display as green, scheduled slots will display as white with a number in the corner, and unavailable slots will either display as white or a crossed-out box.
5
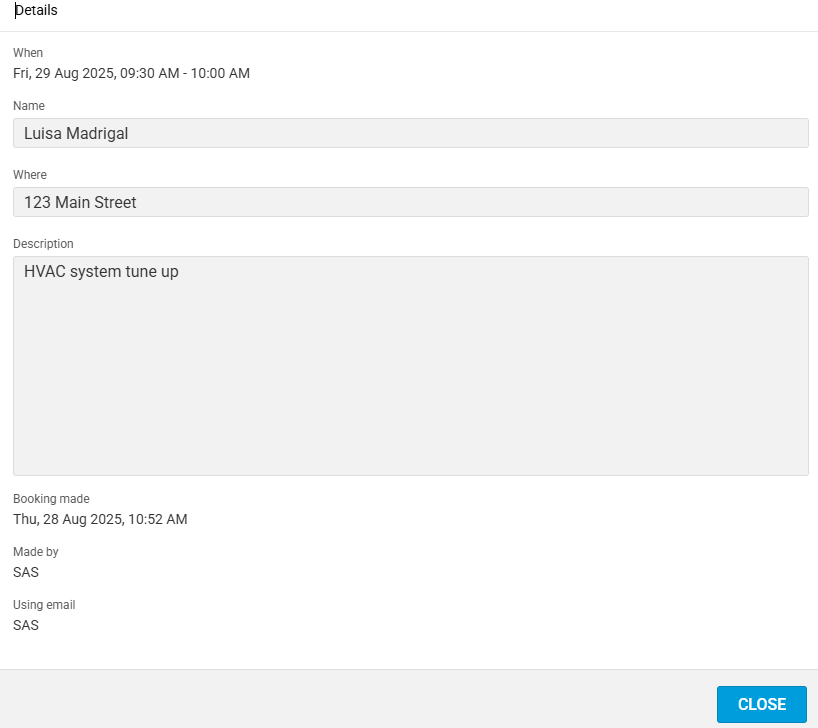
If your account does not need to adhere to HIPAA guidelines, you can click on any scheduled slot to view the details of the appointment.