Removing Contacts in SAS Flex
If employees are no longer with your company, it's important to remove them as contacts within your SAS Flex portal. Below are all of the areas in which a contact may be listed within your portal.
Once you have finished removing the employee from your SAS Flex portal, please contact Customer Support to double check that the employee has been thoroughly removed. Customer Support may also need to remove the employee from any back-end locations.
In this article we'll show you how to:
Remove Contacts as Users
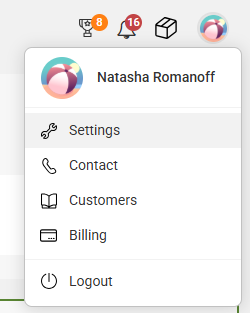
1
Within SAS Flex, go to your User icon in the upper right corner and click Settings.
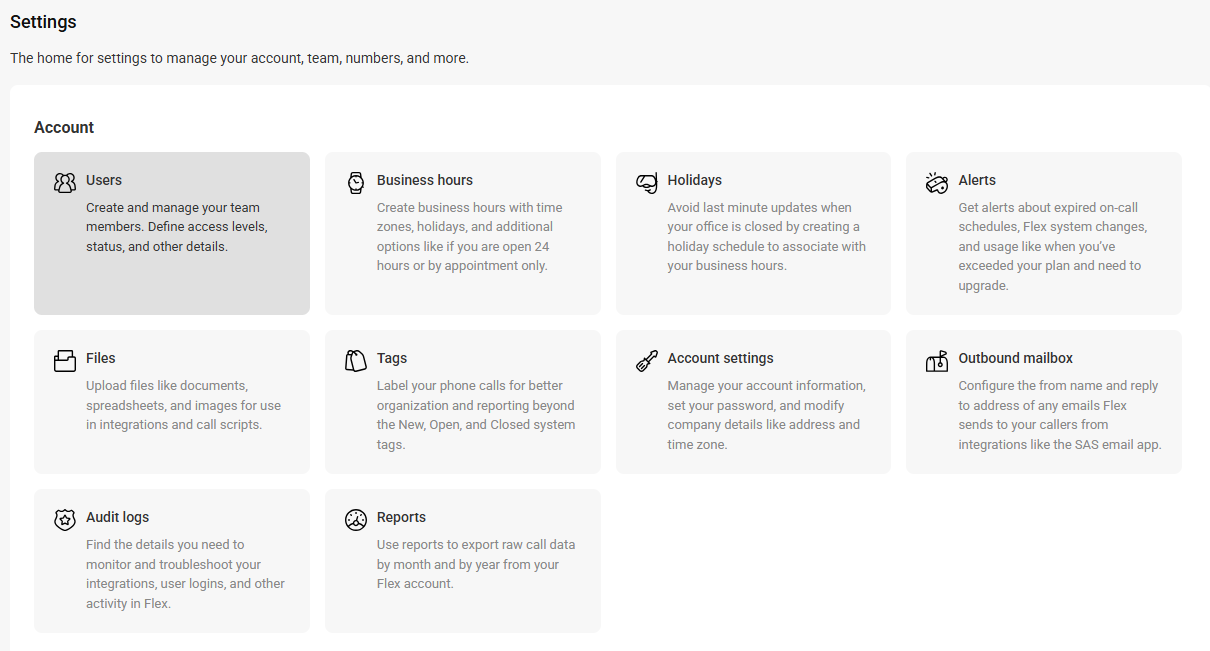
2
On the main Settings page under the Account section, click Users.
3
On the next page you'll see a list of all current users. Locate the user you wish to remove, click the 3-dot menu icon adjacent to their name, and click Delete.

Remove Contacts as Payment Contacts
If your account is currently set up on our Flex Billing platform, you may have added employees to receive billing related emails.
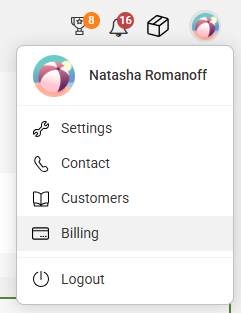
1
Within SAS Flex, go to your User icon in the upper right-hand corner and click Billing.
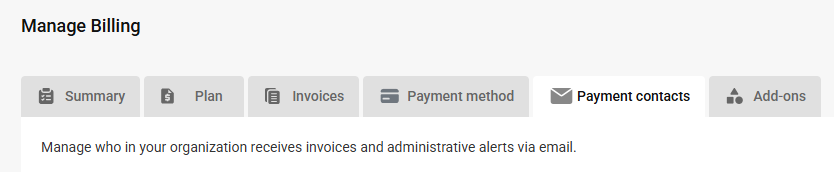
2
Under the Manage Billing page, click the Payment Contacts tab.
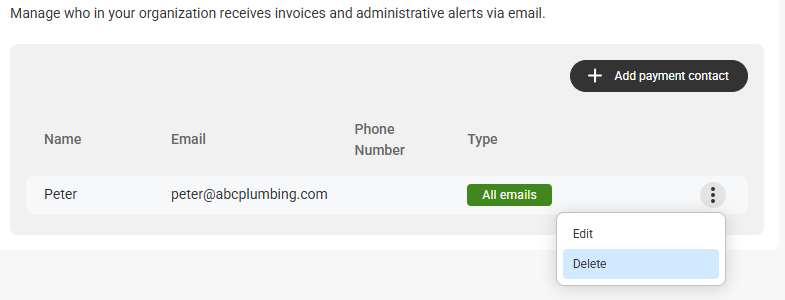
3
On the next page you'll see a list of all current payment contacts. Locate the contact you wish to remove, click the 3-dot menu icon adjacent to their name, and click Delete.
Remove Contacts from an Advanced On-Call Schedule
If the contact you wish to remove is currently listed in any On-Call schedules, you must remove them by deleting their Profile. For those instructions, please move on to the Remove Contact from Profiles section below. If you'd like to replace a contact with another in an On-Call schedule, follow the instructions below.
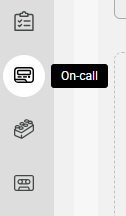
1
Within SAS Flex, click on the On-Call tab on the left-hand navigation panel of SAS Flex.
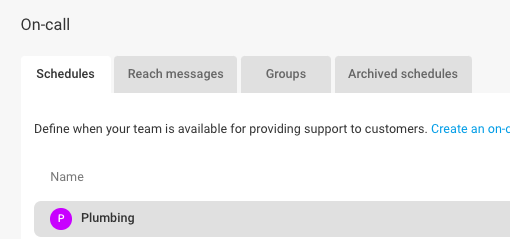
2
On the next page, locate the On-Call schedule you would like to update.
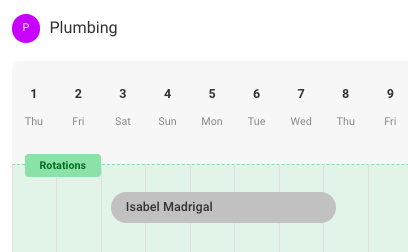
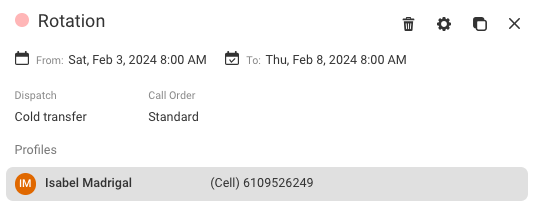
3
In our example we want to replace Isabel with Luisa. Under the Rotations section, select the rotation you wish to edit.
4
In the pop-up window, click the Gear icon to edit.
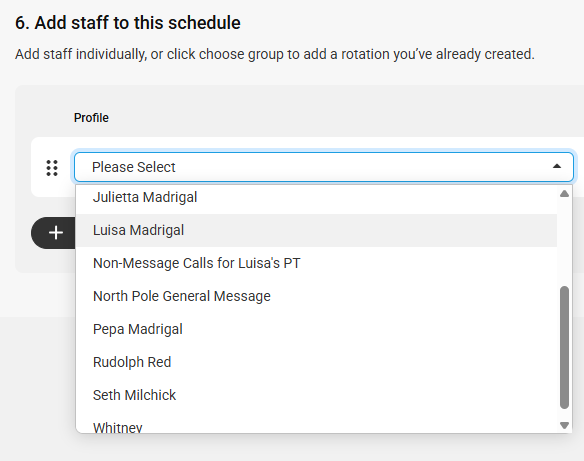
5
Under step 4, use the drop downs to change the staff member. Then click Save in the bottom right-hand corner.
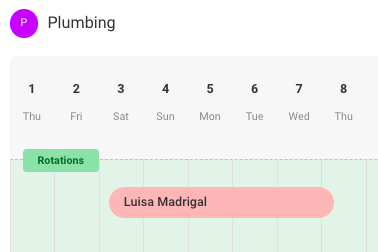
Upon clicking Save, you will see the updated on-call schedule as shown below.
Remove Contacts from a Basic On-Call Schedule
1
Within SAS Flex, click on the On-Call tab on the left-hand navigation panel of SAS Flex.
2
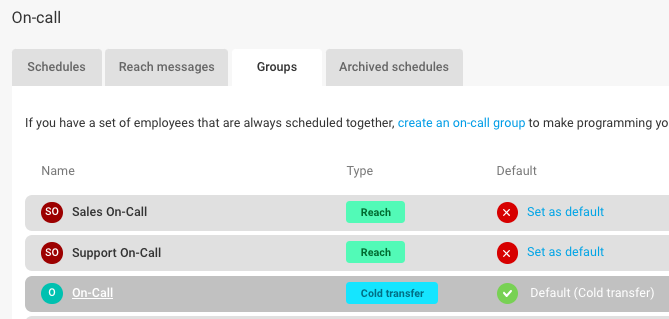
Under the main On-Call page, select the Groups tab. Then select the on-call group you wish to update.
3
Under step 5, use the drop downs to change the staff member(s). Then click Save in the bottom right-hand corner.
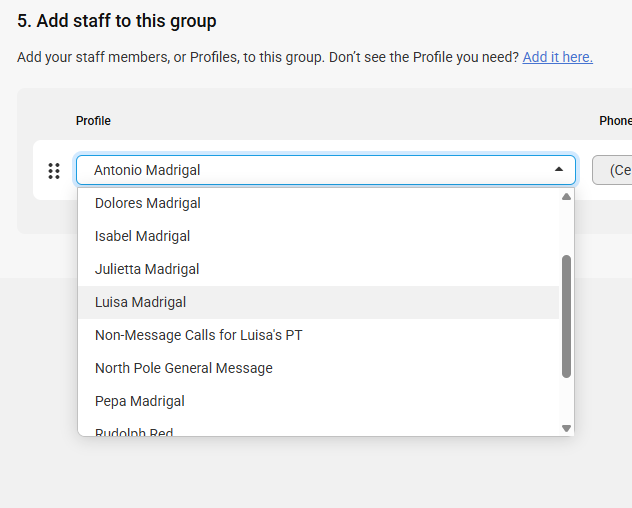
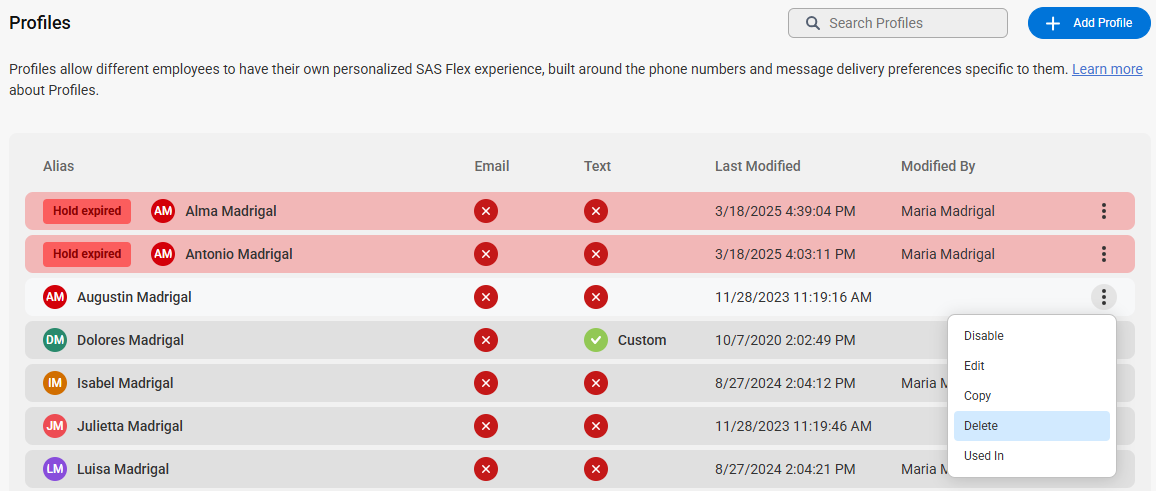
Remove Contacts from Profiles
If the contact you wish to remove doesn't have their own Profile but is receiving messages, they may be listed in another Profile, such as General Message. Make sure you check all Profiles to ensure the contact is removed.
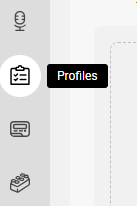
1
Within SAS Flex, click on the Profiles tab on the left-hand navigation panel of SAS Flex.
2
On the next page you'll see a list of all current Profiles. Locate the Profile you wish to remove, click the 3-dot menu icon adjacent to their name, and click Delete.
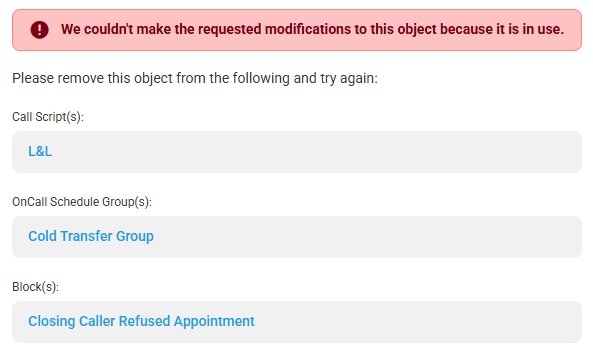
If the Profile you are trying to remove is currently listed in any on-call schedules or script blocks, the following pop-up will appear with the locations in which the Profile is being used. You can click directly on each location to be brought to that specific schedule or block to remove the Profile. Once the Profile is removed from those locations, it can be deleted.
Remove Contacts from Scripts
When removing contacts from your account, it's important to check your script(s) to ensure they are thoroughly removed. Contacts may be listed within a Specific Person or Transfer block, or their name may be listed within a Closing block.
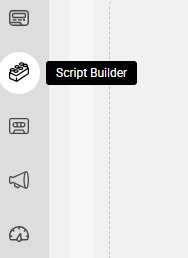
1
In SAS Flex, click on the Script Builder icon on the left-hand navigation panel.
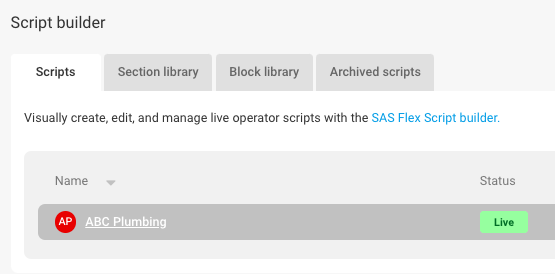
2
On the main Scripts page, select the script you would like to edit.
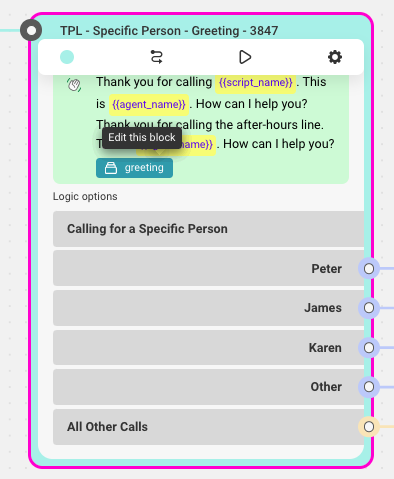
3
Your script workflow will appear on the next page. If you currently have a Specific Person path set up, locate it and click on the applicable field name to edit as shown below. Depending on where your Specific Person path is located in your script, the field name may be different.
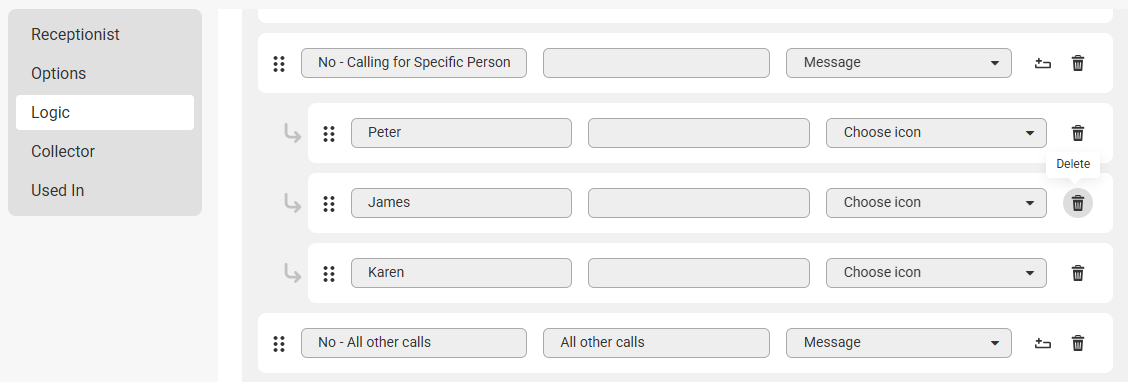
4
When the block opens, go to the Logic tab, then click the trashcan icon next to the contact you wish to remove. Then click Save in the bottom right-hand corner.
Depending on how your Specific Person path is configured, you may need to update the script section that your Specific Person options are pointed to. For example, each Specific Person option may follow it's own subsequent path, or they may all be pointed to the same path. Additionally, if your script uses any Collector blocks, the contact may need to be removed from there as well.
5
If your script has any Warm or Cold Transfer blocks in which the contact is listed, locate them and click on the applicable field name to edit as shown below.
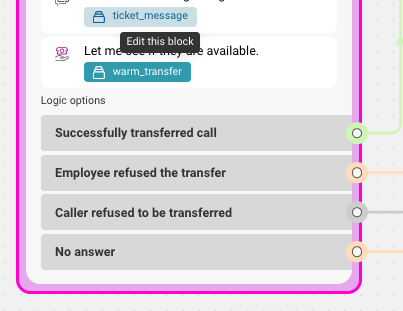
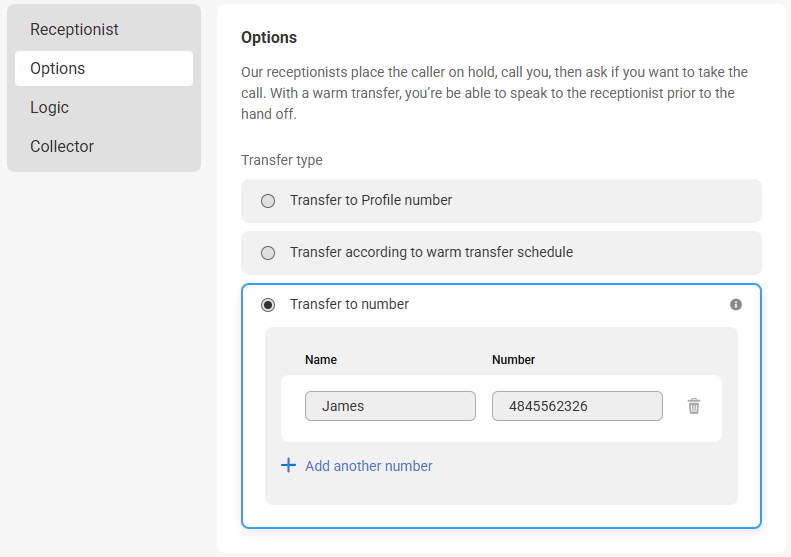
6
When the block opens, go to the Options tab. If the contact is listed as a transfer option, remove or replace the contact accordingly. Then click Save in the bottom right-hand corner.
7
Depending on your script set up, you may need to repeat the steps above to ensure the contact is thoroughly removed.
8
When you are finished editing your script, click Save in the upper right-hand corner.
Remove Contacts from the Script Wiki
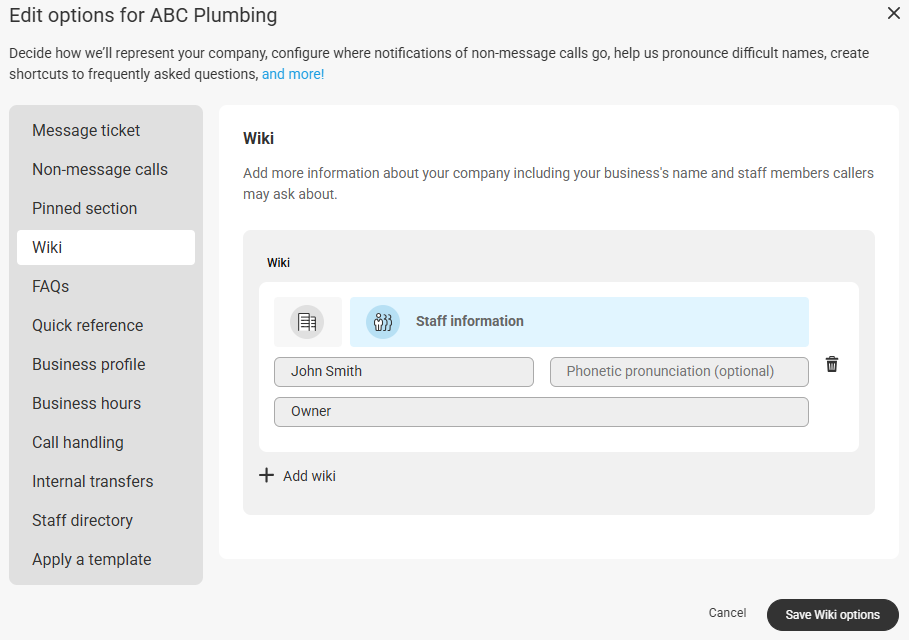
The Wiki feature allows you to add more information about your company, including your business's name and pronunciation, as well as any staff members callers may ask about, and their roles.
1
In SAS Flex, click on the Script Builder icon on the left-hand navigation panel.
2
On the main Scripts page, select the script you would like to edit.
3
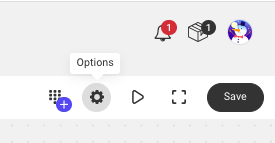
In the upper right-hand corner, click the Gear icon to open up additional Script options.
4
From within the pop-up window, select the Wiki option. If the contact you wish to remove is listed here, you can remove or replace accordingly.
5
When you are finished, click Save Wiki options.
Remove Contacts from IVRs
If you currently have an advanced IVR configured, you may have direct transfers set up within the IVR.
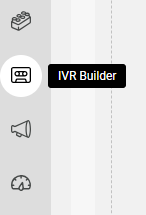
1
Within SAS Flex, go to the Cassette Tape icon on the left navigation panel to access the IVR Builder.
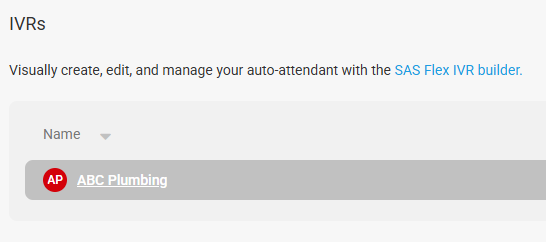
2
On the next page, select the IVR you wish to edit.
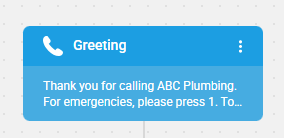
3
Select the Greeting block to edit.
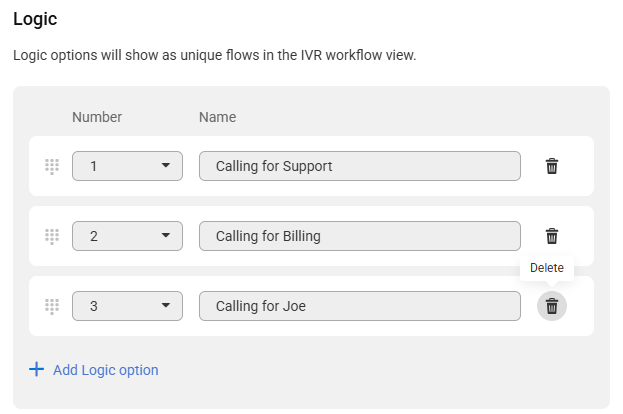
4
When the block opens, go to the Logic tab then click the trashcan icon next to the contact you wish to remove. Then click Save in the bottom right-hand corner.
5
When you are finished updating your IVR, click Save in the upper right-hand corner.
Remove Contacts from the Staff Directory
The Staff Directory option allows users to program specific person transfers or specific person message taking without having to build a Specific Person path within the script.
1
In SAS Flex, click on the Script Builder icon on the left-hand navigation panel.
2
On the main Scripts page, select the script you would like to edit. 
3
In the upper right-hand corner, click the Gear icon to open up additional Script options. 
4
From within the pop-up window, select the Staff Directory option. If the contact you wish to remove is listed here, you can remove or replace accordingly. 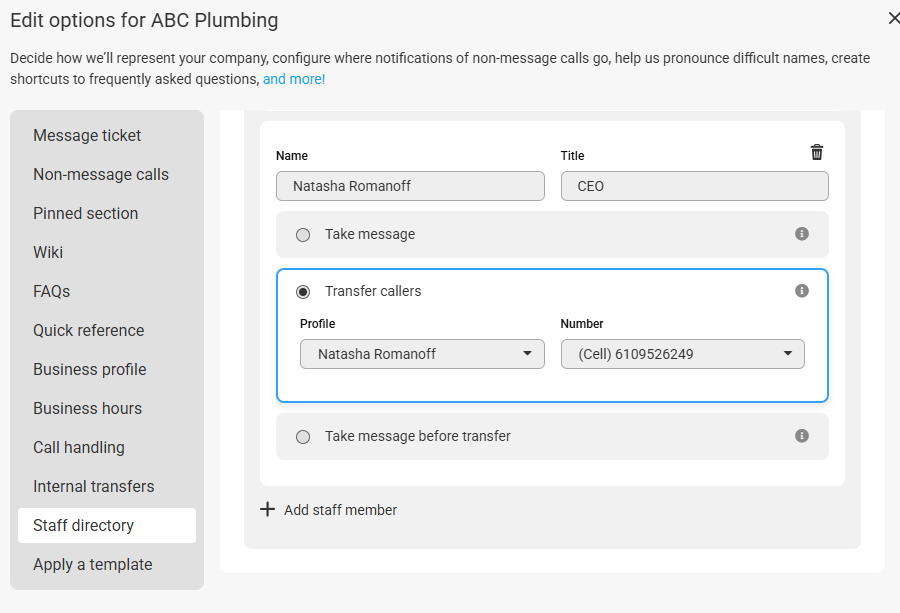
5
When you are finished, click Save Staff Directory.


