Setting up an Advanced IVR
Many businesses utilize IVR or auto-attendant features to control the flow of calls, which can help reduce inbound traffic or easily route callers to the appropriate party without requiring agent interaction. IVRs can be simple, such as offering a Press 1 or 2 option for English or Spanish-speaking callers. They can also be complex, such as including a voicemail option, transfers, employee directories, etc. For more information on how to configure a simple IVR, follow these instructions. For advanced IVRs, continue with the instructions below.
Advanced IVRs are billed at $0.15/minute, starting from when the IVR begins to when the caller is finished interacting with it. For more information, check out this article.
In this article we'll discuss:
To configure an Advanced IVR, you may need an Additional Line to attach to your IVR.
Creating a Main IVR Greeting
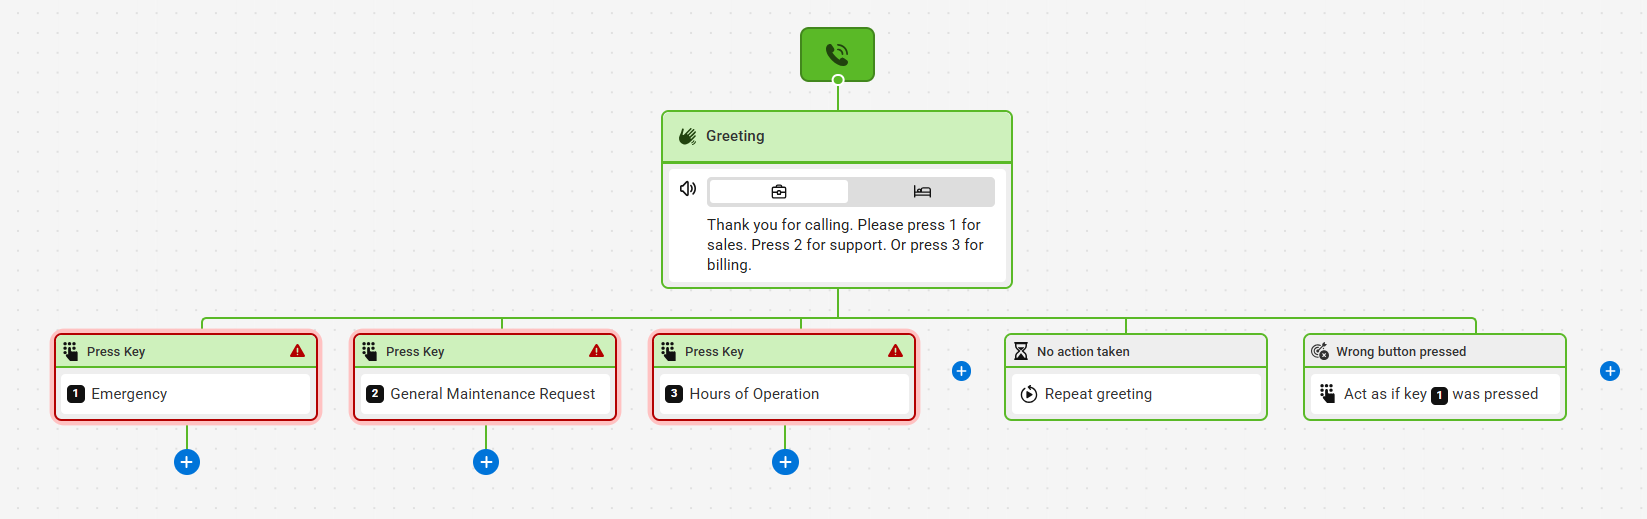
All IVRs must start with a Greeting. This will be considered your "main menu" and will provide callers with subsequent options. For example, an IVR greeting may say "Thank you for calling ABC Plumbing. For emergencies, please press 1. To schedule general maintenance appointments, please press 2. For our hours of operation, please press 3."
In our tutorial, we'll configure an Advanced IVR based on the example greeting above. However, IVRs can be configured in any number of different ways depending on your business's needs!
1
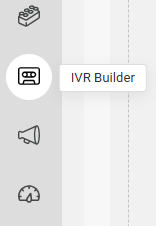
Select the IVR Builder icon on the left-hand navigation menu.
2
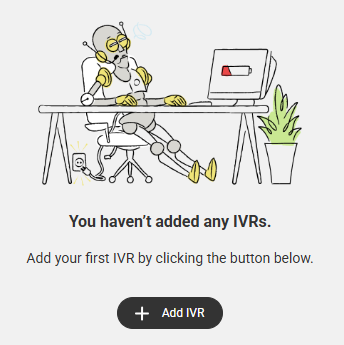
Click the Add IVR button as shown below. In the pop-up that appears, name your IVR accordingly. Then click Save.
 3
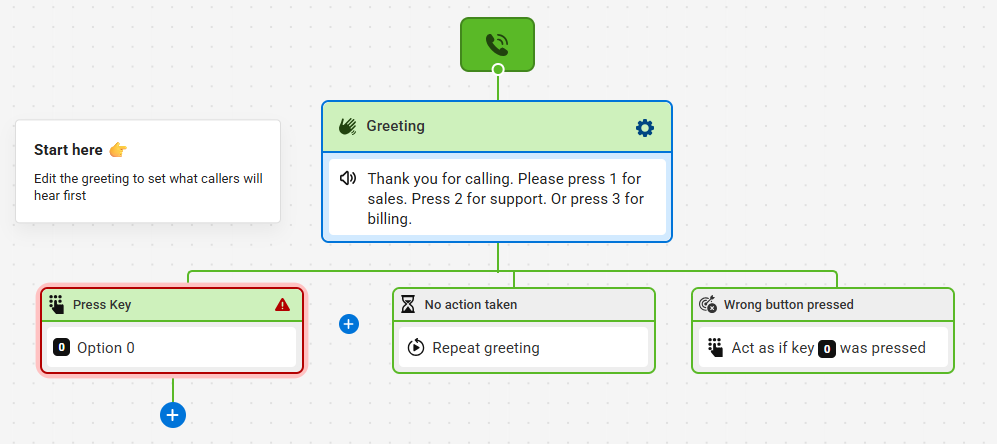
On the next page, you'll see a default configuration which we can update to match our needs. Click on the Greeting block as shown below.
3
On the next page, you'll see a default configuration which we can update to match our needs. Click on the Greeting block as shown below.
4
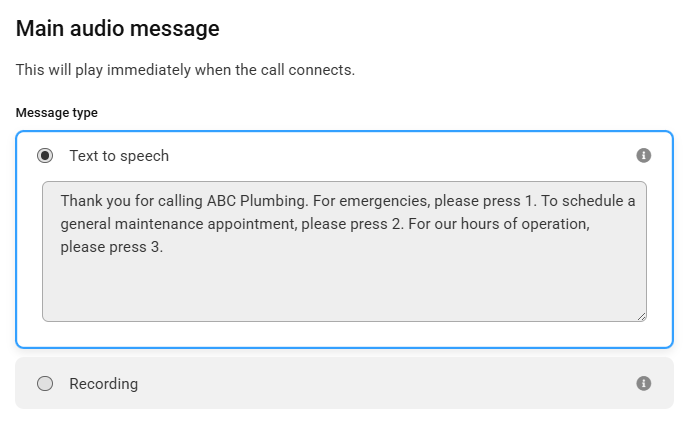
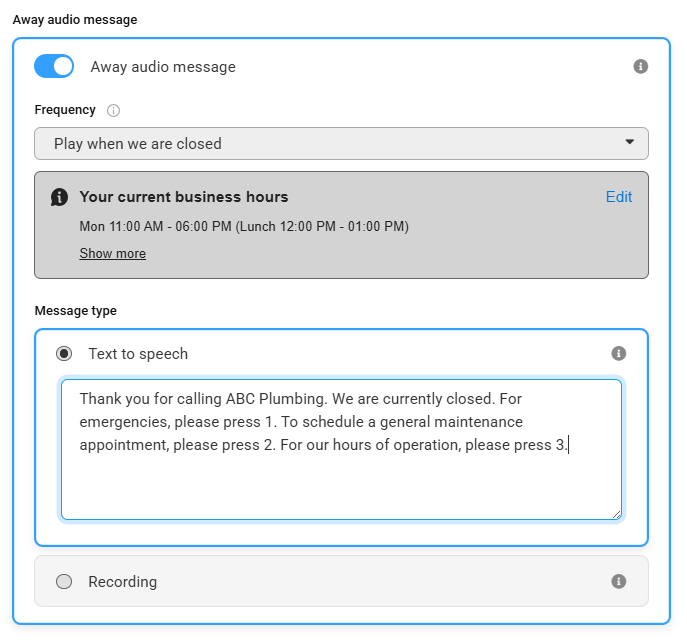
On the panel that appears on the right-hand side of your screen, you can choose your Recorded greeting from the Recording dropdown, or type in your greeting to use our Text to Speech option.
If you want a different message to play when you are closed for after hours or holidays, use the Away audio message toggle, then choose Play when we are closed from the Frequency dropdown and add your respective greeting.
In order for the IVR to be able to change based off your business hours or after hours, you'll want to make sure you have already created a business hours set and a holiday set. Additionally, you'll want to make sure your business hours set is selected under the Options gear within the IVR workflow.
5
Next, we'll begin adding our prompt options under the Logic section. In our example, we're adding 3 options that reflect the prompts in our initial greeting. Simply select the numerical keypad option, and type in the respective title. For example, Press 1 will be for Emergencies.
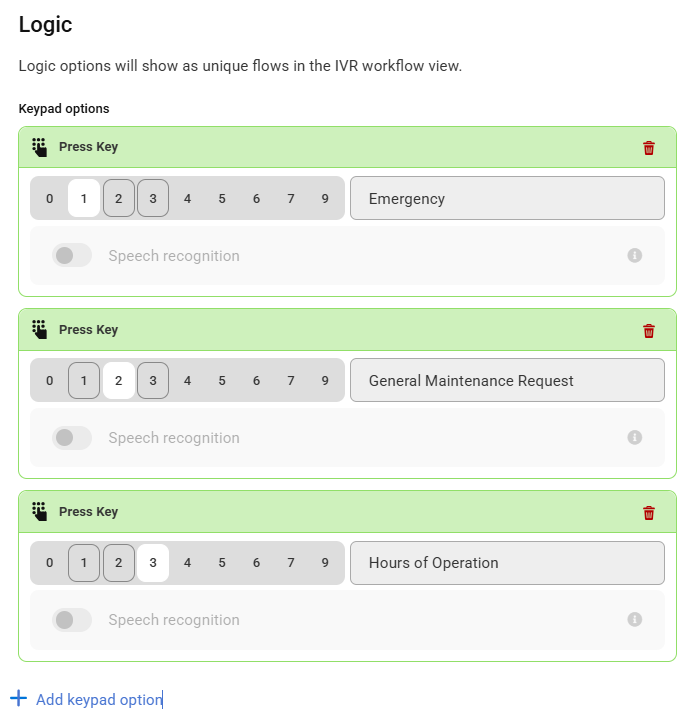
There is a max of 9 options that can be added within a Greeting block. If you need to include more than 9 options, you can configure a Keypad Option.
6
Under the Options section, choose what will happen if there is no input from the caller after the greeting, or if there is an invalid input.
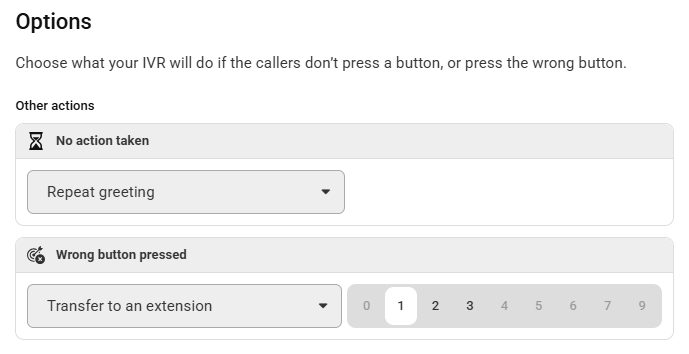
If you choose the Transfer to an Extension option, the number you input in the Extension field should correlate to the options you add within the Logic section.
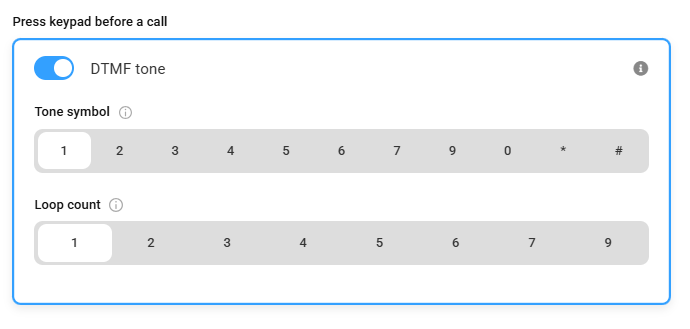
If you use an automated system that requires a keypad press before a call is connected, activate and set the DTMF tone so that our system can accept the call. The Tone symbol is the keypad option that needs to be pressed, and the Loop count is how many times the system will attempt to press it.
7
If you want to include a list of Employee extensions, you may fill them out under the Employees section. This is not required, but if you choose to use it, you will also need to configure Employee Extension blocks.
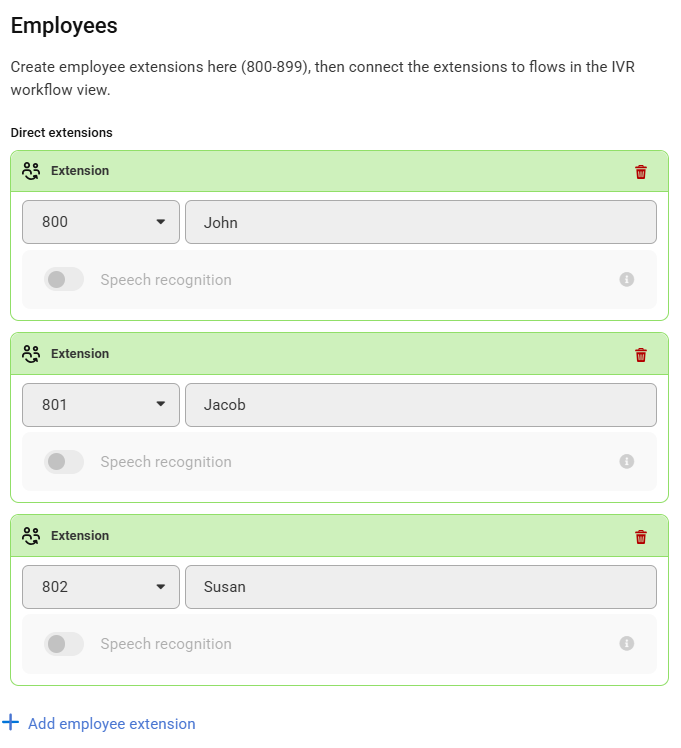
8
When you are done, click Save. Your new workflow should look something like the image below.
Configuring an IVR Workflow
Once your Greeting has been created, you are now ready to configure the rest of your IVR workflow.
1
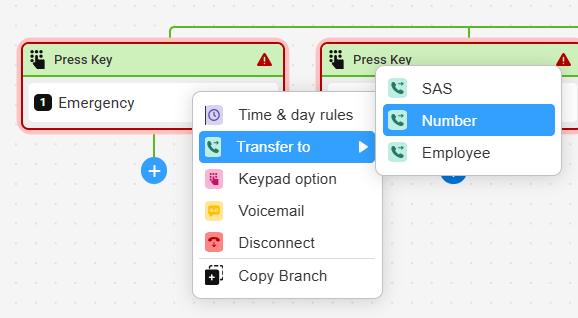
From your IVR workflow, click the + sign underneath one of your newly created Logic Options and select what you want to happen once this option is selected.
We'll move from left to right starting with our Emergency option. In our example, we'll choose the Transfer to > Number option so that we can transfer emergency calls to an outside (non SAS) number.
2
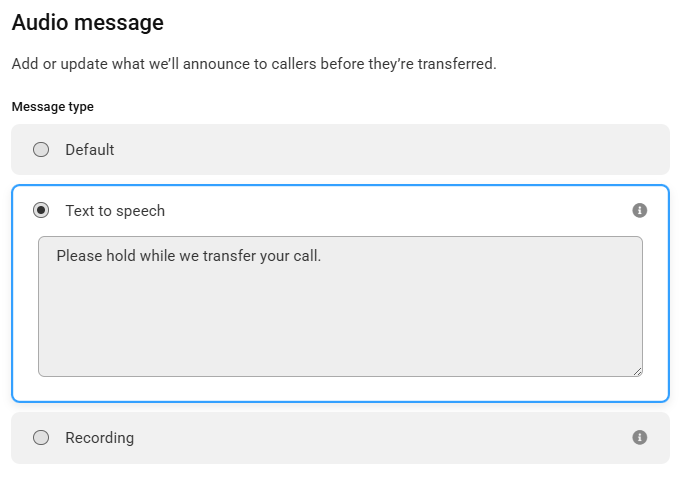
On the panel that appears on the right-hand side of your screen, select your audio message, which is what your callers will hear when they press this option. You can choose our Default option, you can select a pre-uploaded recording, or you can use our Text to Speech option.
3
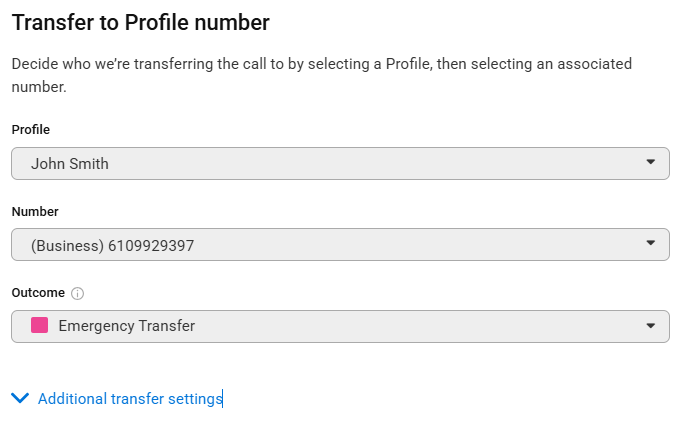
Next scroll down to the Transfer to Profile number section so you can tell the system which number to dial. Select a Profile, an associated number, and then choose an Outcome which will help you easily identify calls within your IVR log.
4
If you want to configure additional transfer settings, expand the Additional transfer settings menu. First, choose which number you'd like to display when a call is being transferred from the IVR.
- SAS Number: This option will display the SAS number attached to your IVR when we transfer.
- Callers Number: This option will display the caller ID of the caller when we transfer.
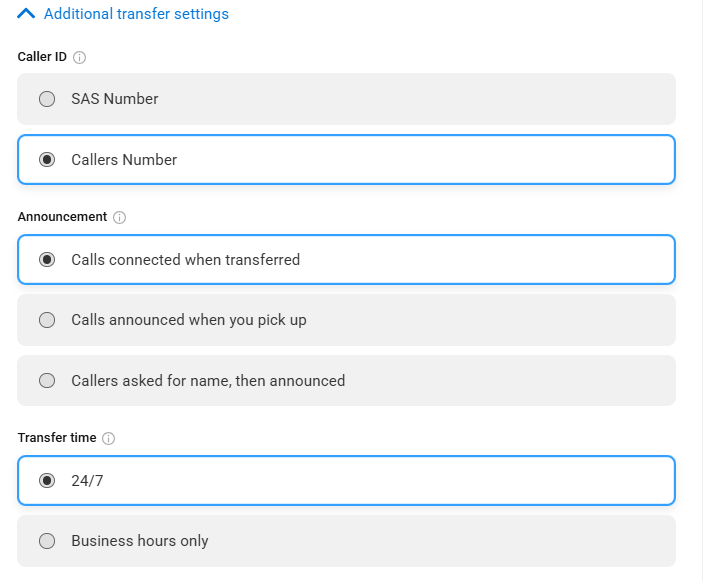
Next, choose what happens when the call is being transferred.
- Calls connected when transferred: Choosing this option will transfer the caller without any prior announcement, and will not give you the option to accept or reject the call.
- Calls announced when you pick up: Choosing this option will play an announcement for you prior to the transfer. You can choose to either accept or reject the transfer.
- Callers asked for name, then announced: Choosing this option will ask the caller to say their name which will play for you prior to the transfer. You can choose to either accept or reject the transfer.
If you chose either of the first two options, you'll need to configure an additional option to tell the system what to do if there is no answer or if you reject the call. For example, if there is no answer you may want the call to transfer to an SAS agent instead, or play a recording and disconnect the call.
Next, choose a Transfer time.
- 24/7: This option will allow us to transfer calls 24/7
- Business hours only: This option will only transfer during business hours. If you choose this option, you will need to have already created a business hours set and select your business hours from the Options menu within your IVR workflow
5
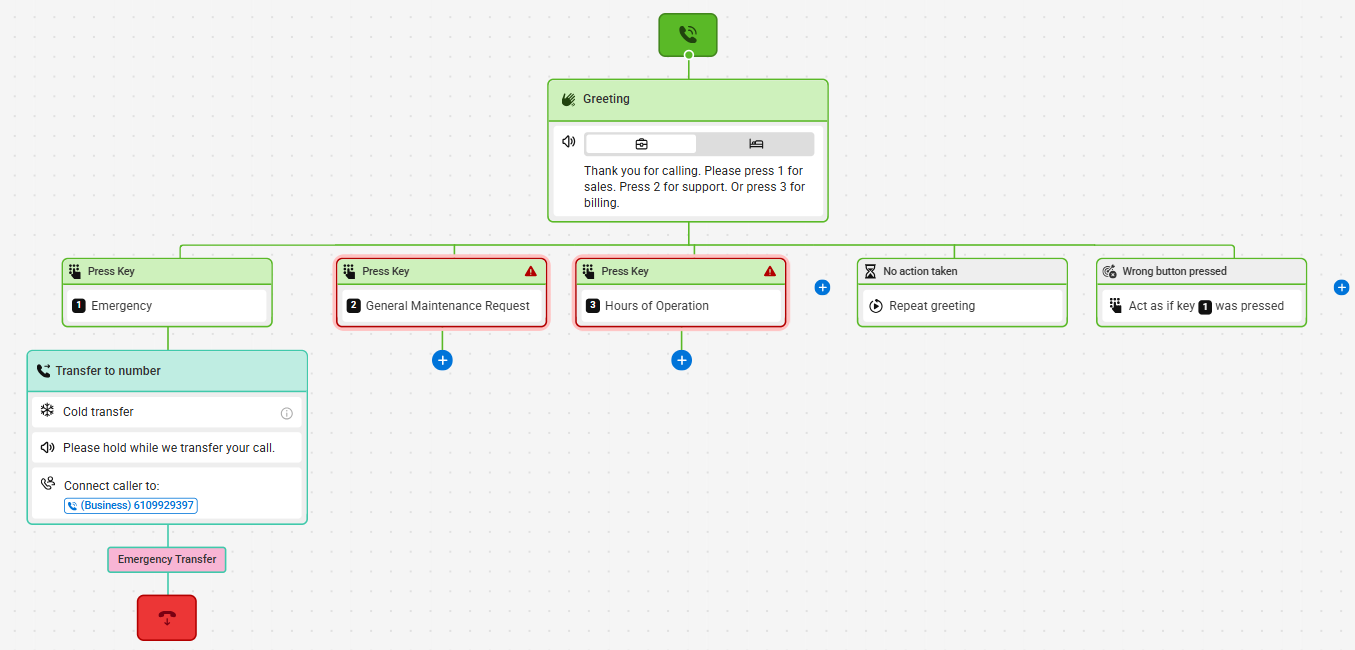
When you are finished, click Save. Your updated workflow should look similar to the image below.
6
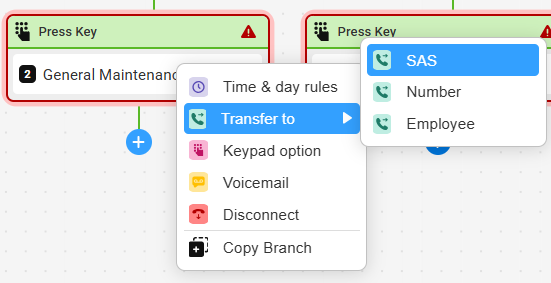
Now let's move onto the next option for General Maintenance Requests. In our example we'll have these calls transfer to an SAS agent. Again, click the + icon and choose Transfer to > SAS.
7
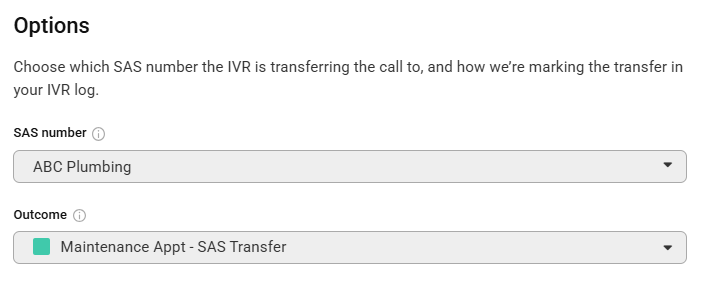
On the panel that appears on the right-hand side of your screen, select the SAS Number you wish to transfer calls to, as well as the Outcome. Then click Save.
8
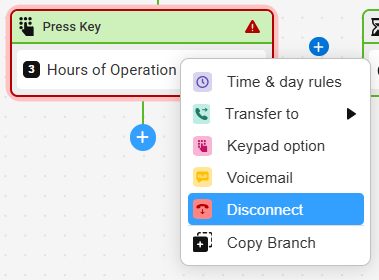
Finally let's move on to the last option for Hours of Operation. In our example we'll have these calls go to a recorded message and then have those calls disconnect. Again, click the + icon and choose Disconnect
9
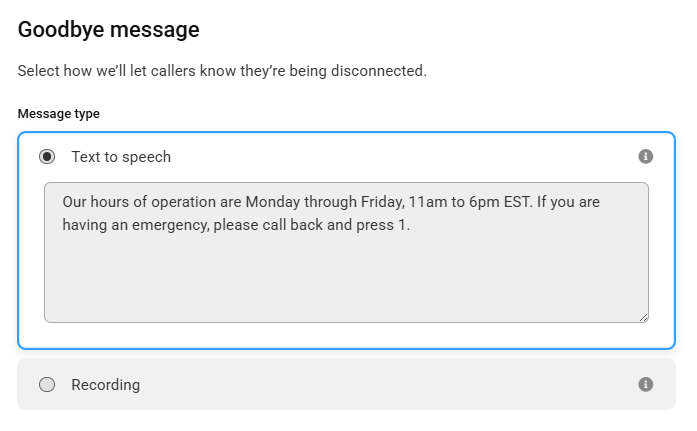
In the panel that appears on the right-hand side of your screen, add your Goodbye Message. You can either use a pre-uploaded audio file, or our Text to Speech option.
10
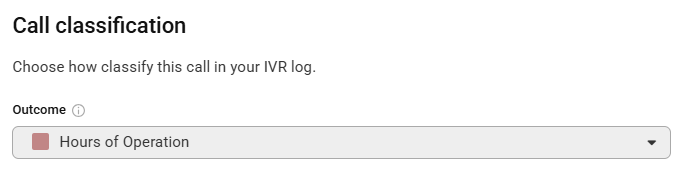
Under the Call Classification section, choose your Outcome. Then click Save.
11
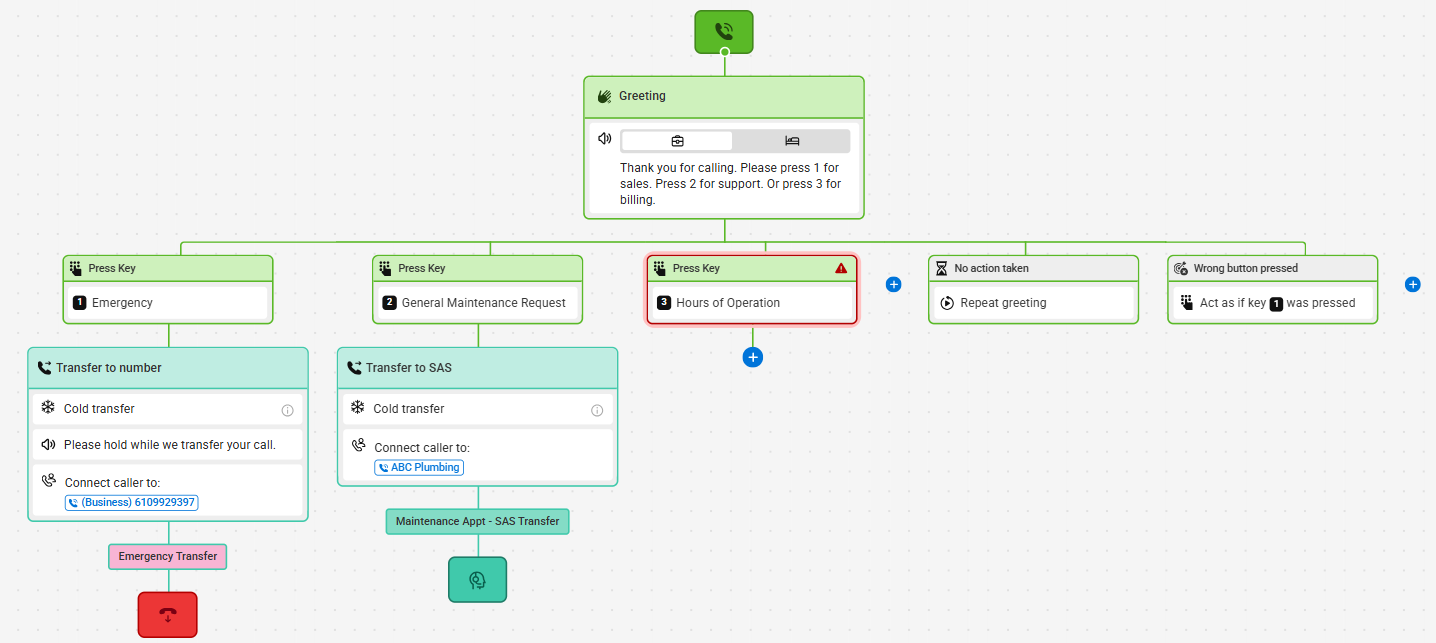
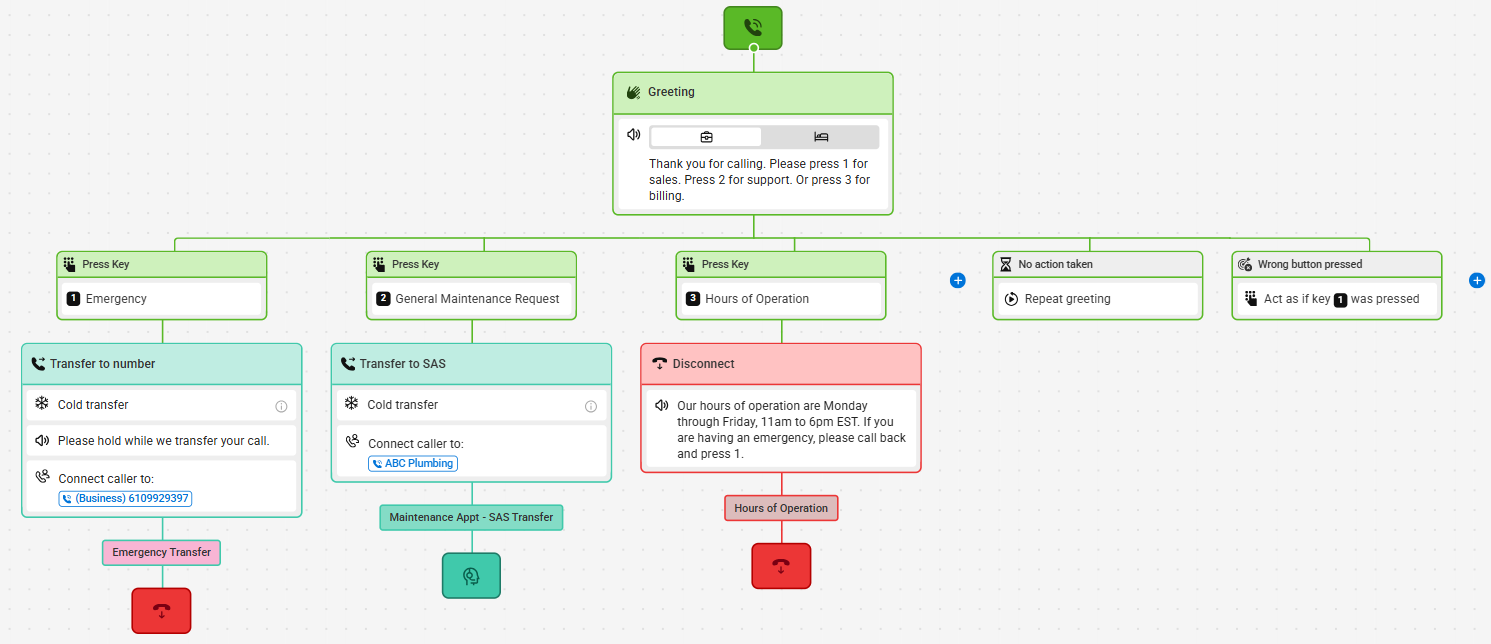
After you click Save, you'll be taken back to your IVR Workflow, which should look something like the image below. When you are satisfied with your IVR, click the Publish button in the top right-hand corner to publish your changes.
Congratulations! You've just built an advanced IVR. Now you'll need to assign your SAS numbers to the IVR and Script accordingly, or you can contact support for help!


