Authorizing and Adding Websites for Use in SAS Flex
On SAS Flex, agents can pop out directly to our customer's websites to help schedule appointments, submit quotes, process donations, and place orders.
Call recordings will automatically turn off once an agent leaves the script to go out to a website, and will remain off for the remainder of the call.
In this article we'll show you how to:
Authorizing a Website
Before an external website can be accessed by our operators, it needs to be authorized by the SAS team to ensure functionality.
1
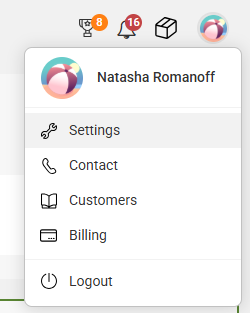
Go to your User icon in the upper right-hand corner and click Settings.
2
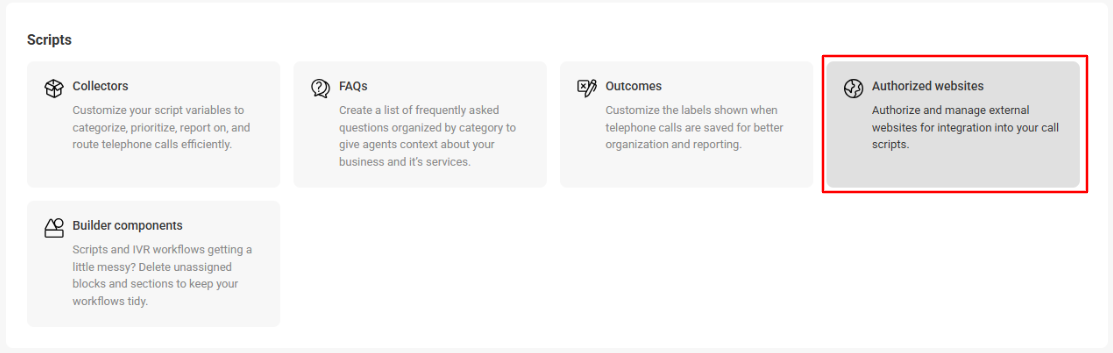
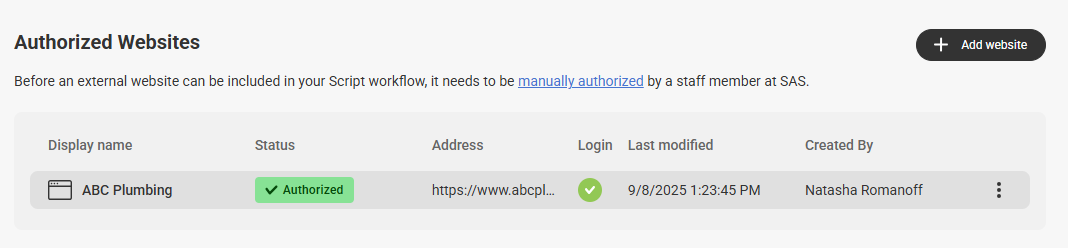
On the main Settings page, scroll down to the Scripts section and select Authorized websites.
3
Next, click on the Add website button as shown below.

4
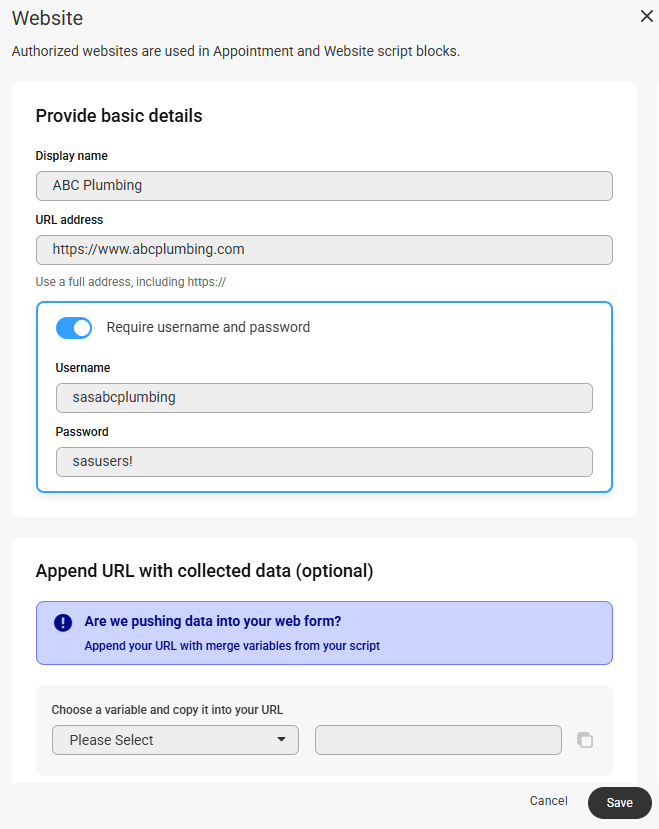
In the pop-up window that appears on your page, you will be asked to enter the Display Name of the website as well as the website’s URL address. If your website requires us to enter a username and password to access it, you can use the Require username and password toggle, then enter in the applicable information.
You can also choose to Append URL with collected data to push variables from your script over to your website. For more information, scroll down to the last section in this article.
5
When you are finished, click Save.
The Authorized Website request will automatically move to a Pending status. Send our support team an email at service@specialtyansweringservice.net, and let us know how you'd like us to use your website. We will review the request within 24-48 business hours and follow up to let you know if the site has been approved or if programming changes are required.
Reasons Why a Website May Not be Authorized
Typically, most websites are approved to use by SAS. However, there are some circumstances where websites are not approved, including the following:
- Unsecured Site: Sites using the protocol prefix http:// are unencrypted and cannot be added to Flex for authorization. All sites must begin with https://, the 'S' indicating Secure, which provides an encrypted and authenticated connection for data transfer.
- Restricted Content: SAS cannot go out to any website to make purchases of marijuana, tobacco, alcohol, or any other restricted products.
- Overly Complicated: SAS cannot go out to any website that is overly complicated. Simple is best!
- Single-User Access: SAS cannot go out to any website that is restricted to one user at a time. Since multiple agents may be handling your calls at the same time, a website needs to allow multiple logins.
- Persistent Cookies: Websites must be configured so that any data entered or selected by agents, such as name, email address, shopping cart info, etc., is automatically deleted when the website closes. Any necessary cookies must be "Session Cookies," which are designed to be deleted once the agent closes their browser window.
- Login Authentication: Agents are not permitted to send or receive code or authentication requests, or prompt callers to authenticate login attempts for sites requiring two-factor/multi-factor authentication. This feature must be disabled.
- Unrestricted Credentials: When agents are required to log in to a site to access specified procedures, agents must not be able to see or alter any backend information. This includes but is not limited to administrative privileges, billing and payment details, user credentials, password resets, the ability to add, edit or remove accounts or website pages, etc.
Creating a Website Block
Once your website has been authorized, you can create a Website block. In our example, we want agents to use our website to submit quotes. So, we'll configure the Website block accordingly.
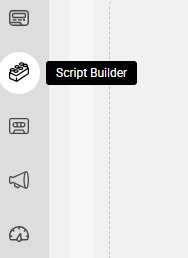
1
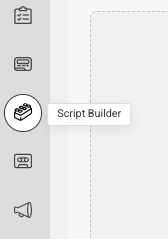
Select the Script Builder icon on the left-hand navigation menu.
2
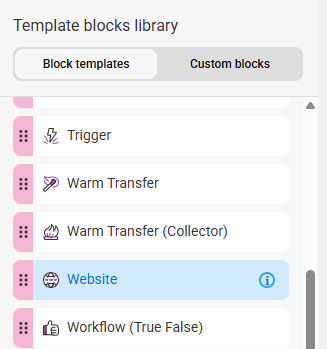
On the next page, click the Blocks tab, then select Add new block. From the Blocks list under Block Templates, locate and select the Webiste block.

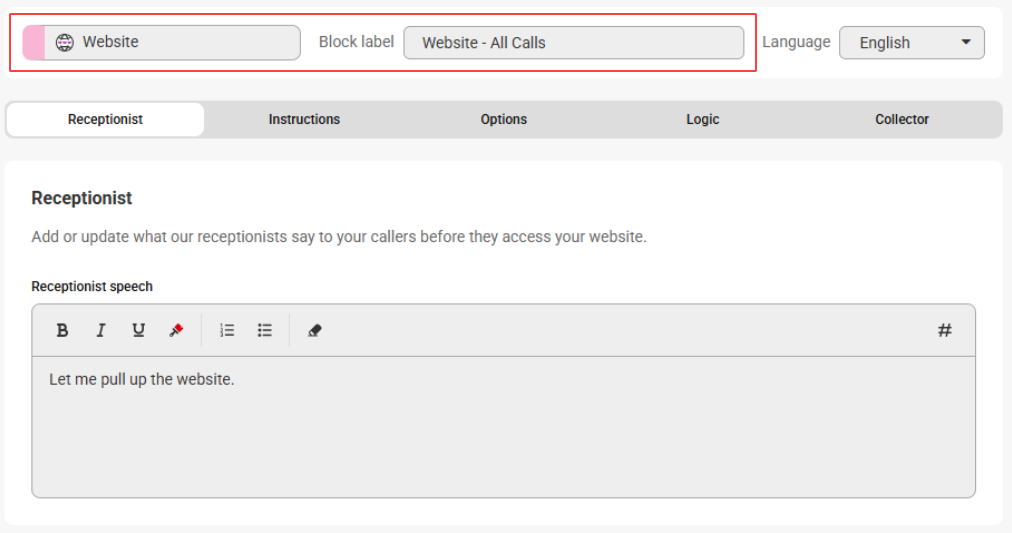
3
Once the block populates on your screen, you'll see the Block Type along the top of the block, and a space to add a Block Label next to it. Block Labels will help us identify the block within the system later on. We named ours Website - All Calls.
4
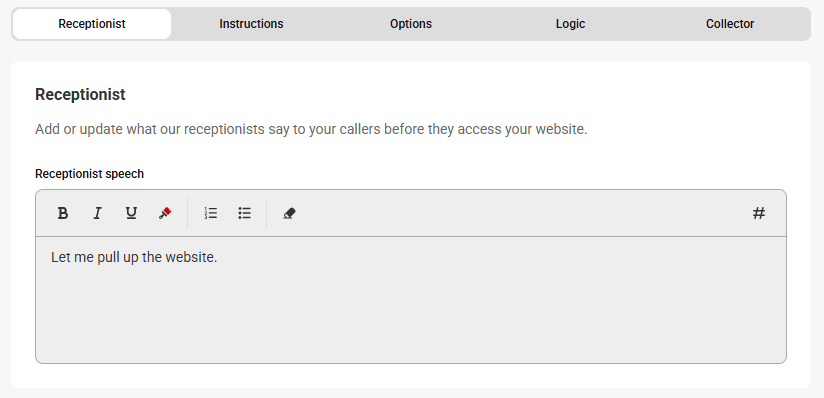
Under the Receptionist tab, you can choose to stick with the default text, or feel free to customize what you want the operator to say to your callers.
5
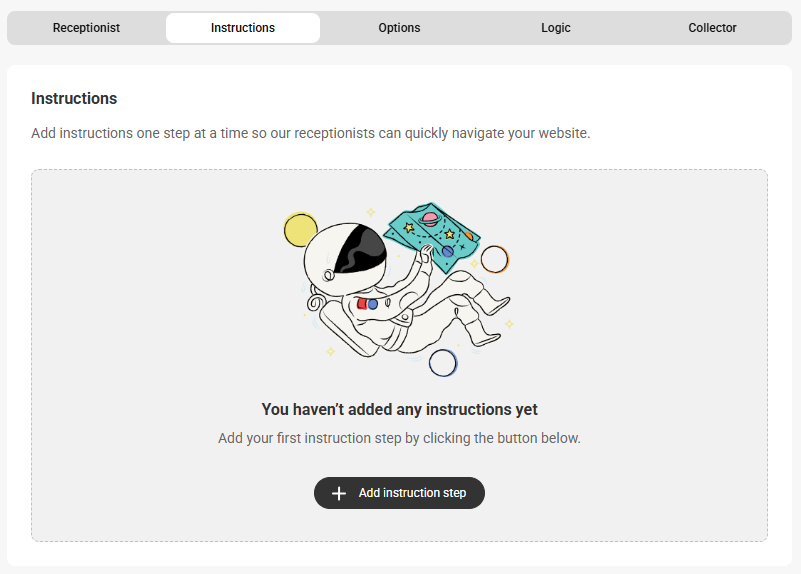
Under the Instructions tab, click the Add instruction step button to begin adding instructions for the agents.
6
Within the pop-up, you'll see 3 sections; Heading, Instructions, and Additional Options. We will go over all 3 sections below.
Heading
The Heading section is for short instructions that don't require any additional information. You can think of each Heading as an individual step for the agents. For example, our 1st step will be to instruct the agent to select the Get Quote icon on the website. Because that is the only instruction for step 1, we will leave the Instructions section blank.
You do not need to add numbers in front of each Heading. The system will add them for you.
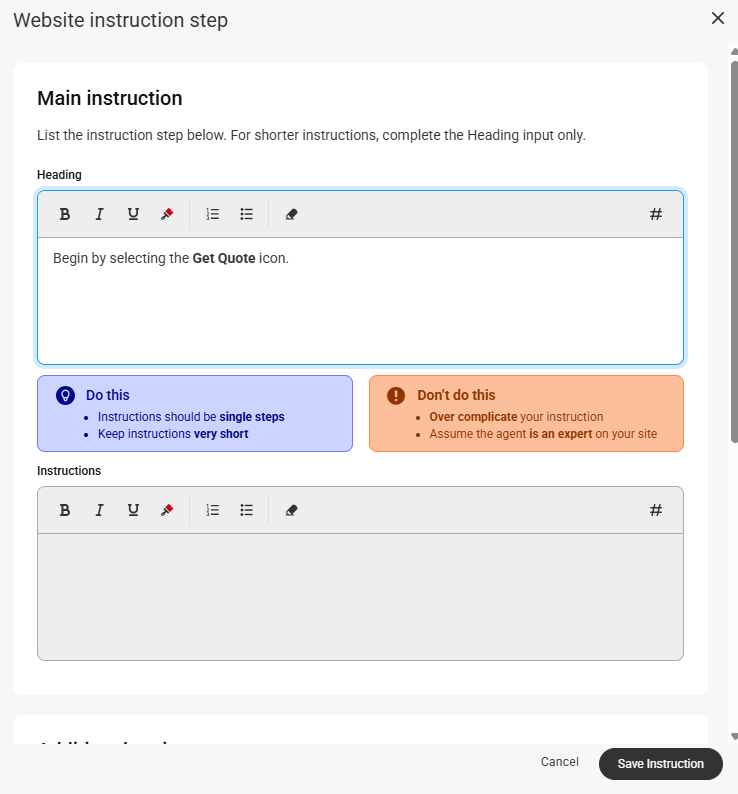
After adding your first step, click the Save Instruction button in the bottom right-hand corner of the block. To continue adding additional steps, click the Add instruction step as shown below.

Instructions
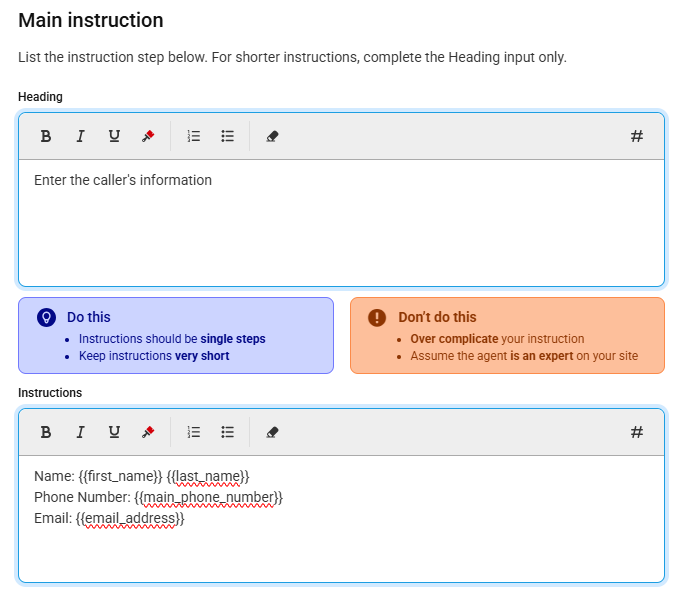
The Instructions section is for instructions that might require a bit more depth. For example, our 2nd step will be to instruct the agent to enter the caller's contact information. We will put that instruction into the Heading section. Within the Instructions section, we will add the information that we want agents to enter into the form. In this case, it will be the caller's name and email address. Note that we are grabbing the collector fields using the # icon below the text box.
When you are finished with your second step, go ahead and click Save Instruction again to be brought back to the main Website block. Then, click Add Instruction step to continue adding more instructions.
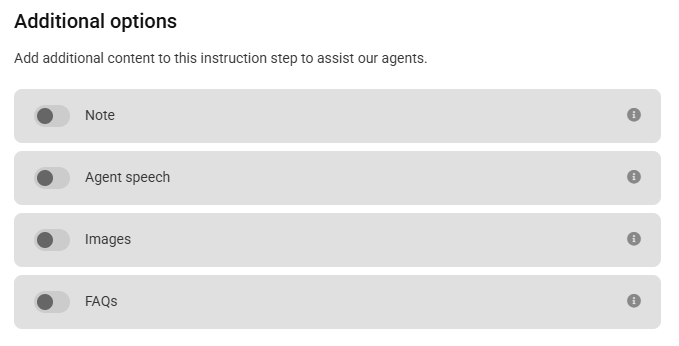
Additional options
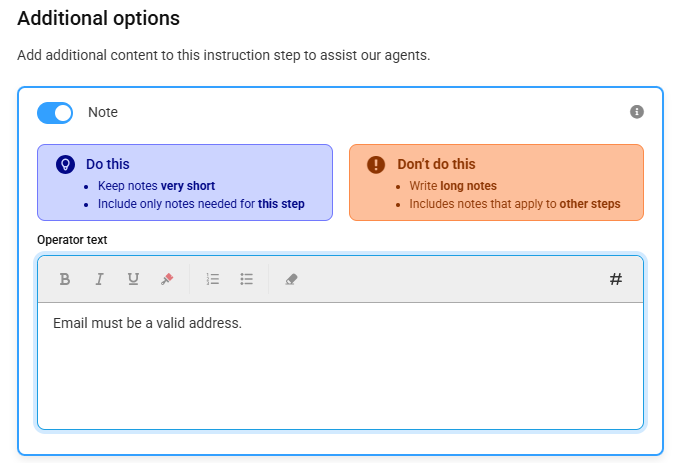
This section allows you to add any additional pieces of information within a particular step. For example, in step 2 we are instructing the agent to enter the caller's name and email. Under the Additional options section, we can activate the Note option to add a note for the agent to let them know the email they enter must be a valid address (i.e., don't enter "none@none.com")
Other additional options include;
- Agent speech: This option allows you to add text that you want the agents to say to your callers while on the website.
- Images: This option allows you to add an image to go along with your instructions so that agents can easily identify a specific part of your website, like a Submit Quote button.
- FAQs: This option allows you to associate any FAQs that you've added to your account with the website so that agents can easily access that information while on your site.
Below is an example of what the completed website instructions will look like for an agent, including an example of if a website requires a username and password to enter.

7
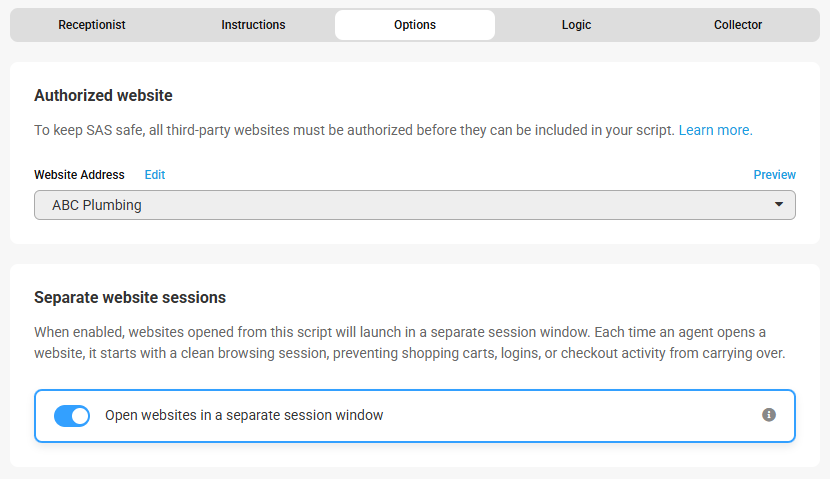
Under the Options tab, select your website from the Authorized website drop down.
If your website collects medical or payment information, or if our agents are logging in, then you'll want to use the Separate website sessions toggle to ensure no previous caller data pre-populates for agents.
8
Next move on to the Logic tab. Here you'll see the default logic option agents will use if the website is unreachable. Click the Add another logic option button to add more options. In our example we'll add an option for when a quote was submitted successfully, and an option for callers who might refuse to continue.
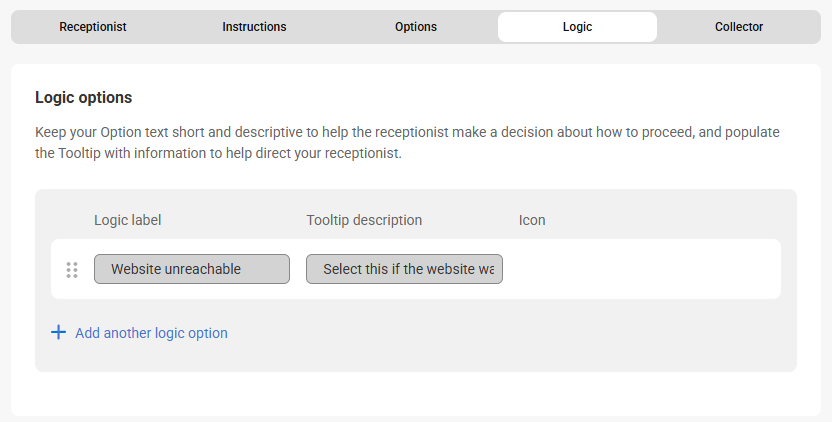
Feel free to use tooltips and icons to help agents understand and navigate your calls more efficiently.
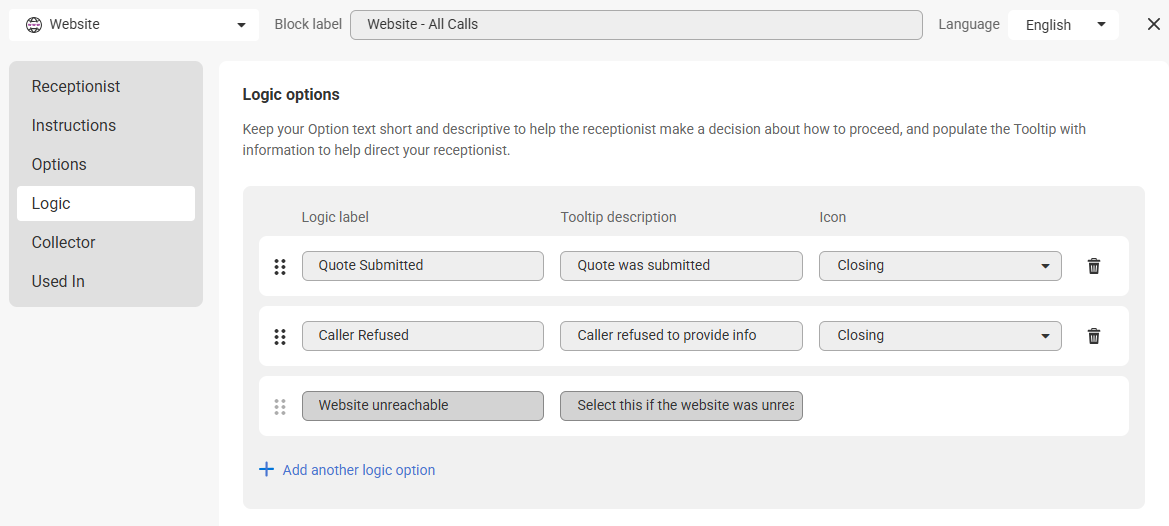
Keep in mind any additional logic options you create will need to have their own subsequent steps built into the script as well. For our purposes we've created Closing blocks for each of the 3 options listed above, which we'll input into the script later.
9
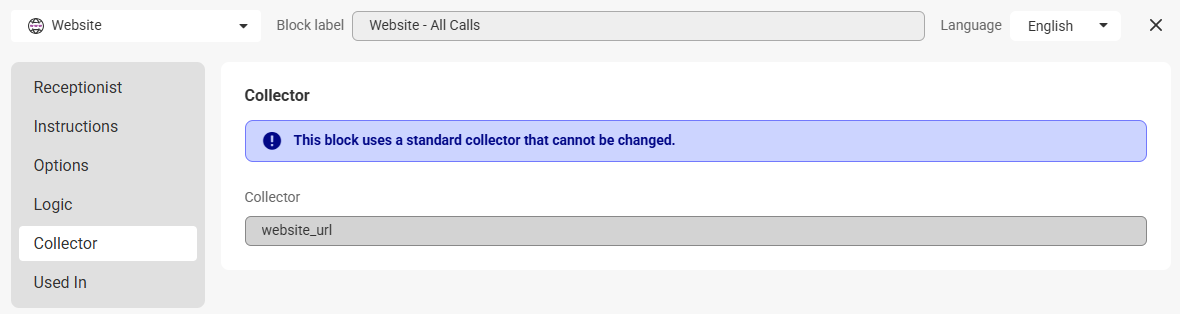
The Collector tab will have pre-set data that cannot be changed.
10
The Used In tab will show you if this block is being used anywhere within the script. Since this is a brand new script block, it's not yet being used anywhere.
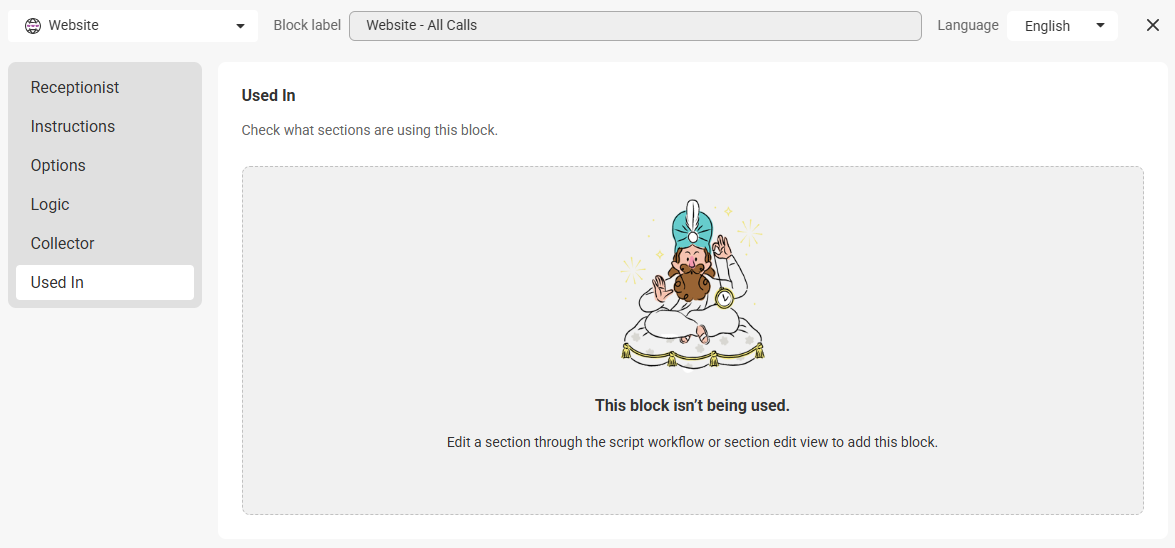
11
When you are finished editing your Website block, click Save.
Adding a Website to your Script
Once your website has been authorized and your Website block has been created, it can be added to your script.
1
Click on the Script Builder icon on the left-hand navigation panel.
2
From the main Scripts page, select the script you wish to update.

3
On the next page, you'll see your script workflow. It should look something like this:

4
In our example, we want to replace our current Closing block with our Website block so agents can submit a quote. So, we'll hover over our All Calls section and click the Gear icon to edit.

5
Within the Section Editor, scroll down to the current Closing block and click Remove.

6
On the left-hand side of your screen, search the Custom Blocks Library for your website block and drag it over to the Section editor.


7
Click Save. Your script should now look something like this:

8
Now that the Website block has been added, we'll need to add the subsequent Closing sections that will match up to the website's Logic options. We've already created our Closing blocks and sections, but if you haven't, check out these instructions.
At the top left-hand side of your screen, click the + sign to Add Sections. Then locate your Closing sections and drag them out.

9
Link up each circle within the Logic Option to its appropriate Closing. When you are done, click Save.

Removing a Website From your Script
If you no longer want agents to go out to your website, it can easily be removed. First, we'll need to remove the website block from your script.
1
Click on the Script Builder icon on the left-hand navigation panel.
2
From the main Scripts page, select the script you wish to update.

3
On the next page, you'll see your script workflow. It should look something like this:

4
In our example, we want to remove our current Website block and replace it with a Closing block. So, we'll hover over our All Calls section and click the Gear icon to edit.

5
Within the Section Editor, scroll down to the current Website block and click Remove.

6
On the left-hand side of your screen, search the Custom Blocks Library for your Closing block and drag it over to the Section editor.


7
Click Save. Your script should now look something like this:

8
Once your script has been updated, you can delete the website from your account by going to the Authorized Websites section within your portal's Settings. Click the 3-dot menu icon next to the website you wish to remove, and click Delete.

Adding an Append URL to an Authorized Website
If you're having issues where the data from previous calls is auto-populating on your site, or if you want to have information auto populate onto a form after agents have collected it within the script, you can add an Append URL which allows our agents to pass information to your website via query string without having to input the same information twice.
If you are using Calendly, check out this article to understand what information you can add to your Calendly link.
1
Back on the Authorized Websites page within Settings, click on the Website you wish to add the Append URL to.
2
Next, copy and paste the following query string in the Append URL field, as shown below. The Append URL field can push any fields that the user's website allows, but for our example we'll push through the caller's name and email address.
?first_name={{first_name}}&last_name={{last_name}}&email={{email_address}}

3
When you are finished, click Save. Going forward, the data that agents collect will automatically push through to your site.


