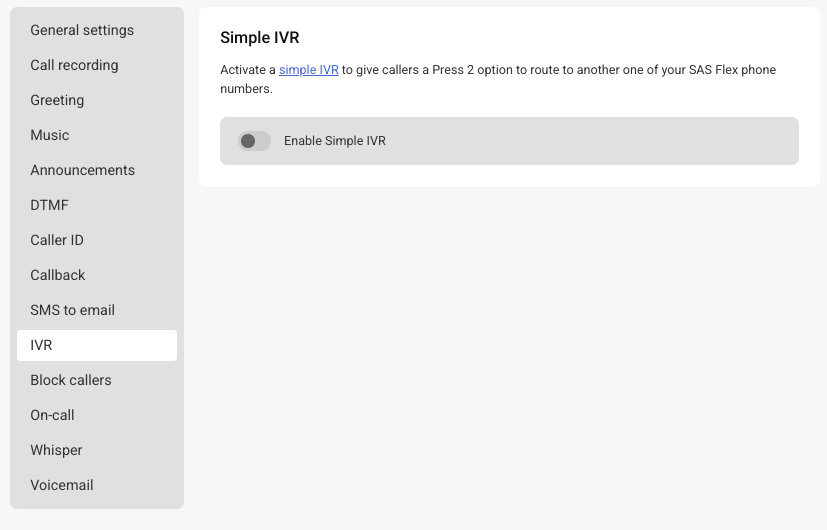
Routing Incoming Calls with a Simple IVR
SAS Flex offers customization tools right at your fingertips. With advanced script and IVR building technology, if you can dream it, you can build it. Whether you want to help route English and Spanish speaking callers accordingly or want to cut down on spam calls, a Simple IVR is all you need. Let's get started!
In this article we'll discuss:
Learn the Basics of IVRs
IVR, or Interactive Voice Response, is an effective tool frequently used by businesses to direct inbound calls based on the option that the caller selects. For example, pressing 1 to schedule an appointment or pressing 2 to speak with Billing. SAS offers two types of IVR; Simple and Advanced. We'll go over the basics of both below.
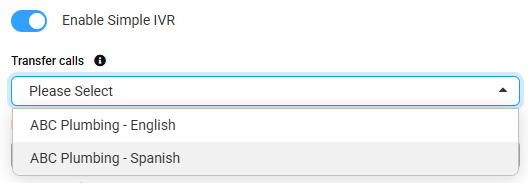
- Simple IVRs: Simple IVRs are primarily used to route English and Spanish speaking callers to the appropriate agent distribution, or helping to weed out spam calls by disconnecting the line if an option is not pressed. There is no fee associated with Simple IVRs, but there are limitations. Simple IVRs only offer 2 selections, and can only transfer to SAS numbers. In this article, we'll show you how to create Simple IVRs for both English/Spanish routing, and spam call management.
- Advanced IVRs: Advanced IVRs allow for more customization than Simple IVRs. For example, Advanced IVRs allow users to configure Date/Time routing, Voicemails, Outside Transfers, and more. Advanced IVRs are billed at an IVR rate, and typically require an additional line. For more information on Advanced IVRs, check out this article.
Setting up an English/Spanish IVR
In this section, we will show you how to configure an IVR that routes callers to an English or Spanish speaking agent based on the number they select.
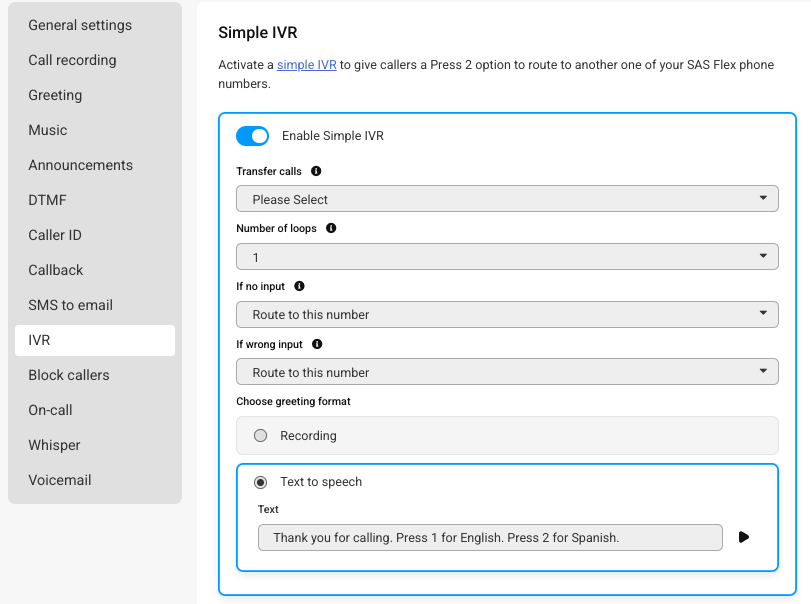
- Number of Loops: This represents the number of times the IVR greeting will play if there is no selection from the caller.
- If no input: If the caller does not input a selection, this setting will tell the system what to do. The Route to this number option will route calls to the number you've enabled the IVR on, the Route to number in Transfer Calls dropdown option will route calls to the number you've selected in the Transfer Calls drop down above, and the Disconnect option will disconnect the call.
- If wrong input: If the caller inputs the wrong selection, this setting will tell the sytem what to do. The Route to this number option will route calls to the number you've enabled the IVR on, the Route to number in Transfer Calls dropdown option will route calls to the number you've selected in the Transfer Calls drop down above, and the Disconnect option will disconnect the call.
Thank you for calling. Press 1 for English. Press 2 for Spanish.
Once our team confirms the proper distribution has been set, you can test to make sure everything is working properly by calling your English-labeled number directly and following the prompts.
Using an IVR to Filter Out Spam Calls
In this section, we will show you how to configure an IVR that disconnects if no option is selected, which will help weed out spam or robo-dialer calls as spam-bots can't press numbers.

By default, a Simple IVR's Press 1 option will always go to the number in which you are enabling the IVR on. However, the system will not let you save without choosing a Press 2 option as well. So, we'll choose the same number that we're activating the Simple IVR on.

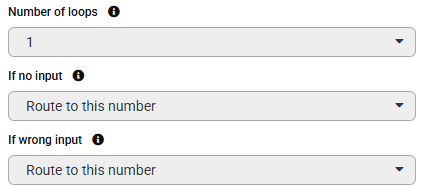
- Number of Loops: This represents the number of times the IVR greeting will play if there is no selection from the caller.
- If no input: If the caller does not input a selection, this setting will tell the system what to do. The Route to this number option will route calls to the number you've enabled the IVR on, the Route to number in Transfer Calls dropdown option will route calls to the number you've selected in the Transfer Calls drop down above, and the Disconnect option will disconnect the call.
- If wrong input: If the caller inputs the wrong selection, this setting will tell the sytem what to do. The Route to this number option will route calls to the number you've enabled the IVR on, the Route to number in Transfer Calls dropdown option will route calls to the number you've selected in the Transfer Calls drop down above, and the Disconnect option will disconnect the call.
In this example, we want calls to disconnect if there is a wrong input or no input.

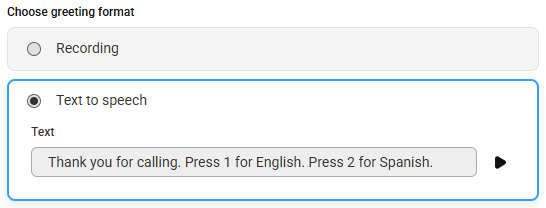
Thank you for calling. Press 1 to be connected.

We recommend calling your own IVR setup once to confirm the prompts and routing work as expected.
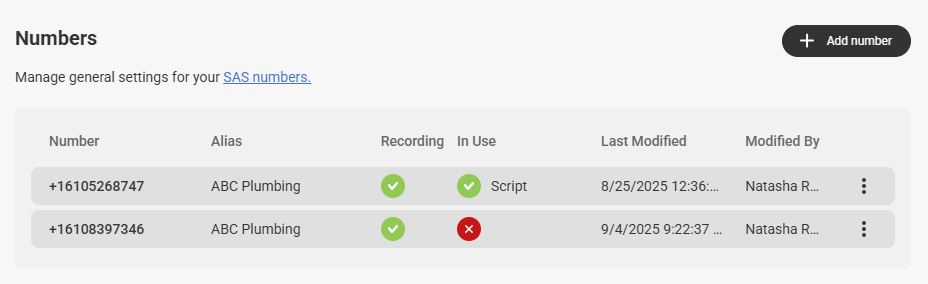
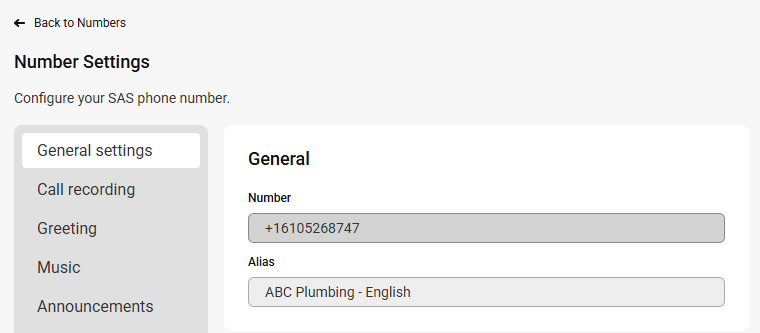
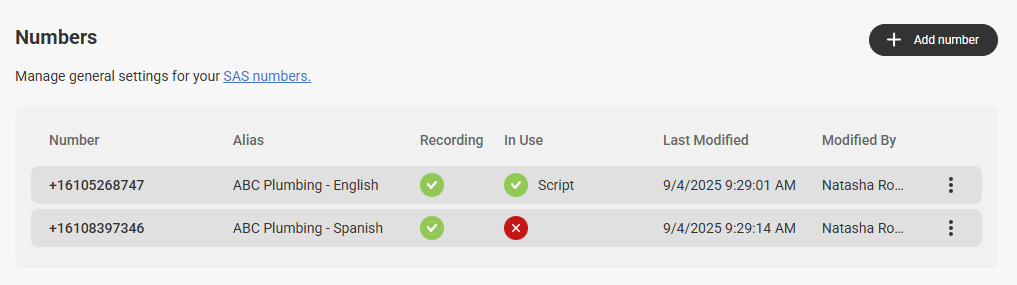
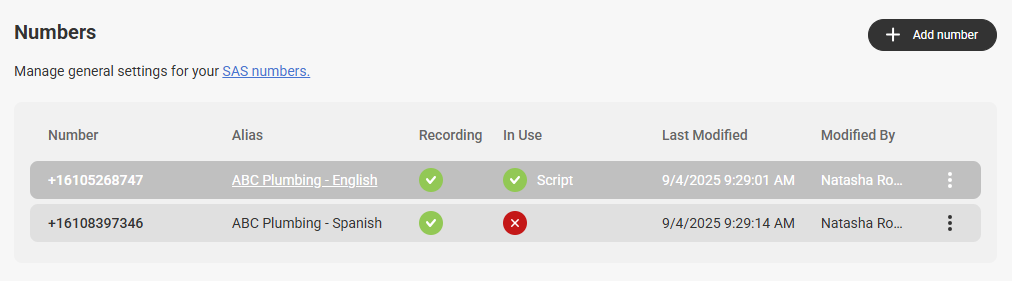
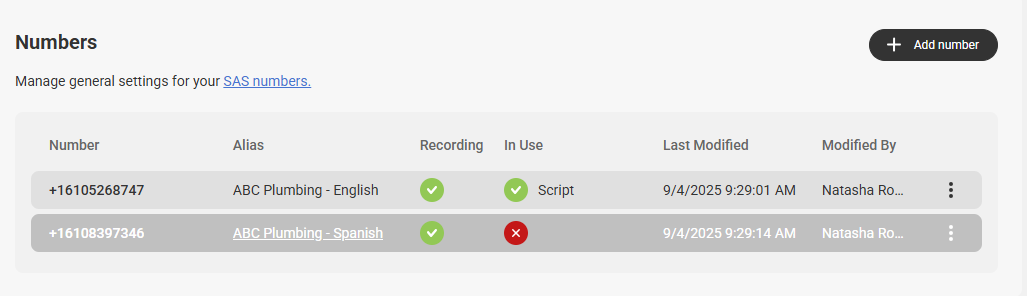
Adjusting Number Settings
Once your Simple IVR has been built, we'll need to remove any default greetings that are attached to your number(s). The instructions below apply to both types of IVRs outlined above. However, if you had set up an IVR to help filter out Spam calls, then you can ignore the Spanish-related instructions below.
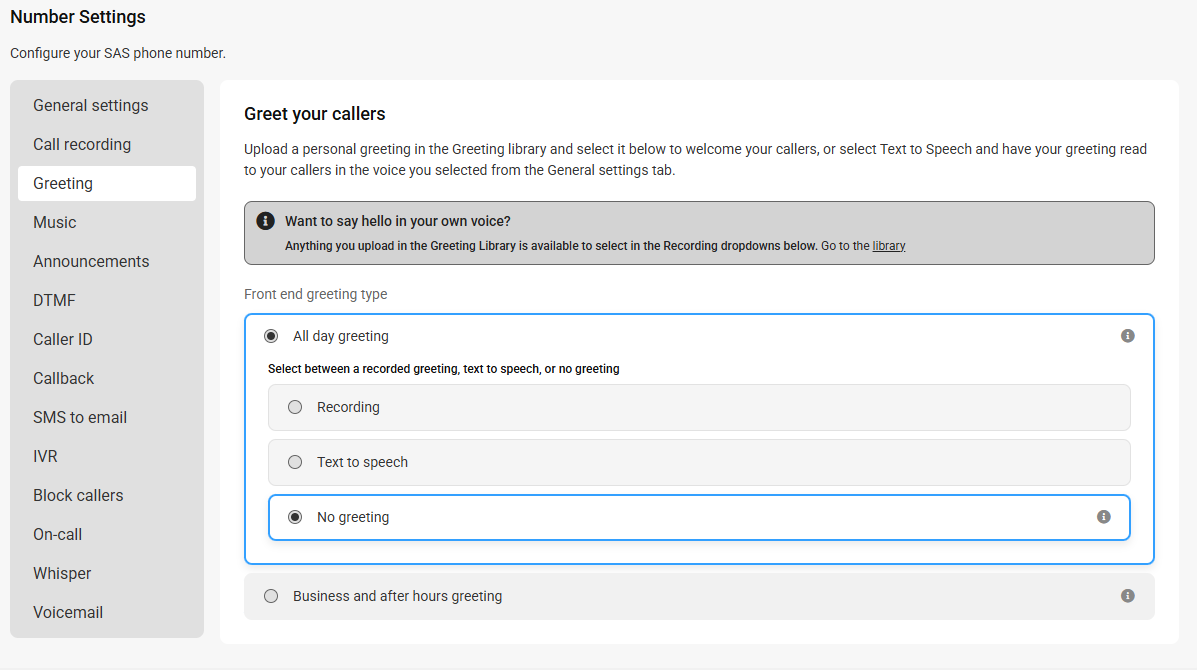
When you are done, click Save.