Building a Script with Business Hours and After Hours Call Handling
Whether you forward calls to SAS 24/7 or you just want to include some temporary holiday instructions, having the ability to automatically change your script depending on the day or time allows our agents to provide the most up-to-date information to your callers, and appropriately direct messages to your staff. For example, a plumber may want all messages that come in after hours to be sent to an on-call technician, whereas all messages that come in during business hours can be sent to their general mailbox.
In this article we'll discuss:
Before we begin, you'll need to create a business hours set. This will help tell the script what to do depending on the hours you've configured.
Using a Business Hours Set in Your Greeting
Once you have created your business hours set, you'll be able to add it into your script. This first option will allow us to tell the callers that the office is closed without changing the overall flow of the script. Essentially, we will let callers know the office is closed, but we will still handle calls as normal.
1
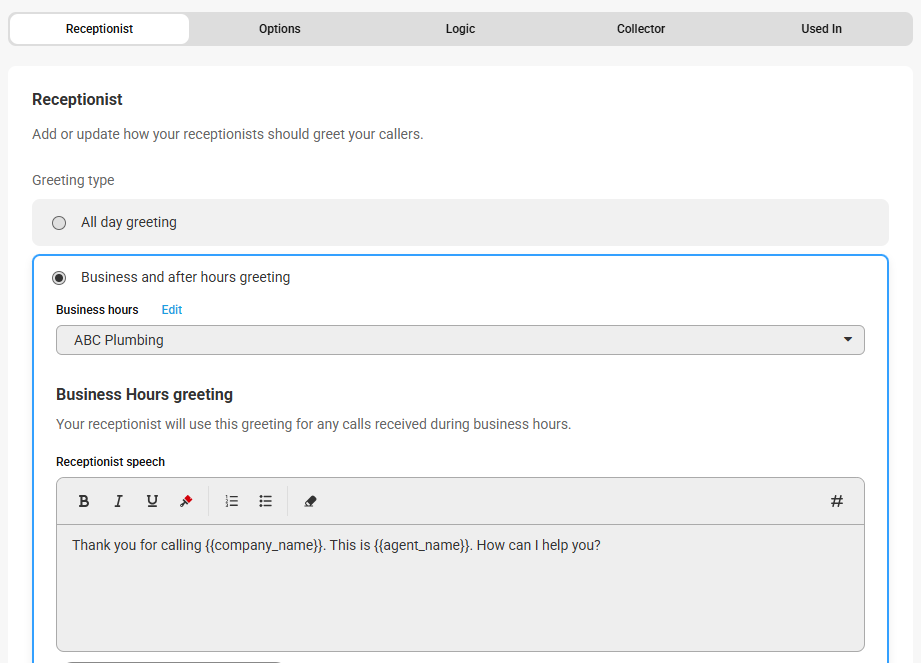
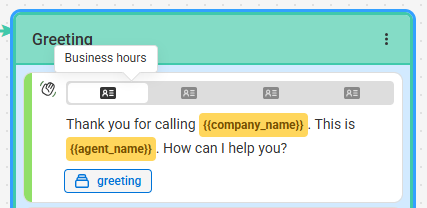
In your Greeting block, under the Receptionist tab, choose Business and after hours greeting as your Greeting type. Then, from the Business Hours dropdown, select the business hours set you've created, and fill in the Receptionist speech area accordingly.
2
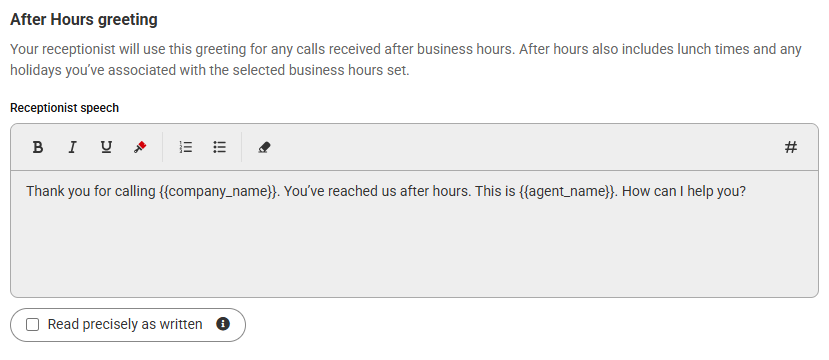
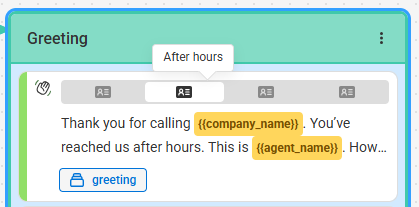
Next, fill in the text for your After Hours greeting, which is what the agents will read to your callers after hours. You can also choose to activate a Lunch and/or Holiday greeting, as outlined below:
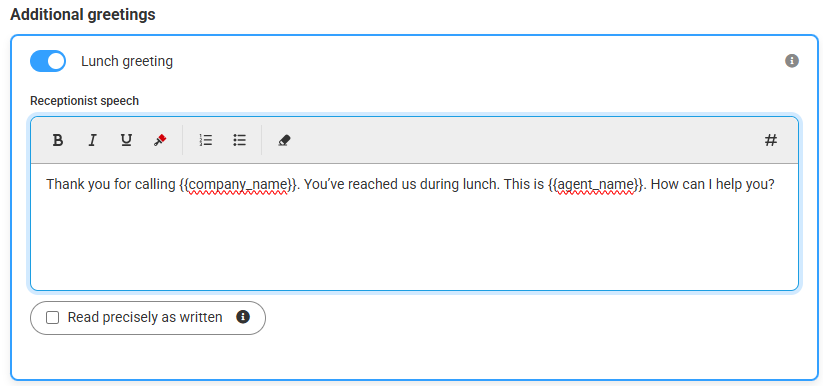
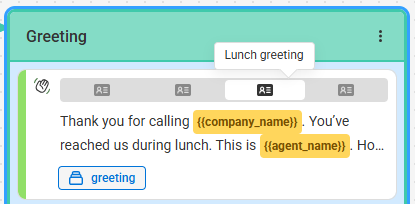
- Lunch Greeting: Once activated, the Lunch Greeting will show instead of your After Hours greeting on calls received during your Closed Between times.
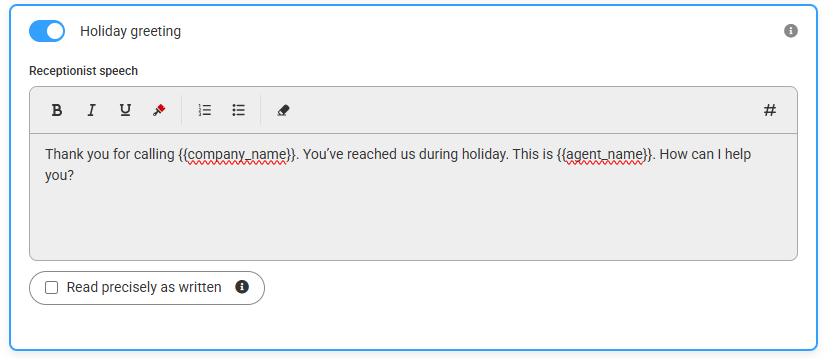
- Holiday Greeting: Once activated, the Holiday Greeting will show instead of your After Hours greeting on calls received during any holidays you’ve associated with your business hours.
If you are using any of our call back features, you can also customize the greeting the operators will use when they call your customers back.
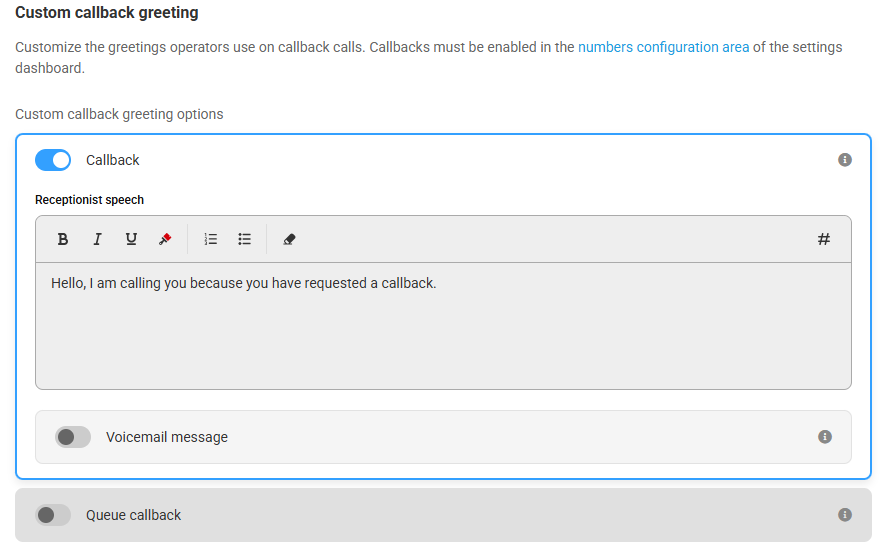
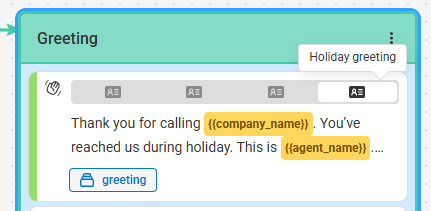
3
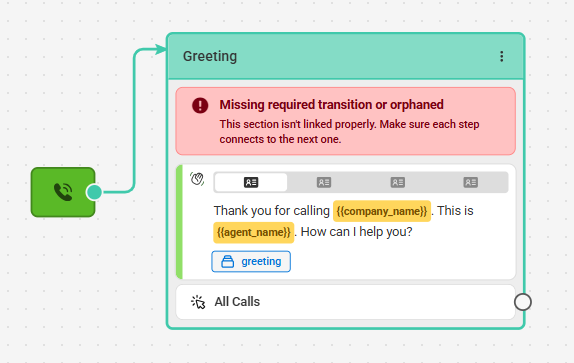
Continue editing your Greeting block as necessary. Once you are finished, click Save. Back in your script workflow, your business hours and after hours greetings will be visible in the Greeting block as shown below.
Creating a Workflow (Date Time) Block
We've already created the script sections that agents will follow if a call comes in during business hours or after hours. Now we need to create the script block that will tell the script when to switch.
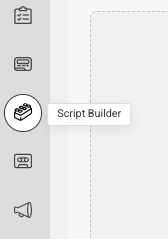
1
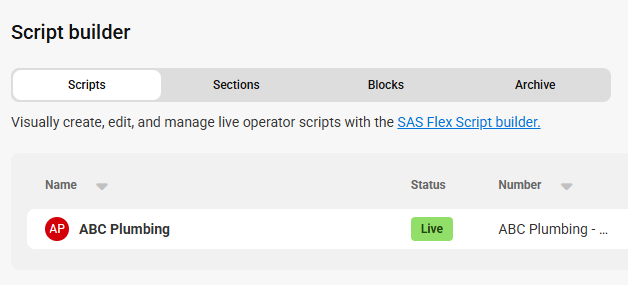
Select the Script Builder icon on the left-hand navigation menu.
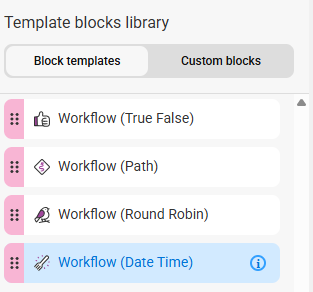
2
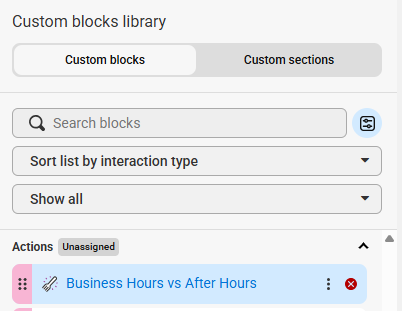
On the next page, click the Blocks tab, then select Add new block. From the Blocks list under Block Templates, locate and select the Workflow (Date Time) block.

3
You'll see the Block Type along the top of the block listed as Trigger, and a space to add a Block Label next to it. Block Labels will help us identify the block within the system later on. We named ours Business Hours vs After Hours.
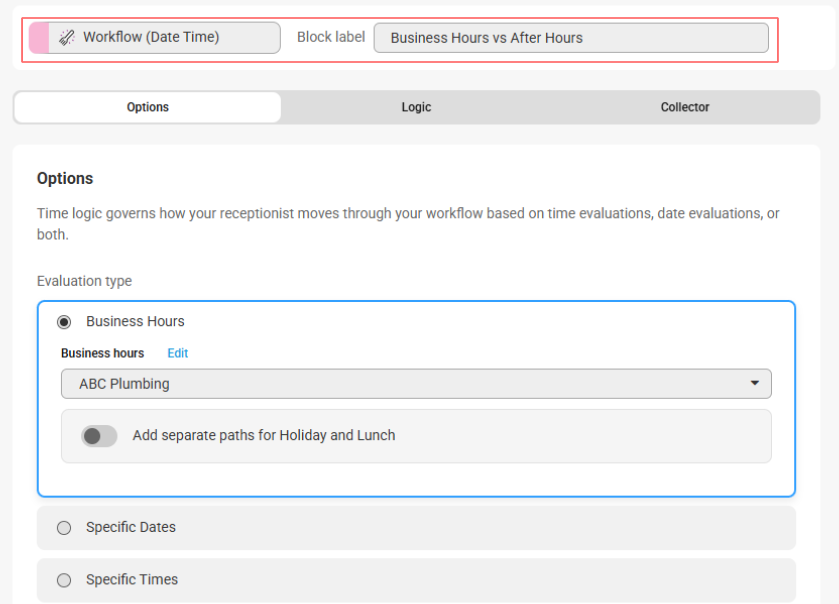
4
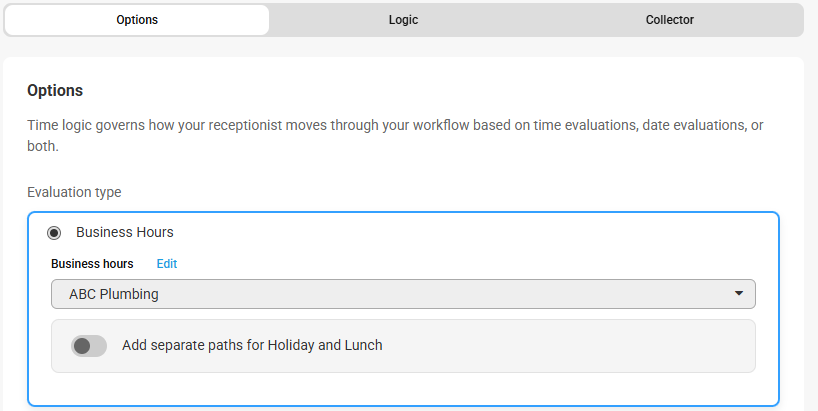
Under the Options tab, select your Evalutation Type. In this case, we'll choose the Business Hours option and select our business hours set from the drop down. If you want separate paths for calls that come in during Holidays or Lunch hours, use the applicable toggle as shown below.
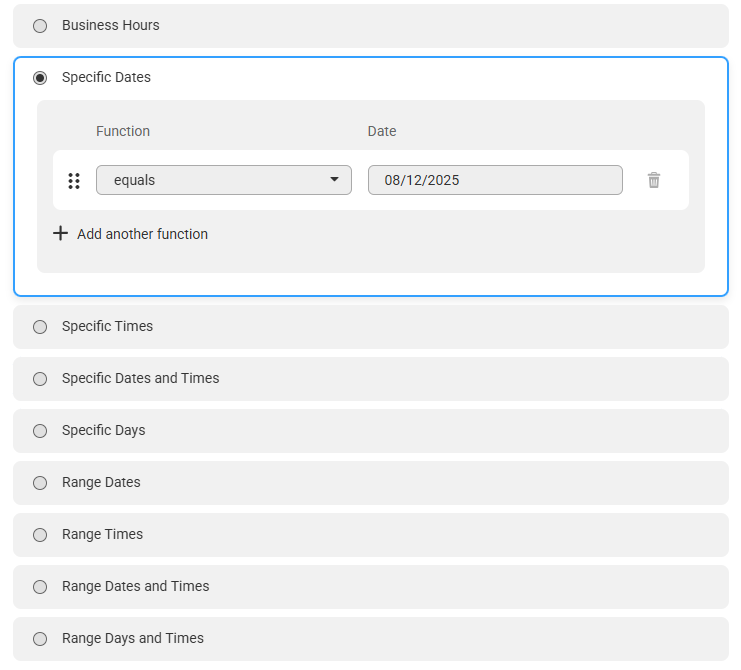
If you want to change your script based on specific date(s), day(s), specific time(s), specific dates and times, or date/day/time ranges, select the applicable option as shown in the picture below. Then, add your dates, days, or times accordingly.
 5
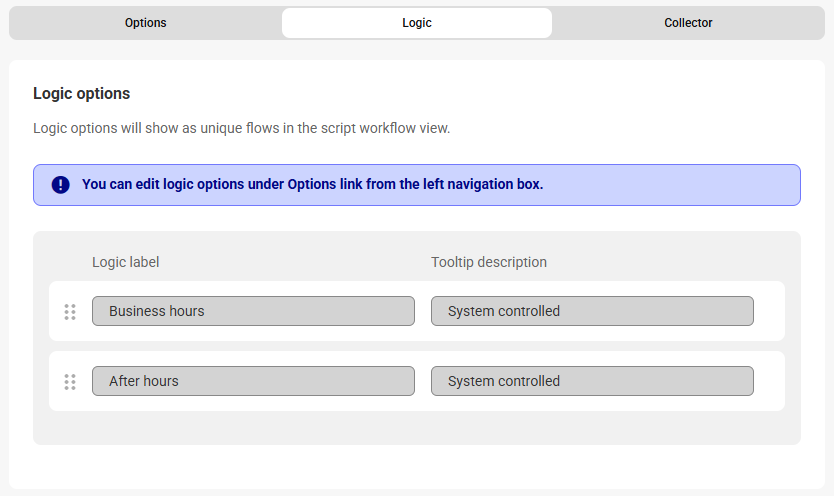
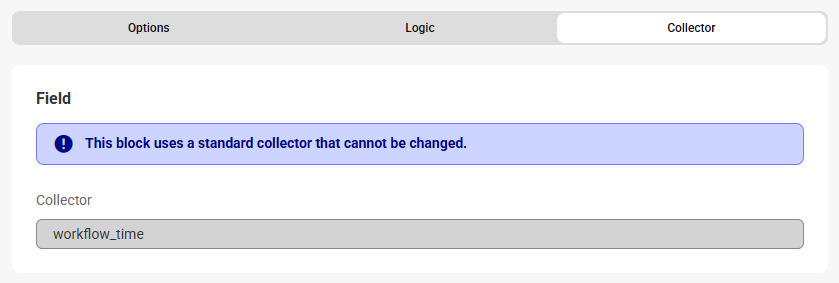
The Logic and Collector tabs will show system controlled functions, which cannot be edited.
5
The Logic and Collector tabs will show system controlled functions, which cannot be edited.
6
When you are finished creating your block, click Save.
Creating a new Section for your Workflow (Date Time) block
Once your Workflow (Date Time) block has been created, you'll need to add it to its own script section.
1
Select the Script Builder icon on the left-hand navigation menu.
2
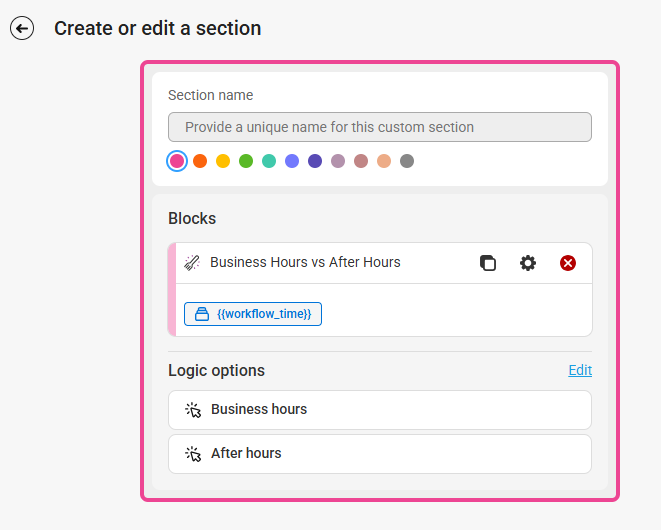
On the next page, click on the Sections tab. Then click Add new section.

3
On the left side of your screen, locate your newly created Workflow (Date Time) block and drag it over into the section builder.
4
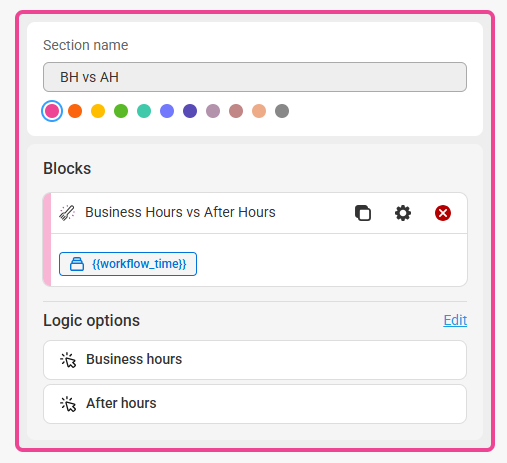
Name your section, select a color (optional), and click Save.
Depending on when you want the script to use the Workflow (Date Time) block, you may need to edit your current script sections by adding Page Breaks or Logic Options to point the script in the right direction.
Adding the New Section into the Script Workflow
Once your script block has been added to a new script section, it's time to incorporate the new section in your script.
1
Select the Script Builder icon on the left-hand navigation menu. Then select the script you wish to update.
2
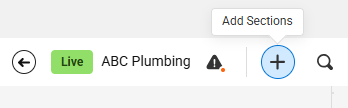
Once you've accessed your script, you will be taken to your workflow. In our example, we want to add our new Workflow (Date Time) block right after our greeting. Click on the + sign in the upper right-hand corner and click Add Sections.
3
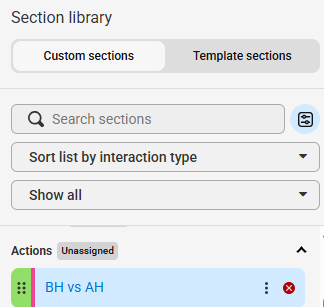
From the Custom sections list, locate your newly created section.
4
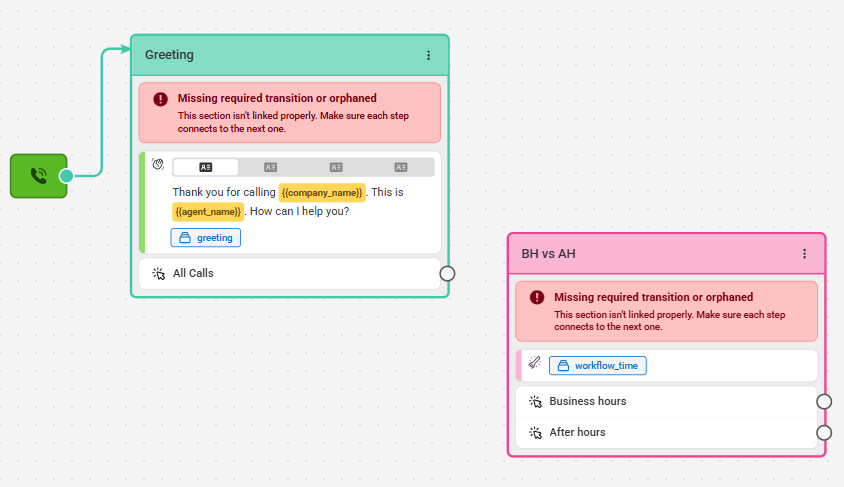
Next, drag over your section, placing it near the Main Greeting.
5
Link up the Greeting section to the BH vs. AH section, as shown below:
6
Next locate and drag over the the sections you want to follow the BH/AH section. In our example, we'll drag out our After Hours and Business Hours sections, placing them near the BH vs. AH section.
7
Link the Business Hours and After Hours sections to the BH vs. AH section, as shown below:
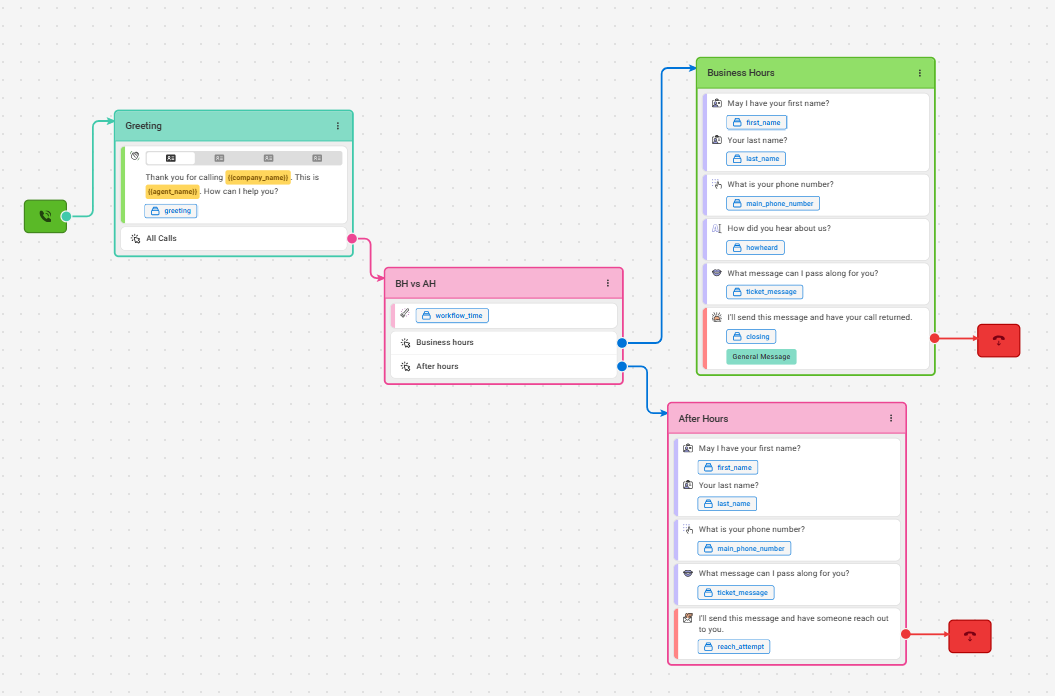
8
After you've finished editing your script, don't forget to Save your work!
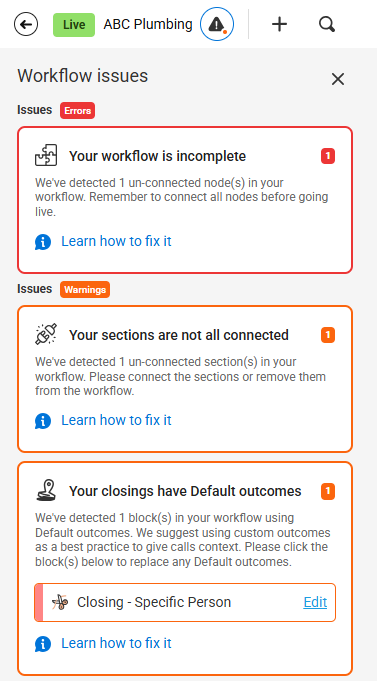
If you have any scripting errors, the caution triangle will display a red dot indicating that there are errors. Clicking on the triangle will open up a window explaining the errors and how to fix them.
Editing an Existing Date/Time Workflow
If you already have an existing Date/Time workflow programmed into your script, you may want to make adjustments. For example, clients using a Date/Time workflow to transfer calls during specific hours may want to edit the time frame. Here's how!
1
Within your script, locate your Workflow Date/Time block. You can either click the 3-dot menu icon and select Edit or you can click directly on the block label to pull up the editor.
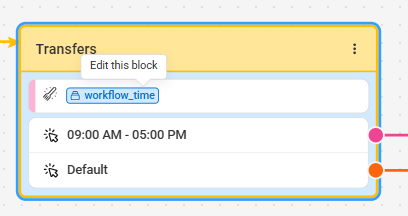
2
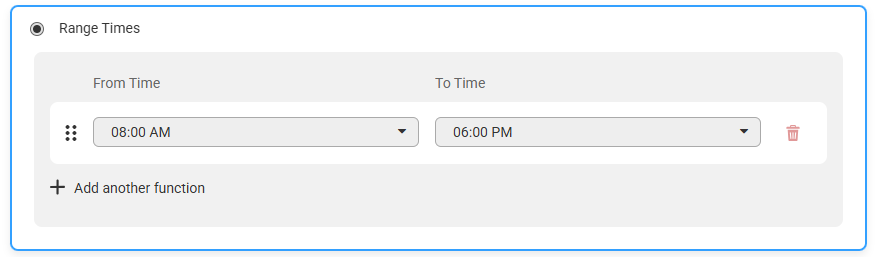
Under the Options tab, locate your active Evaluation Type. In our case, we're using Range Times to determine when agents can transfer calls.
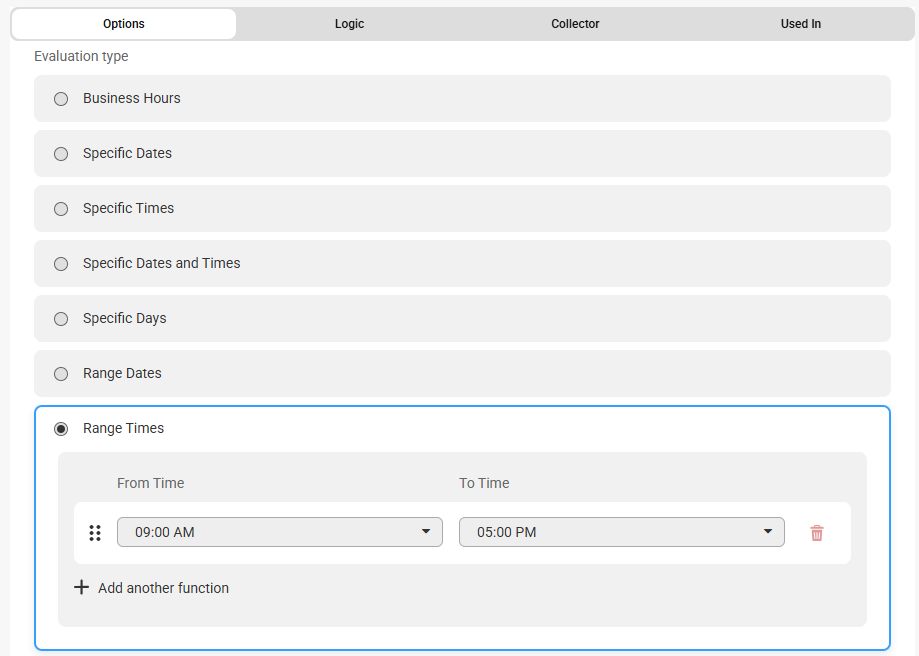
3
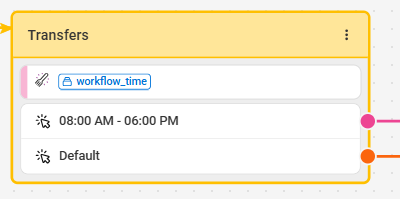
Depending on what you want to do, you can either add additional functions, or update your existing functions. In this case, we'll adjust our time range from 9am-5pm to 8am-6pm. When you are done, click Save
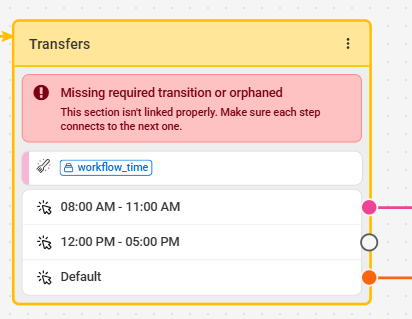
Note that if you choose to add another function, your workflow will have additional options that will need to be linked up to a next step.
4
When you are finished updating your workflow, click Publish live script in the upper right-hand corner.


