Set Your Company Business Hours
If your office ever closes, if you want calls handled differently when you're at lunch, or if you ever take a day off, you'll want to set your business hours. This article will tell you all about business hours and how they're used in Flex.
You can also edit business hours within the SAS Flex mobile app. For instructions on how to do that, check out this article.
In this article, we'll let you know:
What are business hours
In SAS Flex, business hours tell our system and our live receptionists when your business is open, and when it's not. Once you've created a Business Hours set, it can be associated with different parts of Flex to:
- Display your hours of operation to our Receptionists while they're on a call via Google Maps
- Determine which on-call staff members we contact
- Control where an operator gets directed in a script flow
- Control which IVR flow options a caller is presented with
- Show a different greeting to our Receptionists
- Read alternate text or play a different audio file in an IVR flow
How to add or edit a Business Hours Set
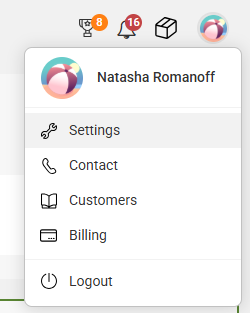
Then, on the main Settings page under the Account section, select Business Hours.

If you have no business hours, click the Add business hours set button as shown below. If you already have a business hour set, the Add business hours set button will be in the upper right-hand corner of your page.

Next, you’ll be taken to a new page where you'll need to complete Name and Time zone. You can also select a Holiday set from the Holidays drop down.

On the right-hand side of your screen, you’ll see toggles for each day of the week. Simply toggle on/off the days you are open and closed. Once you activate a certain day, the dropdown fields to the right will become accessible. In those dropdowns, set your From and To hours accordingly.

If your business offers service 24/7, you can toggle on Offers 24 hour service beneath the Additional options section. If checked, agents will see a red 24 HOUR alert when viewing your company's business hours during the time in which your business is marked as closed.


If your business offers service by appointment only, you can toggle on By appointment only box beneath the Additional options section. If checked, agents will see hours listed as By Appointment Only


How to set days and times you may be unavailable
You can also set time between your open hours where you may be unavailable, like if you take a lunch break, or dates you may be unavailable, like a holiday where your office is closed. Our operators will know if you're on lunch or it's a holiday, and if you are using business hours to control logic, our system will treat any of these times as after hours.
Setting your lunch or closed between hours
We understand you get hungry and want to be left alone. If you want calls that are received during these times to be treated differently, you'll want to set your closed between times.
Just select the applicable Closed Between toggle on the day(s) in which you want to amend your business hours.

Adding holidays
Everyone needs a break! If we're handling calls differently during holidays, create a holiday list and associate this list with your business hours.
Click the Holidays dropdown, shown below. If you don't see any Holidays here, check out our article on how to add Holidays.

How to apply a Business Hours set
Once you have a Business Hours set created, you can apply it to your script(s), Front End IVR(s) and the Google Maps app.
- Appling a Business Hours set to a script
- Applying a Business Hours set to a Front End IVR
- Applying a Business Hours set to the Google Maps app
Applying a Business Hours set to a script


Applying a Business Hours set to a Front End IVR


Applying a Business Hours set to Google Maps


