How to Configure a Voice Option Within Joy AI
A Voice Option in Joy AI is similar to a Logic Option in the regular script builder. It allows Joy to ask an "either/or" type question, and then follow a specific path depending on the caller's response.
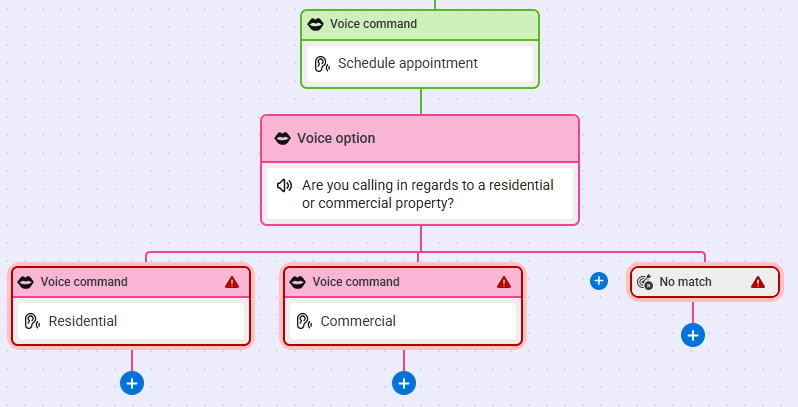
For example, a Plumber using Joy may want our system to ask the caller if they want to schedule an appointment. If the caller says yes, they may want an additional prompt asking if they're calling regarding a residential or commercial job. If the caller answers with residential, Joy can gather the appropriate information. If the caller answers with commercial, Joy can go to a closing letting the caller know they only service residential properties.
1
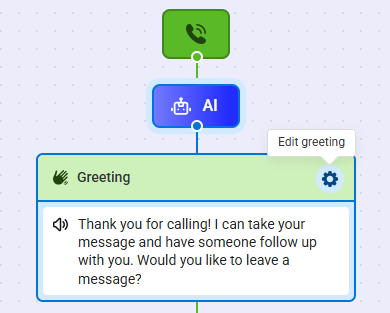
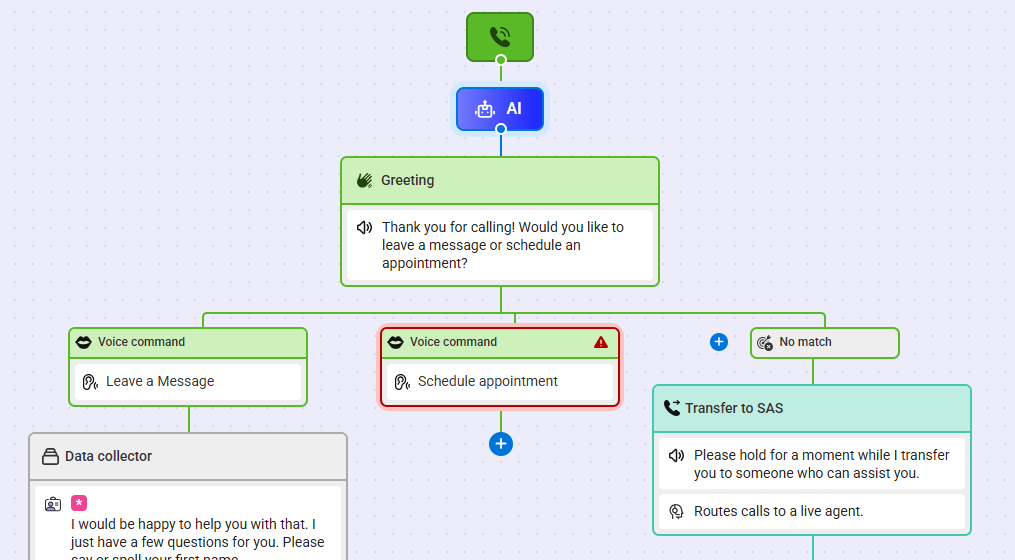
Within the Joy AI builder, the first thing we'll do is update our Greeting to include an option for callers looking to schedule. Click on the Gear icon to edit.
2
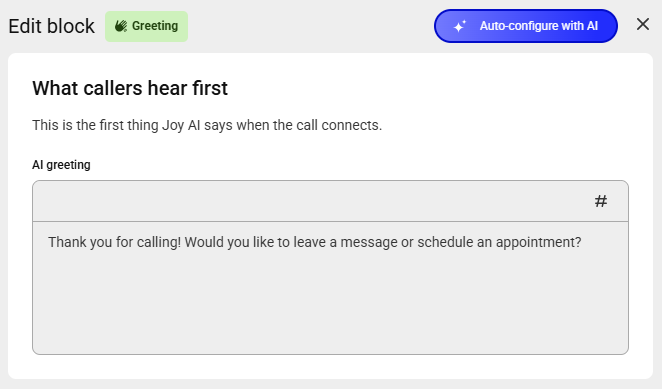
In the AI greeting text box, update your greeting accordingly. In this example, we'll include verbiage for callers looking to schedule. You can also use the Auto-configure with AI option to create a greeting based on your existing live script using generative AI.
3
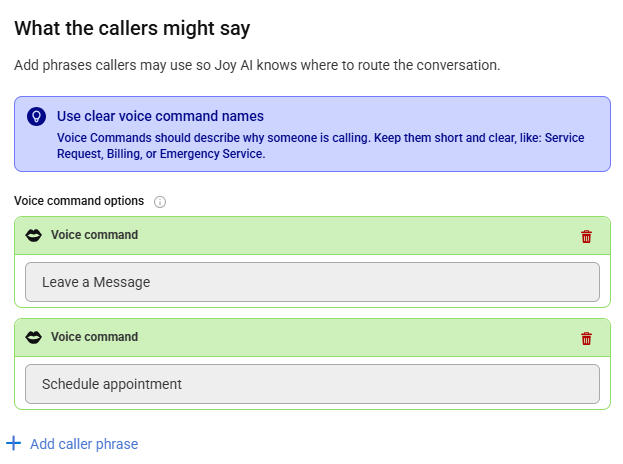
Under the What the callers might say section, we'll need to add another voice command. Click Add caller phrase and add an option for callers looking to schedule.
4
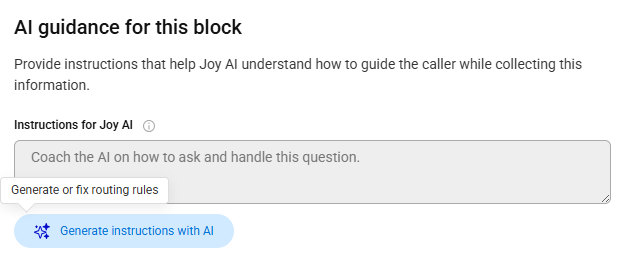
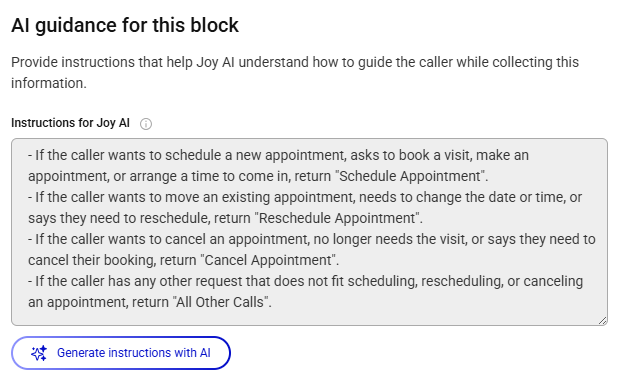
Under the AI Guidance section, you can add instructions that help Joy AI understand how to guide the caller while collecting information. Click the Generate instructions with AI button to auto-configure instructions.
5
When you are finished editing your Greeting block, click Save. You'll see your new Voice Command added below your Greeting.
6
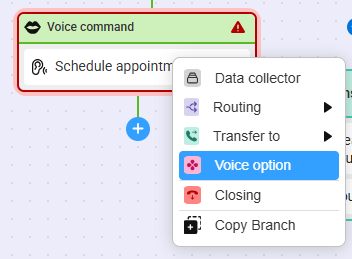
next, click the blue + nodule below the new Voice Command and select Voice Option.
7
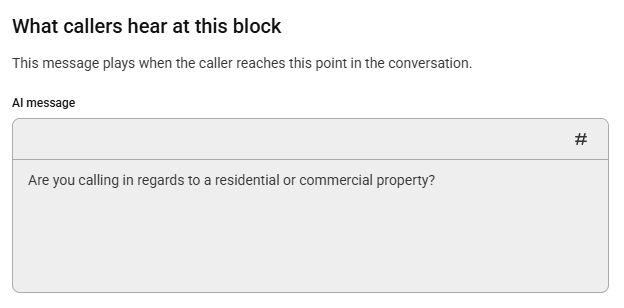
A bump out will appear on the right-hand side of your screen. Within the AI message text box, add in your prompt. In this case, we'll be asking callers if they're calling in regards to a residential or commercial property.
8
In the next section, we'll need to add our caller phrases. Click Add caller phrase, and then add in your options. In this case, we'll add two; Residential and Commercial.

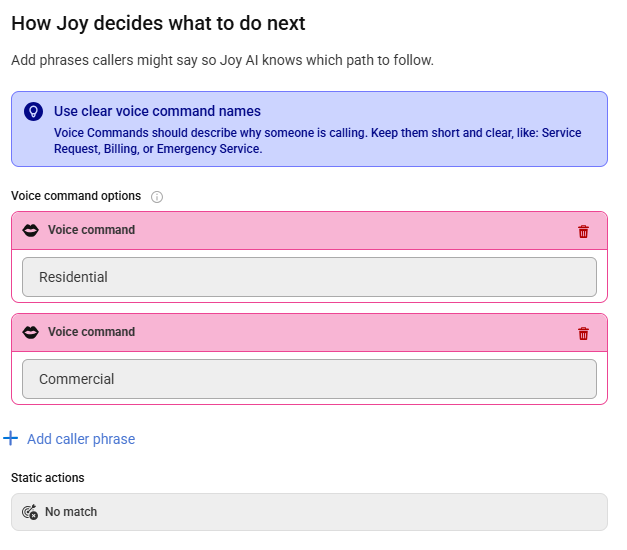
9
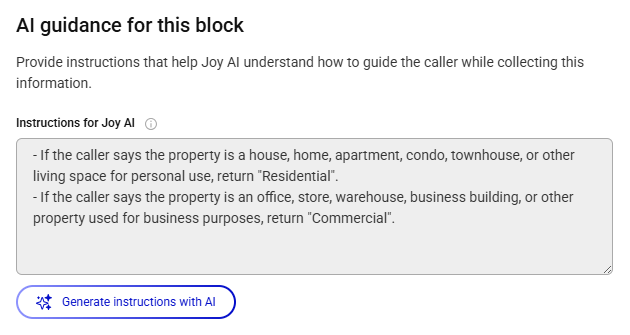
Just like in the Greeting block, you can also choose to add AI guidance to better help Joy navigate calls. For example, instead of answering with "residential" a caller may respond with "house."
10
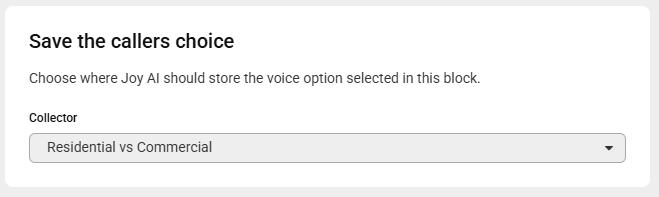
Next, choose a collector which is where data from this block will be stored.
11
When you are finished editing the block, click Save. You'll see your new Voice Commands listed.
12
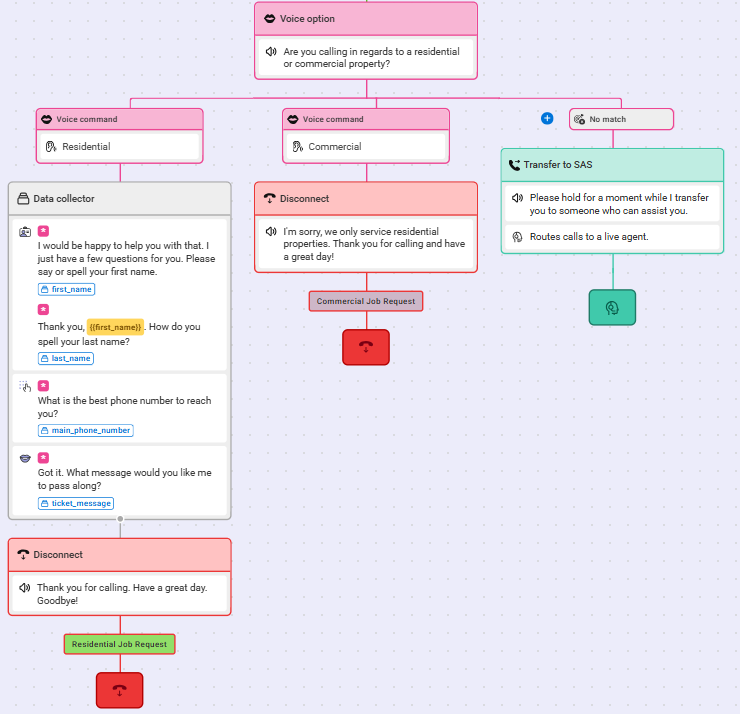
Now we need to build out the paths for each respective Voice Command. In our example, we want calls for Residential appointments to result in Data Collection, and a message sent over to the office for a return call. For Commercial appointments, we'll go to a Closing letting the caller know that we only handle Residential jobs. Additionally, we'll need to add an action for No Match calls. In this case, we'll have those Transfer to an SAS agent.
13
When you are finished making updates to your Joy AI workflow, don't forget to publish your changes in the upper right-hand corner.


