How to Configure a Closing Within Joy AI
Closing blocks within Joy AI operate in much the same way that Closing blocks in the regular script builder do. Users are able to choose an Outcome, control where messages are sent, initiate a Reach On-Call, or integrate with one of our many available apps.
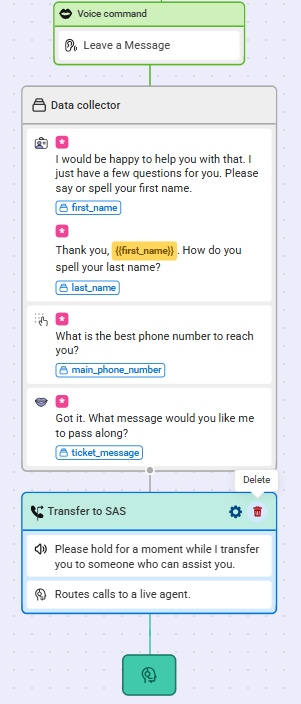
Currently, our main path has Joy collecting basic information from callers and then transferring the caller to an SAS agent. In this tutorial, we will remove the current Transfer option and replace it with a Closing option instead.
1
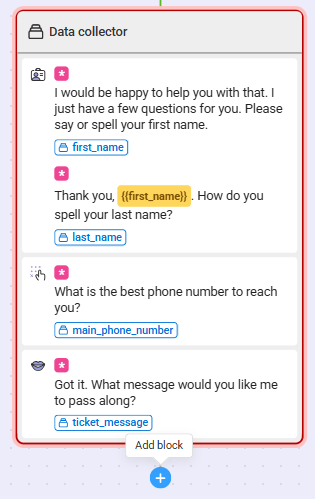
Within the Joy AI builder, hover over the section you want to remove and click the Trash icon to remove.
2
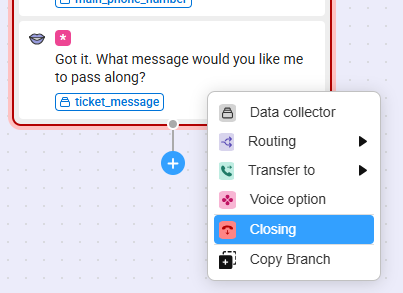
Next, click the blue + icon beneathe the section to add a new block.
3
From the drop down, select Closing.
4
A bump out will appear on the right-hand side of your screen which will allow you to configure your closing. The Closing message text box will be what Joy reads to your callers. You can change the default text or leave it as is.

5
Under the Options section, assign a Call Result to your Closing block by choosing an Outcome. Then choose the Profile(s) you want messages to be sent to. You can select up to 10 Profiles per Closing block.
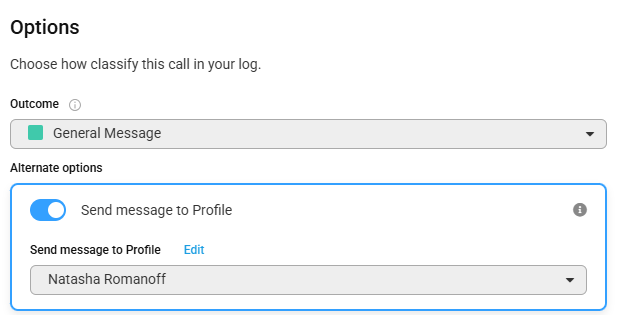
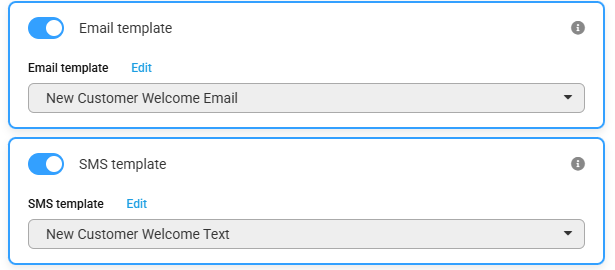
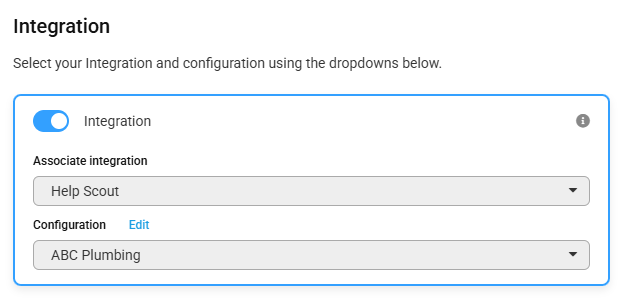
If you are utilizing the SAS Email App, the SAS SMS App, or one of our available App Integrations, toggle the appropriate option, then choose your respective template and/or configuration from the drop down.
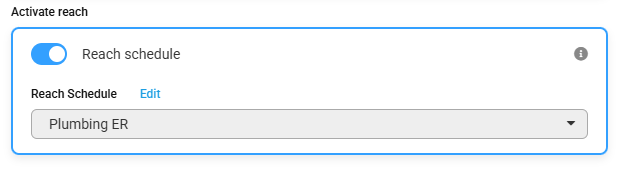
If you want the call to result in a Reach out to your on-call staff, use the Reach schedule toggle and select the applicable Reach schedule from the drop down.
6
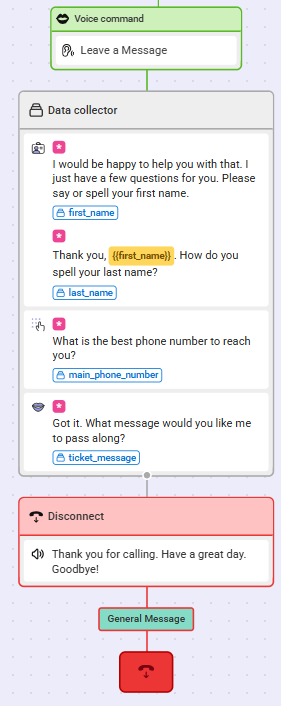
When you are finished configuring your Closing, click Save. your newly updated workflow will look something like the image below.
7
When you are finished making updates to your Joy AI workflow, don't forget to publish your changes in the upper right-hand corner.


