Getting Started with IVR Blocks
SAS Flex gives its customers the ability to create a completely custom IVR, or auto attendant, based on their business's specific needs. In this tutorial, you'll learn about the types of blocks that can be used to build an advanced IVR.
Advanced IVRs are billed at $0.15/minute, starting from when the IVR begins to when the caller is finished interacting with it. For more information, check out this article.
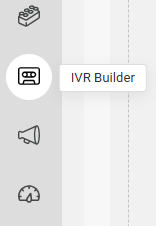
To access the IVR Builder, click the IVR Builder icon from the left-side navigation panel. If you have any existing IVRs, they will be listed on the next page. If not, you'll need to add a new one. For instructions on how to add a new IVR, check out this article.
After you have configured your IVR Greeting, you can choose any of the following options by clicking on the + node icon as shown below. We'll go over each option below.
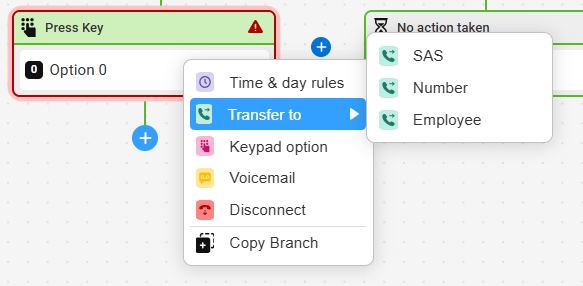
- Time & Day Rules
- Transfer to SAS
- Transfer to Number
- Transfer to Employee
- Keypad Option
- Voicemail
- Disconnect
- Copy branch
Time & Day Rules
Use the Time & Day Rules option to automatically change your IVR during certain hours or dates. For example, a medical practice may want a standard message to play during business hours but may want a different message with emergency information to play after hours. Routing can either follow your set business hours, or you can set specific dates within the block itself.
Transfer to SAS
Use the Transfer to SAS option to transfer calls to one of your other SAS numbers. For example, if you have multiple accounts with SAS for various departments in your company, such as Customer Support or Sales, this block will lead to an internal transfer to another SAS number.
Transfer to Number
Use the Transfer to Number option to transfer callers to an outside number independent of SAS. For example, having callers press 3 for Billing Issues can lead to a direct transfer to your own billing team.
Transfer to Employee
Use this option to set up your Employee Extensions. Note that the Greeting block already includes an Employee option. Connect your Greeting block to Employee Extension blocks for Employee transfers.
Keypad Option
Use the Keypad option to add subsequent options within your IVR. For example, you may want a caller to press 1 for English or 2 for Spanish, and then have additional options listed in each respective language.
Voicemail
Use the Voicemail option to allow callers to leave a voicemail on your SAS number. You can choose to have a recording of the voicemail sent to your OnCall staff, or sent to any Profiles you have already set up. All voicemails will be stored in your Voicemail Log for ninety (90) days.
Disconnect
Use the Disconnect option to customize how a line disconnects after a user presses a certain option. For example, your main IVR may prompt callers to press 3 for business hours and location. Add a recorded greeting to the Disconnect option that will relay the requested information before ending the call.
Copy branch
Use the Copy branch option to easily copy an existing IVR branch option. This feautre is helpful for IVRs that have a lot of options that should be handled the same (i.e, an IVR with multiple Voicemail or Transfer options). Instead of building each one out, users can easily make copies of one branch and make adjustments as needed.