Setting up a Transfer to Number Option with an Advanced IVR
For clients who want to transfer callers from the IVR to a staff member on their team, a Transfer to Number option can be added within an advanced IVR. For example, you may want sales calls transferred to a sales team member on your side, or billing calls transferred to your own billing team.
In this article we'll discuss:
Updating the Main IVR Greeting
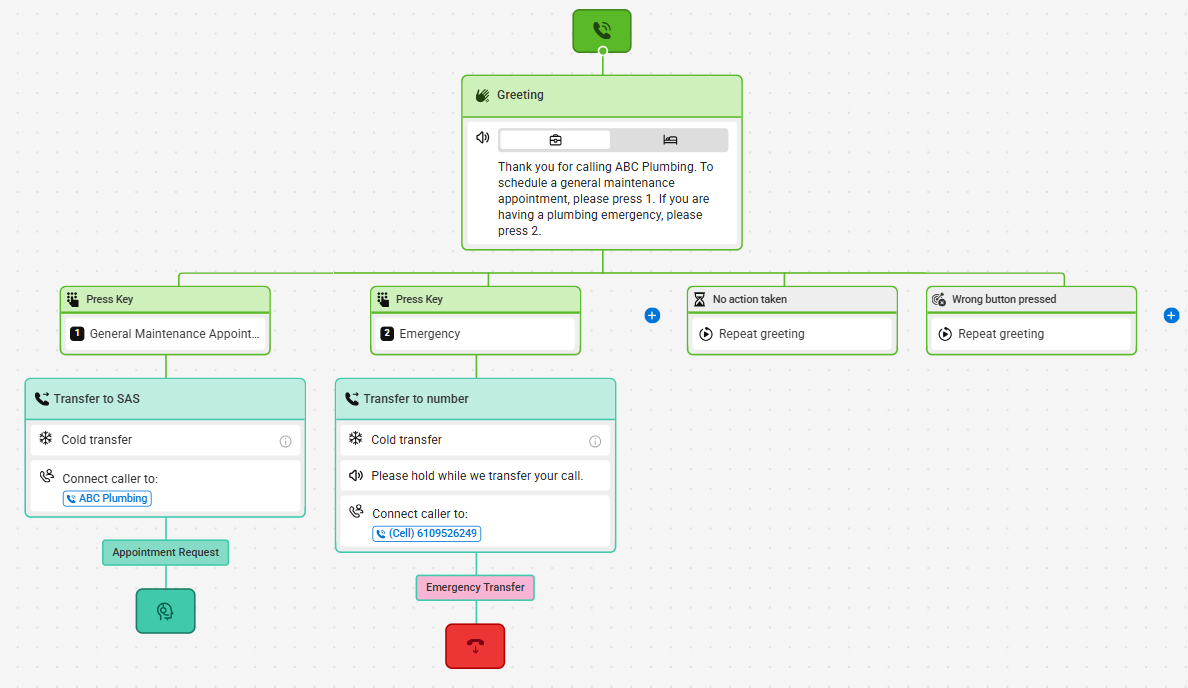
All IVRs must start with a Greeting. This will be considered your "main menu" and will provide callers with subsequent options. In this example, we'll update our main IVR greeting to include an Option which if pressed, will result in a transfer to a non SAS number.
1
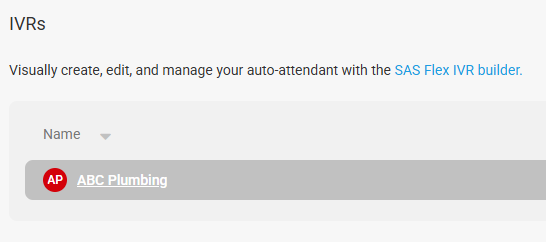
Select the IVR Builder icon on the left-hand navigation menu, then select the IVR you wish to update.
2
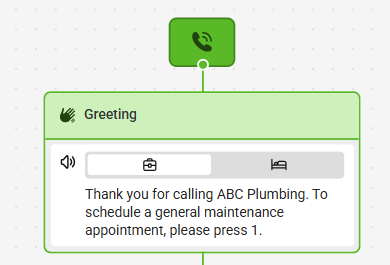
On the next page, click on your Greeting block, as shown below.
3
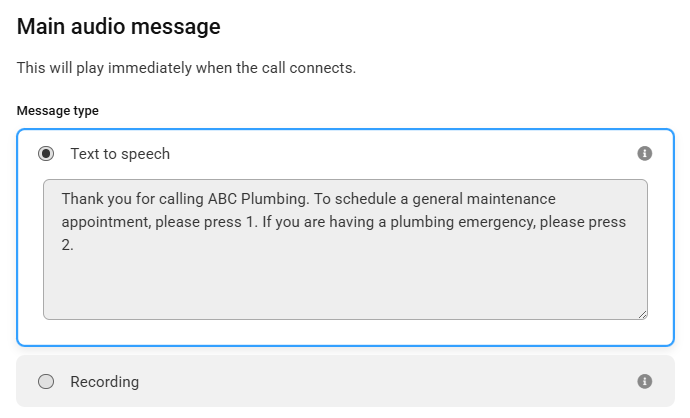
In the panel that appears on the right-hand side of your screen, you'll need to update the prompt language. If you are using a Recorded audio file, you will need to re-record and re-upload the file with the new prompt language. If you are using the Text to Speech option, you can just update the text as shown below.
In our example, we'll be adding a Press 2 option for callers who are having an emergency. These calls will result in a transfer to a non-SAS number.
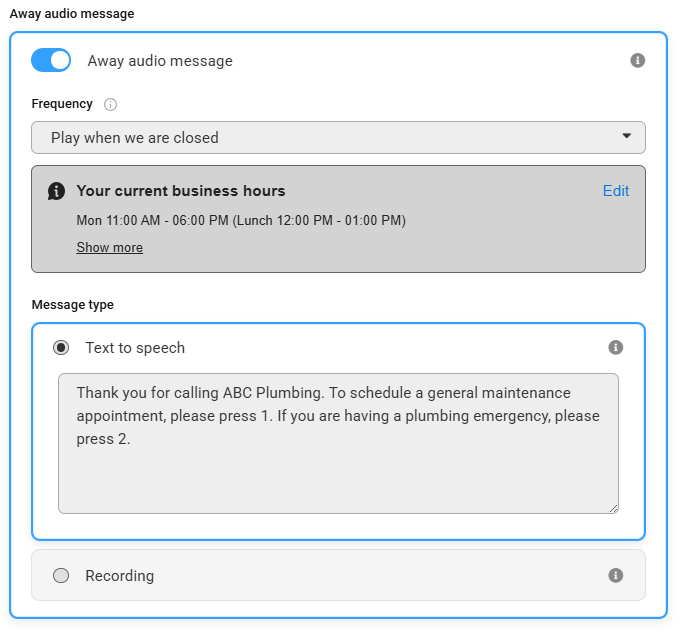
If you want a different message to play when you are closed for after hours or holidays, use the Away audio message toggle, then choose Play when we are closed from the Frequency dropdown and add your respective greeting.
In order for the IVR to be able to change based off your business hours or after hours, you'll want to make sure you have already created a business hours set and a holiday set. Additionally, you'll want to make sure your business hours set is selected under the Options gear within the IVR workflow.
4
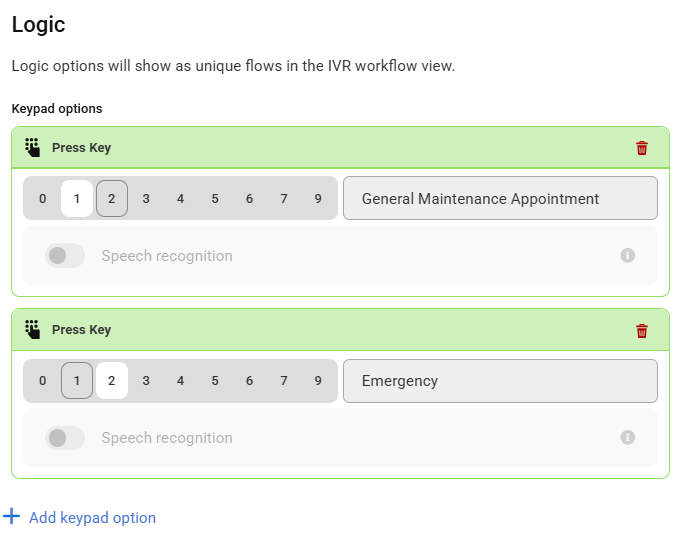
Next, under the Logic section, we'll need to add our new Logic Option. Click Add keypad option, select your numerical keypad option, then type in the respective title. In this case we want callers to press 2 if they're having an emergency.
5
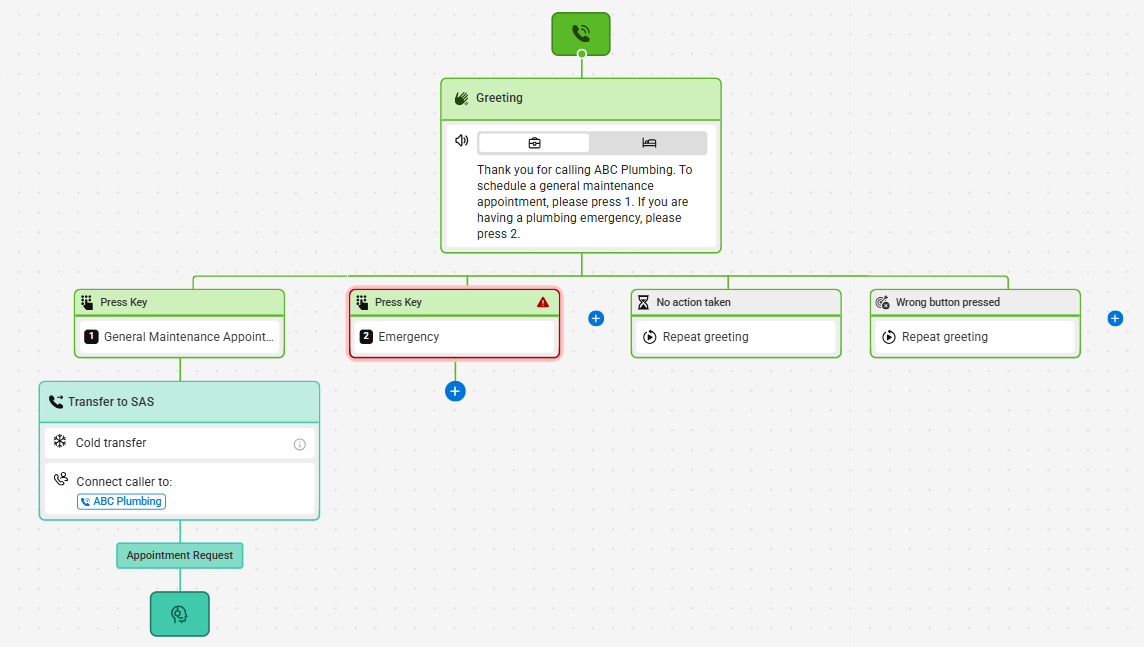
When you are finished, click Save. Your new workflow should look something like the image below.
Creating and Adding a Transfer to Number Option
1
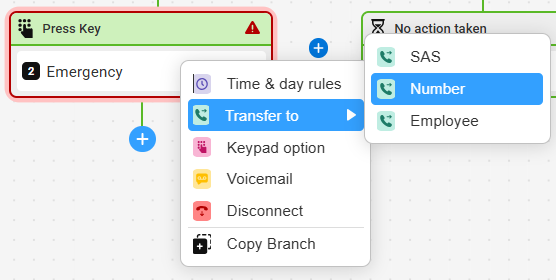
From the main IVR workflow, click the + node beneath the section you want to result in a an outside transfer. Then, select Transfer to > Number.
2
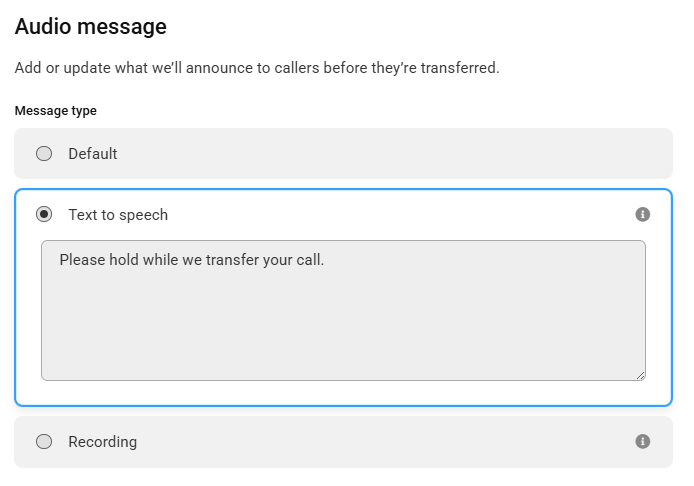
On the panel that appears on the right-hand side of your screen, select your audio message, which is what your callers will hear when they press this option. You can choose our Default option, you can select a pre-uploaded recording, or you can use our Text to Speech option.
3
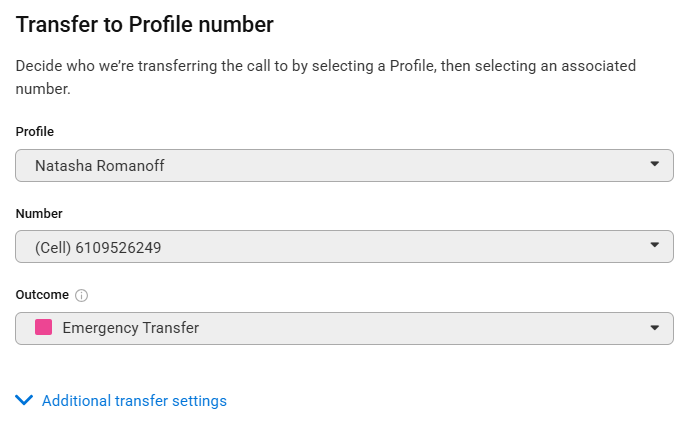
Next scroll down to the Transfer to Profile number section so you can tell the system which number to dial. Select a Profile, an associated number, and then choose an Outcome which will help you easily identify calls within your IVR log.
4
If you want to configure additional transfer settings, expand the Additional transfer settings menu. First, choose which number you'd like to display when a call is being transferred from the IVR.
- SAS Number: This option will display the SAS number attached to your IVR when we transfer.
- Callers Number: This option will display the caller ID of the caller when we transfer.
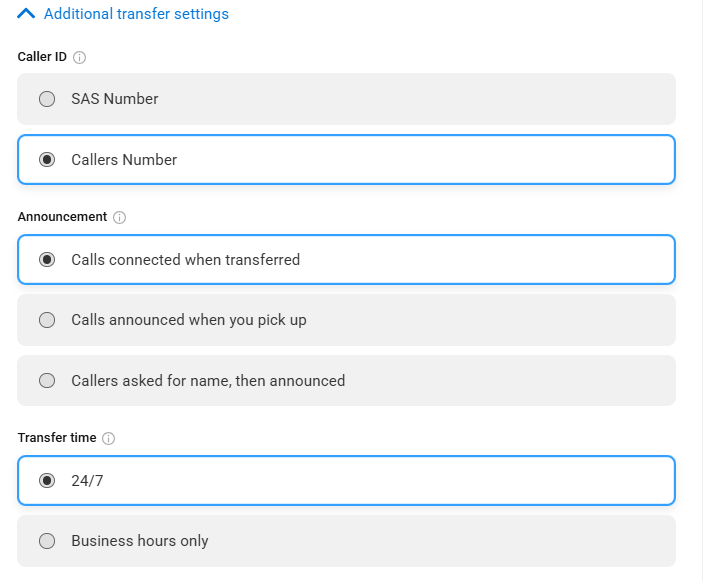
Next, choose what happens when the call is being transferred.
- Calls connected when transferred: Choosing this option will transfer the caller without any prior announcement, and will not give you the option to accept or reject the call.
- Calls announced when you pick up: Choosing this option will play an announcement for you prior to the transfer. You can choose to either accept or reject the transfer.
- Callers asked for name, then announced: Choosing this option will ask the caller to say their name which will play for you prior to the transfer. You can choose to either accept or reject the transfer.
If you chose either of the first two options, you'll need to configure an additional option to tell the system what to do if there is no answer or if you reject the call. For example, if there is no answer you may want the call to transfer to an SAS agent instead, or play a recording and disconnect the call.
Next, choose a Transfer time.
- 24/7: This option will allow us to transfer calls 24/7
- Business hours only: This option will only transfer during business hours. If you choose this option, you will need to have already created a business hours set and select your business hours from the Options menu within your IVR workflow
5
When you are finished, click Save. You will then be taken back to your main IVR workflow, which should look something like the image below. If you are satisfied, don't forget to click Publish in the upper right-hand corner.