Using the Warm Transfer (Collector) Script Block
The Warm Transfer (Collector) block automatically selects a warm transfer number based on a prior collector value. For example, a business may want to set up transfers for callers asking to speak with specific staff members within the company. With a Warm Transfer (Collector) block, we can match up a Condition (specific person) with a Comparison (which person was selected), which alleviates the neee to set up multiple Warm Transfer blocks for each individual employee.
In this article we'll discuss:
Creating the Warm Transfer (Collector) Script Block
1
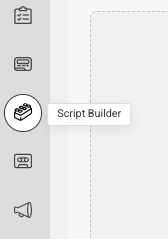
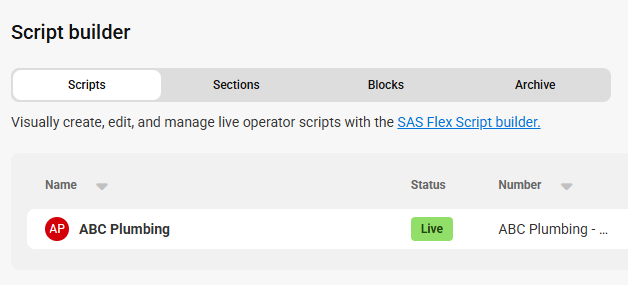
Select the Script Builder icon on the left-hand navigation menu.
2
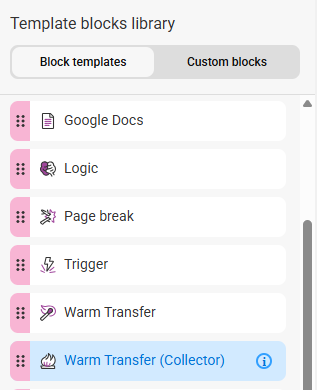
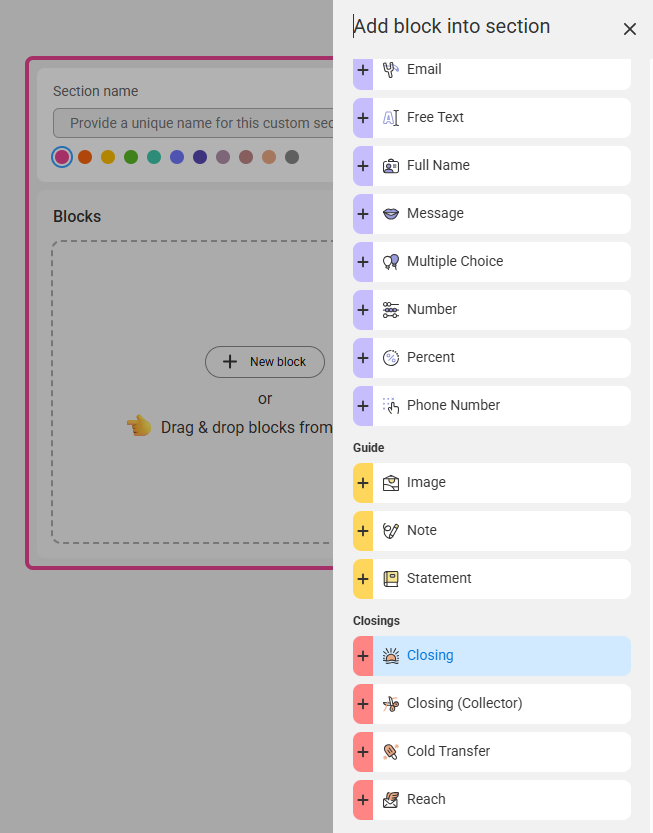
On the next page, click the Blocks tab, then select Add new block. From the Blocks list under Block Templates, locate and select the Warm Transfer (Collector) block.

3
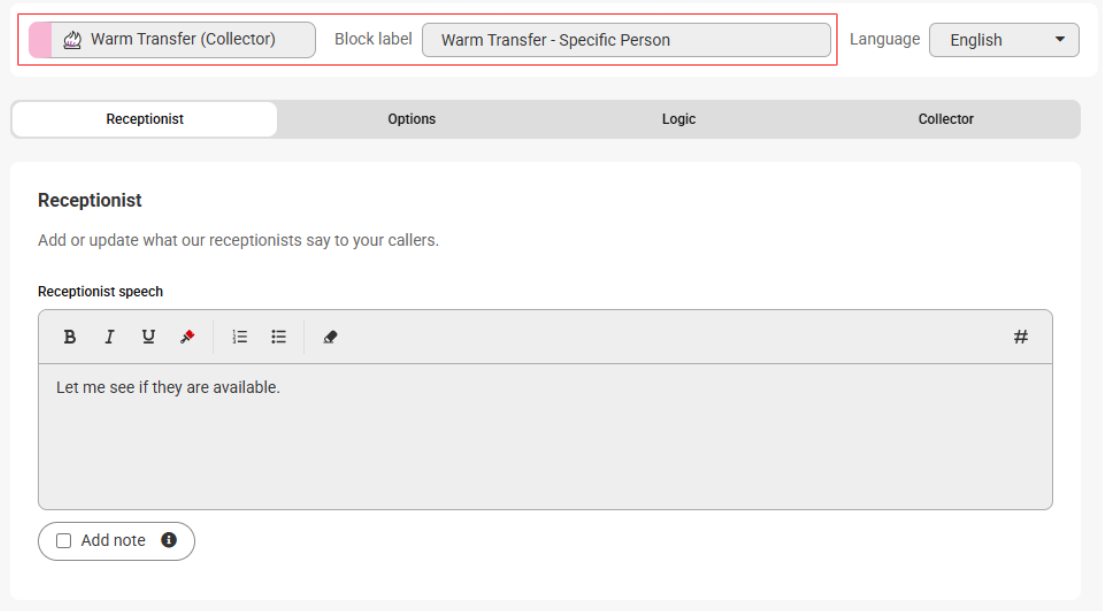
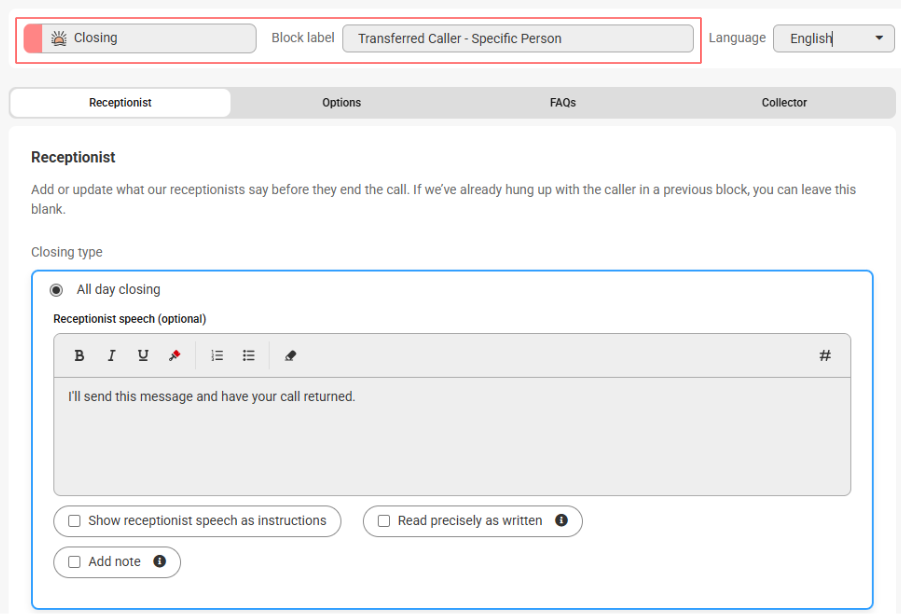
Once the block populates on your screen, you'll see the Block Type along the top of the block, and a space to add a Block Label next to it. Block Labels will help us identify the block within the system later on. We named ours Warm Transfer - Specific Person.
4
Now under the Receptionist tab, you will need to fill in the operator text, or what you want the operator to say to your callers. In this case, we’ll let the caller know we're checking to see if someone is available to take the call.
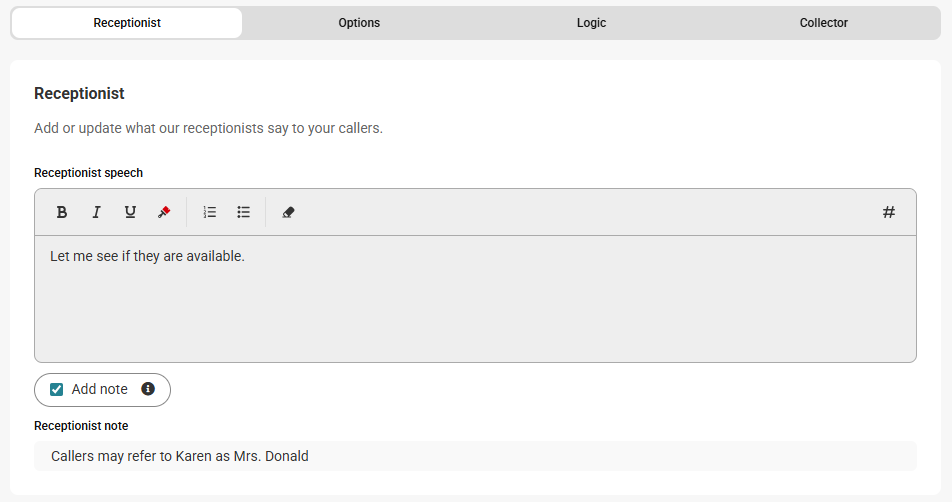
If you want to add a note for the agents, click the Add note check box and add your text accordingly.
5
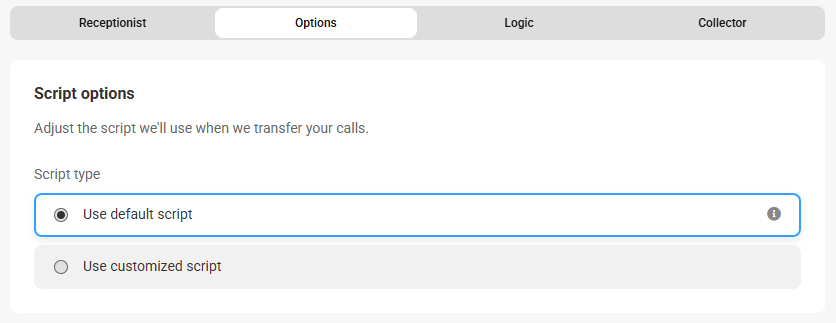
Under the Options tab, you can customize the transfer script, or use the system's default option. The default option will instruct operators to say: "Hello, this is {{agent_name}} from SAS with a call. May I transfer them through?" If you want to customize the script, check the Use customized script option and type in your own message.
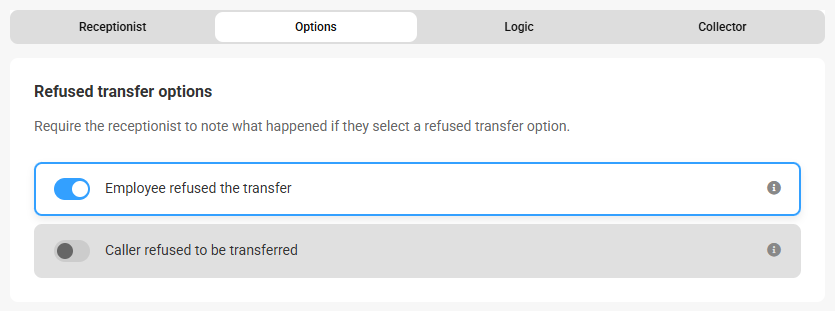
If you'd like the agents to document why a transfer was refused, either by the caller or the recipient, you can use the applicable Refused Transfer toggles accordingly.
After you've configured your transfer script (if applicable), you'll need to choose where to transfer calls to. You can either select the Transfer to Number option and manually type in the contact's name and number, or you can choose the Transfer to Profile number option which will allow you to choose a specific Profile and number to transfer calls to.
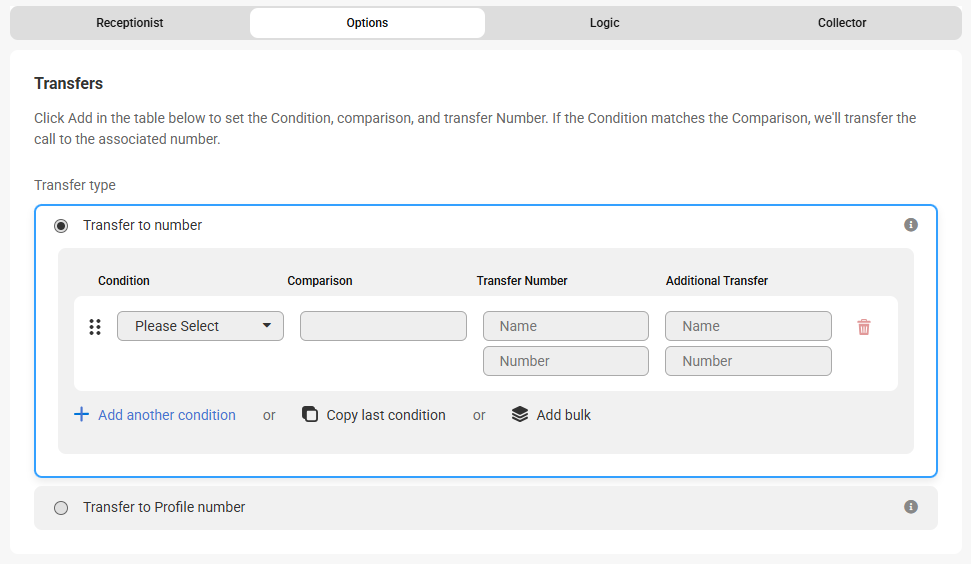
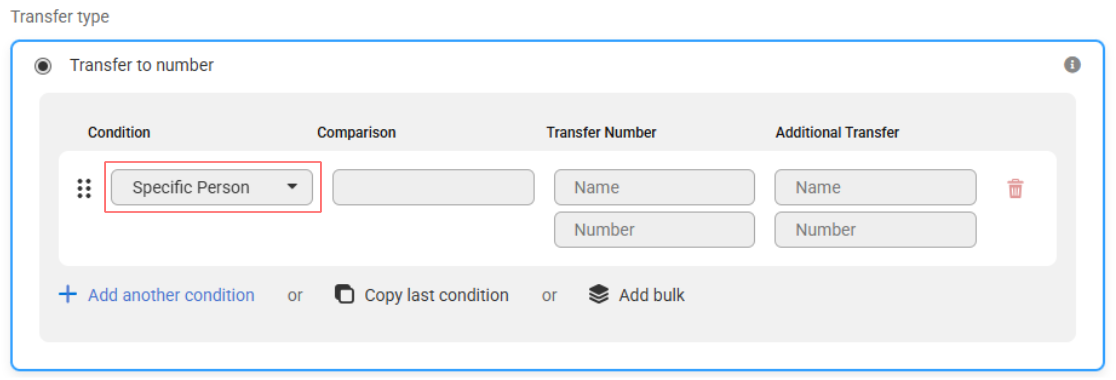
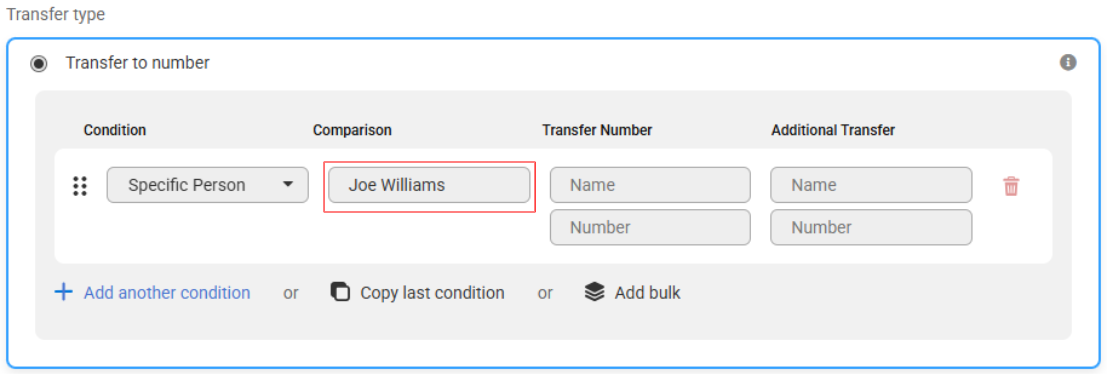
Once you've chosen how you'd like to transfer calls, you'll need to configure your Conditions and Comparisons accordingly. In our example, we'll match the Condition "Specific Person" to a Comparison of the name the agent selected from a Specific Person logic block. First, select your Condition from the appropriate dropdown. We'll choose Specific Person from our list of Custom Collectors.
Next, type in your Comparison. We'll be typing in the names of the people we have listed in our Specific Person logic block.
What you enter in the Comparison field must be an exact match to what you have in the Logic Option you're pulling data from.
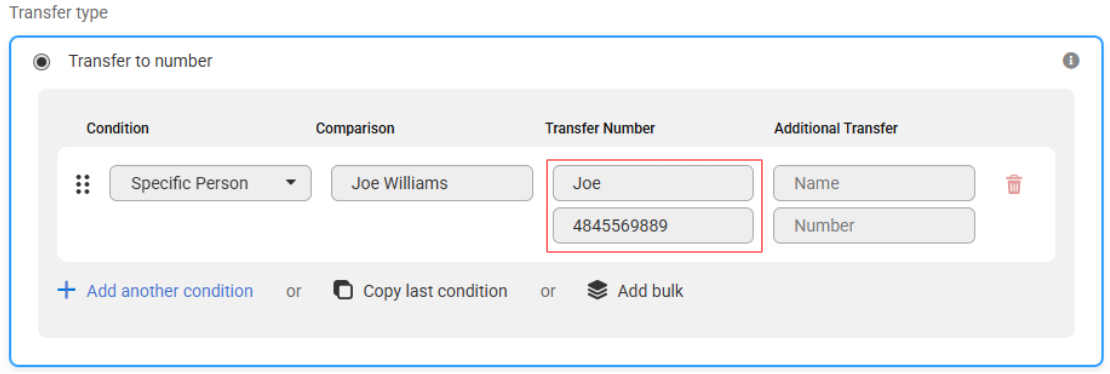
After your Condition and Comparison fields are completed, enter in the transfer number(s) accordingly. If you'd like our agents to attempt to dial 2 numbers for each staff member, add the secondary number in the Additional Transfer field.
You can also include an extension by entering the number in the following format: 8885322479x21
6
Depending on your own setup, continue adding conditions and comparisons until you've completed your list.
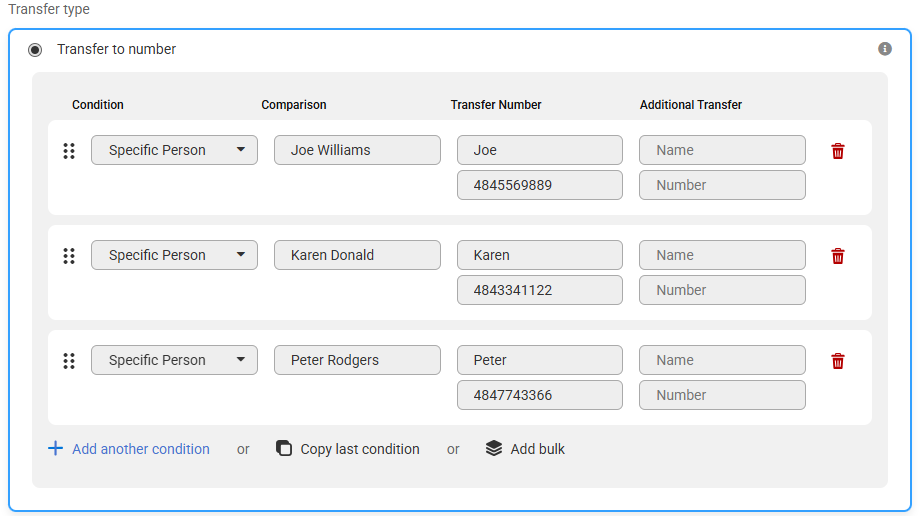
If you want to remove any conditions, click the trashcan icon next to the condition you want deleted.
7
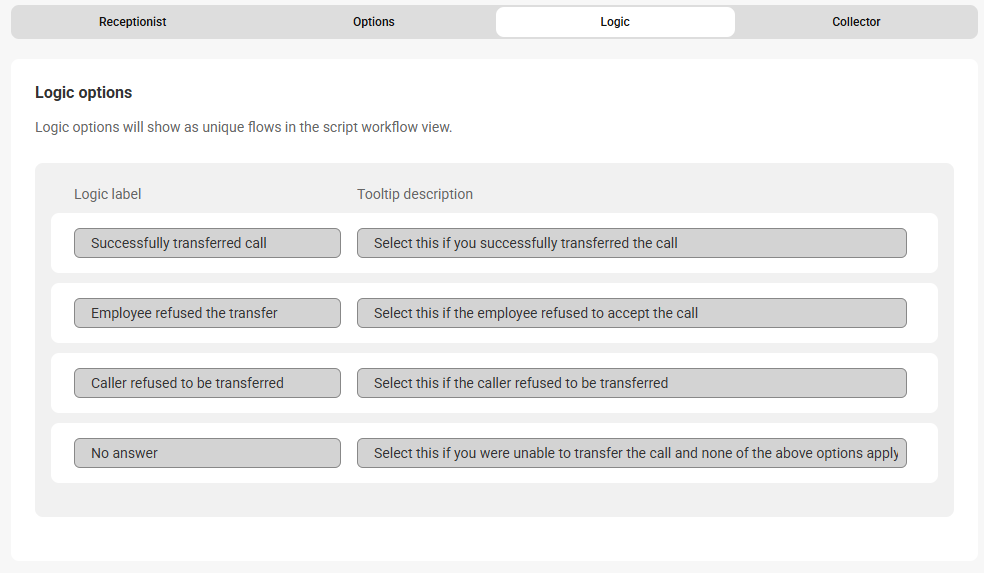
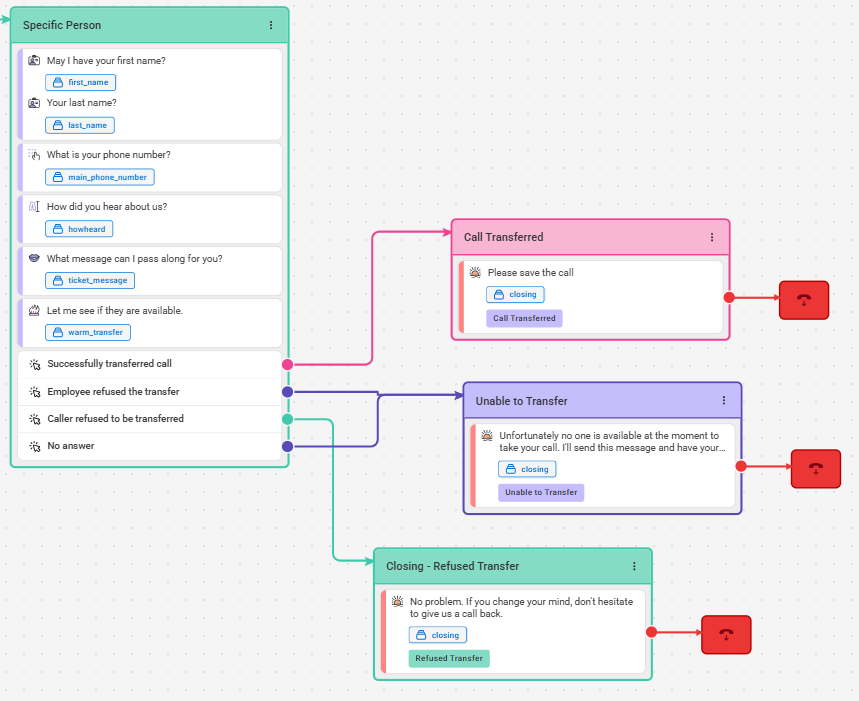
The Logic tab will show 4 pre-programmed options the operator can take depending on what happened on the call. These cannot be edited.
After the Warm Transfer block is completed, we'll need to go back and create the subsequent blocks that will match up with the options listed below. We'll be doing this in a later step.
8
When you are finished, click Save.
Implementing the Warm Transfer (Collector) Block into a Section
Once your Warm Transfer (Collector) block is created, we'll need to add it into it's own section.
1
Select the Script Builder icon on the left-hand navigation menu.
2
Select the script you would like to update.
3
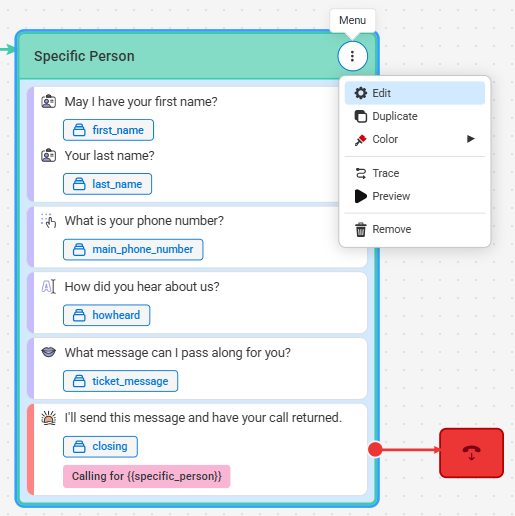
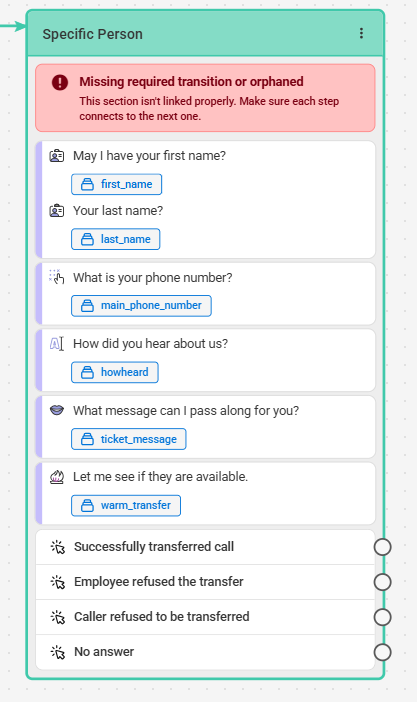
On the script workflow page, locate the script section you want to add the Warm Transfer block to and click the 3-dot menu icon to edit. In our example, we'll add the warm transfer to our Specific Person section.
3
Scroll down to the existing Closing block and click Remove.
4
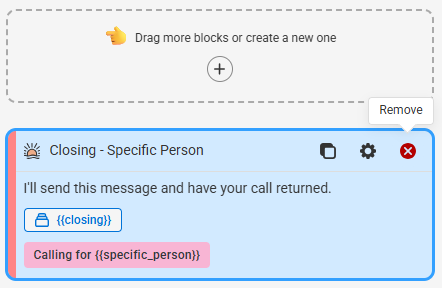
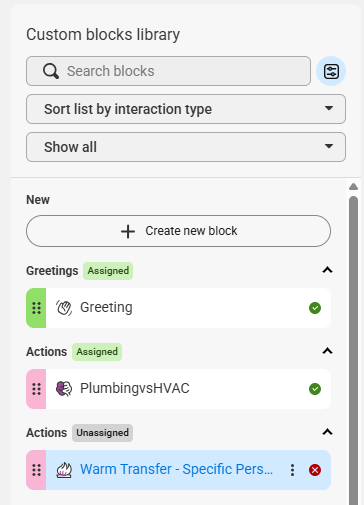
Locate your newly created Warm Transfer block under Custom blocks library, and drag it over to add it to the section.

5
When you are done, click Save. You'll then see your newly updated script section in your script workflow. The section will be incomplete since we need to tell the script what to do after the warm transfer. We'll be covering those steps in the next section.
Creating New Closings
Once you have finished creating the Warm Transfer (Collector) block and adding it to it's own section, we'll need to configure the steps that follow this action. As we've shown above, the Warm Transfer (Collector) block comes pre-programmed with the following logic options:
- Successfully Transferred Call
- Employee Refused the Transfer
- Caller Refused to be Transferred
- No Answer
Each of these options needs to point to a subsequent block. You may want agents to continue gathering more information if they're unable to transfer. However, in this tutorial, we'll be ending the call with a Closing block after the Warm Transfer.
If you want each staff member to receive their own messages after the transfer, you'll want to set up Closing (Collector) script blocks instead of regular Closing blocks. In this tutorial, we'll stick with the standard Closing blocks.
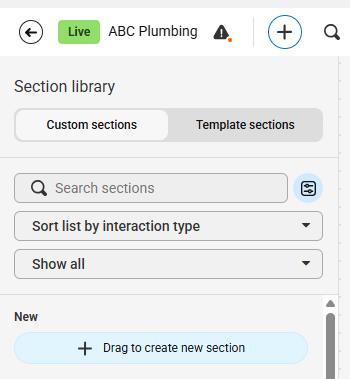
1
From the Script Workflow page, click the + icon in the upper right-hand corner, then click the Drag to create new section button and drag it over to your workflow. From the new section, click Add Script Blocks.
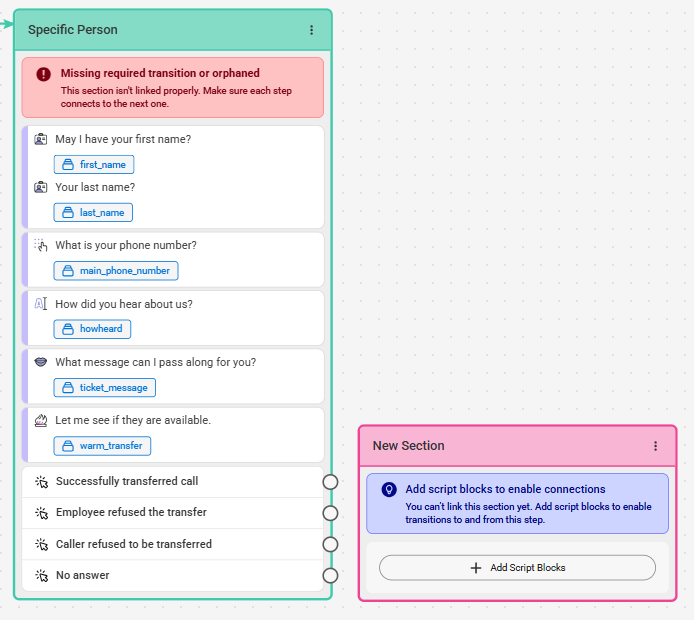
2
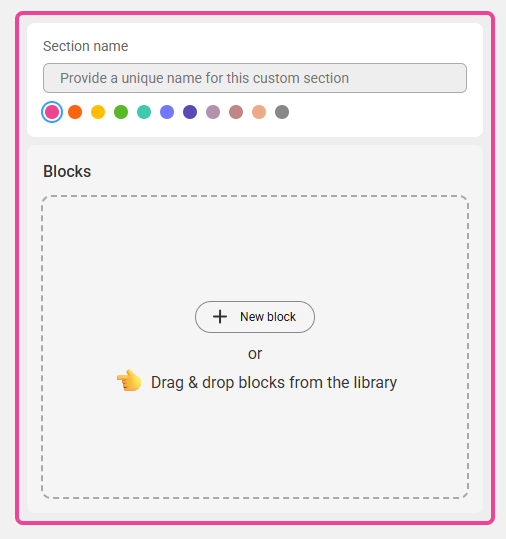
In the new Section, click New Block, then select the Closing block From the Blocks list.
3
Once the block populates on your screen, you'll see the Block Type along the top of the block, and a space to add a Block Label next to it. Block Labels will help us identify the block within the system later on. We named ours Transferred Caller - Specific Person.
4
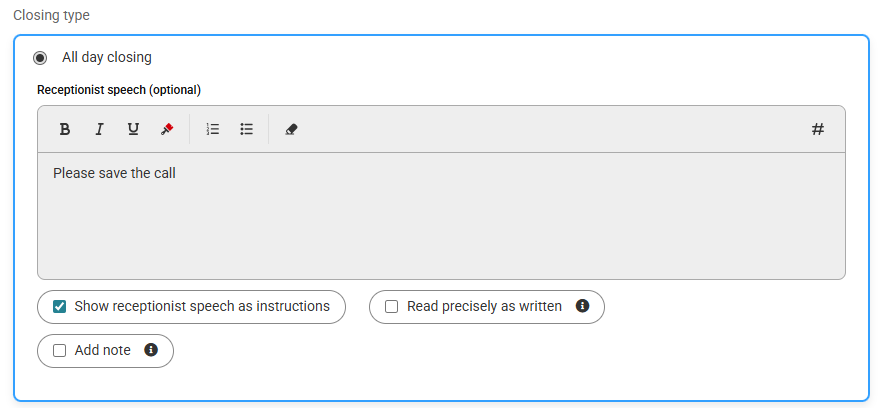
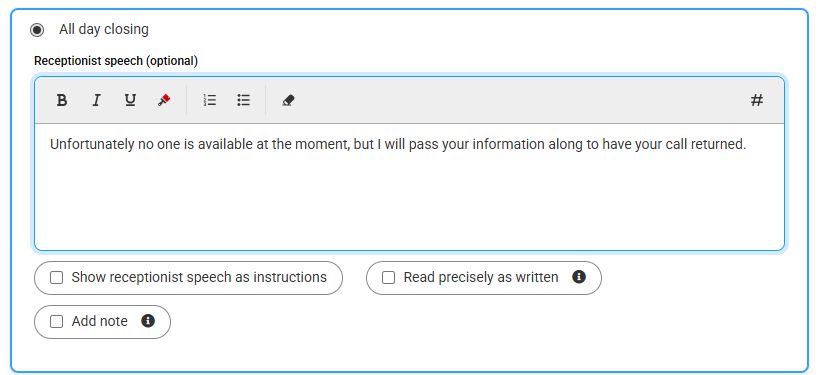
Under the Receptionist tab, we'll be using the All day closing option since we want the agents to use the same closing verbiage 24/7. If this option is chosen, standard text is pre-filled in the Operator Text. Feel free to customize this accordingly. In this Closing block, we'll be instructing the opertor to save the call since the call had already been transferred.
If you want to add different language for after hours calls, check out this article.
5
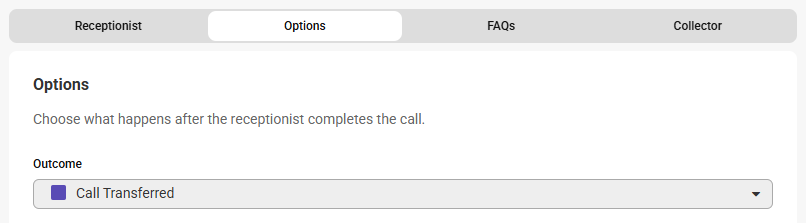
Under the Options tab, you can choose one of the Outcomes listed in the drop down, or you can create your own by using the text box to type in a new Outcome.
6
You can also choose to send the message to a specific Profile or Profiles.
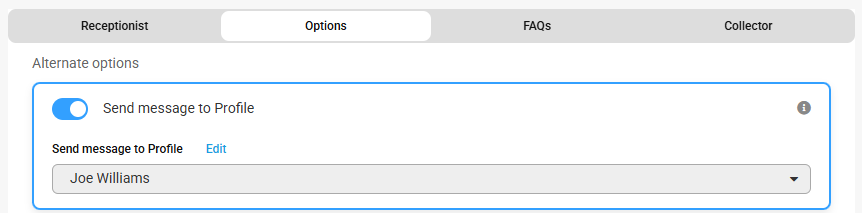
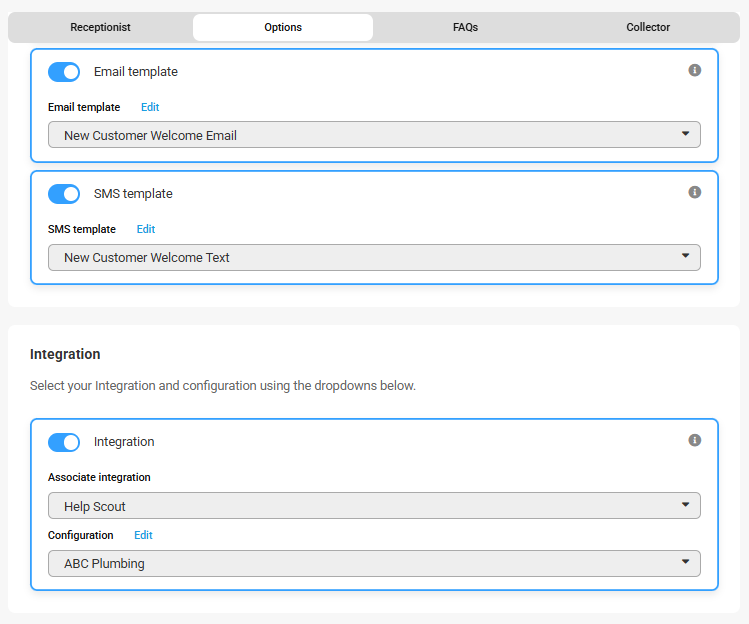
If you are utilizing the SAS Email App, the SAS SMS App, or one of our available App Integrations, toggle the appropriate option, then choose your respective template and/or configuration from the drop down.
7
Click Save. You should see your new Section as shown below. Add a name to your section, then click Save again. We named ours Call Transferred

8
Repeat the steps above to create your other Closing blocks for the remaining logic options. The only difference with these blocks will be the Operator Text, how you name them, and the Outcomes. Check out our examples below.
Text to use for Employee Refused Transfer and No Answer:

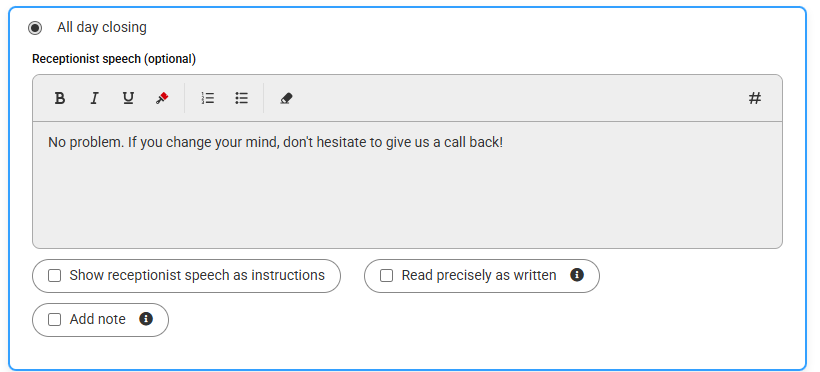
Text to use for Caller Refused Transfer:

9
Once all your Closing blocks and sections are created, link up your Warm Transfer (Collector) section to your newly created Closing sections, as shown below.
10
When you are done, click Save.


