Sending SMS Messages in an Advanced IVR
Texting information to callers via our SAS SMS app while they're navigating through the IVR makes it easy to communicate with callers without having to transfer them to a live agent. Texts will be sent from your SAS forwarding number, and callers can respond right to it. Responses will be visible within your SAS Flex portal as well as the SAS Flex mobile app, allowing for seamless and streamlined customer communication.
In this article we'll discuss:
Updating the Main IVR Greeting
All IVRs must start with a Greeting. This will be considered your "main menu" and will provide callers with subsequent options. In this example, we'll update our main IVR greeting to include options for callers wanting a text with more information.
1
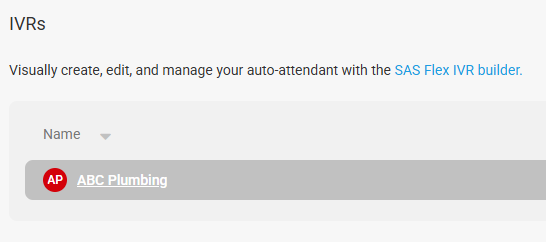
Select the IVR Builder icon on the left-hand navigation menu, then select the IVR you wish to update.
2
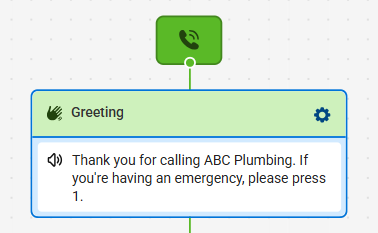
On the next page, click on your Greeting block, as shown below.
3
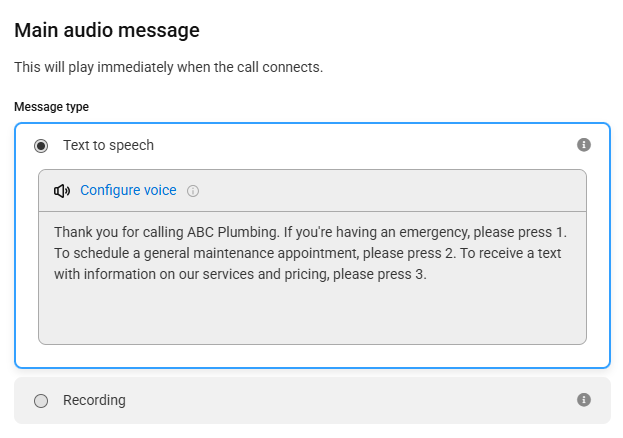
In the panel that appears on the right-hand side of your screen, you'll need to update the prompt language. If you are using a Recorded audio file, you will need to re-record and re-upload the file with the new prompt language. If you are using the Text to Speech option, you can just update the text as shown below.
In our example, we'll be adding a Press 3 option for callers looking to receive a text with more information on our services and pricing.
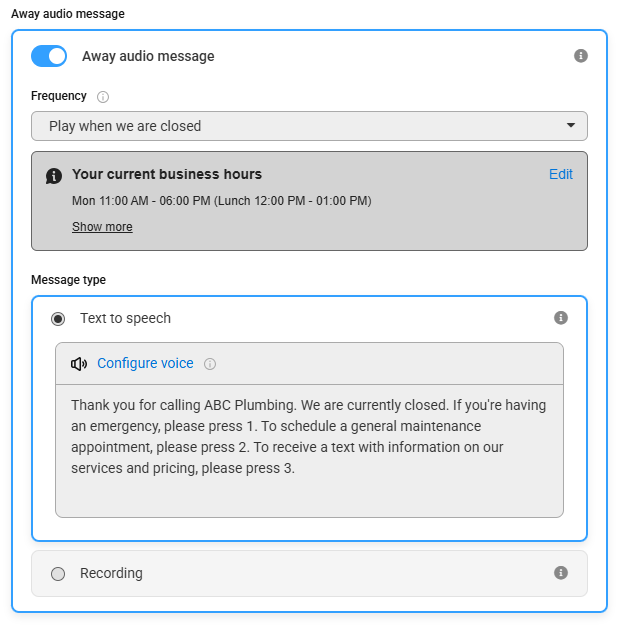
If you want a different message to play when you are closed for after hours or holidays, use the Away audio message toggle, then choose Play when we are closed from the Frequency dropdown and add your respective greeting.
In order for the IVR to be able to change based off your business hours or after hours, you'll want to make sure you have already created a business hours set and a holiday set. Additionally, you'll want to make sure your business hours set is selected under the Options gear within the IVR workflow.
4
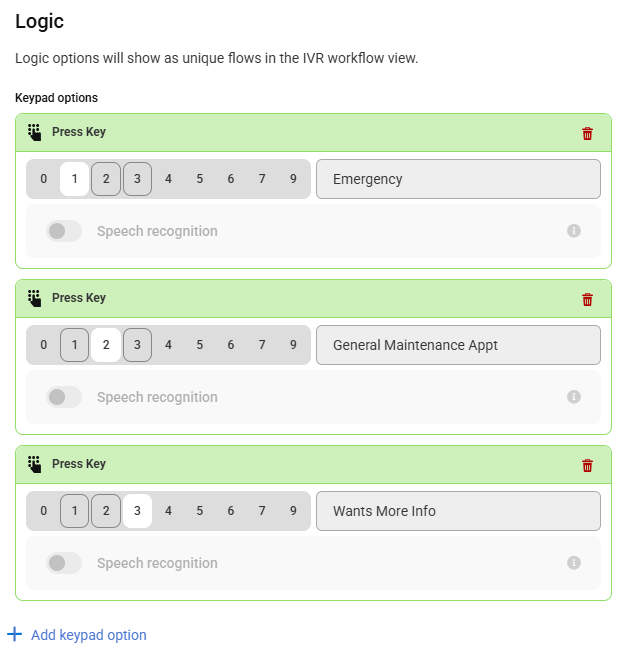
Next, under the Logic section, we'll need to add our new Logic Option. Click Add keypad option, select your numerical keypad option, then type in the respective title. In this case we want callers to press 3 to receive a text with more information.
5
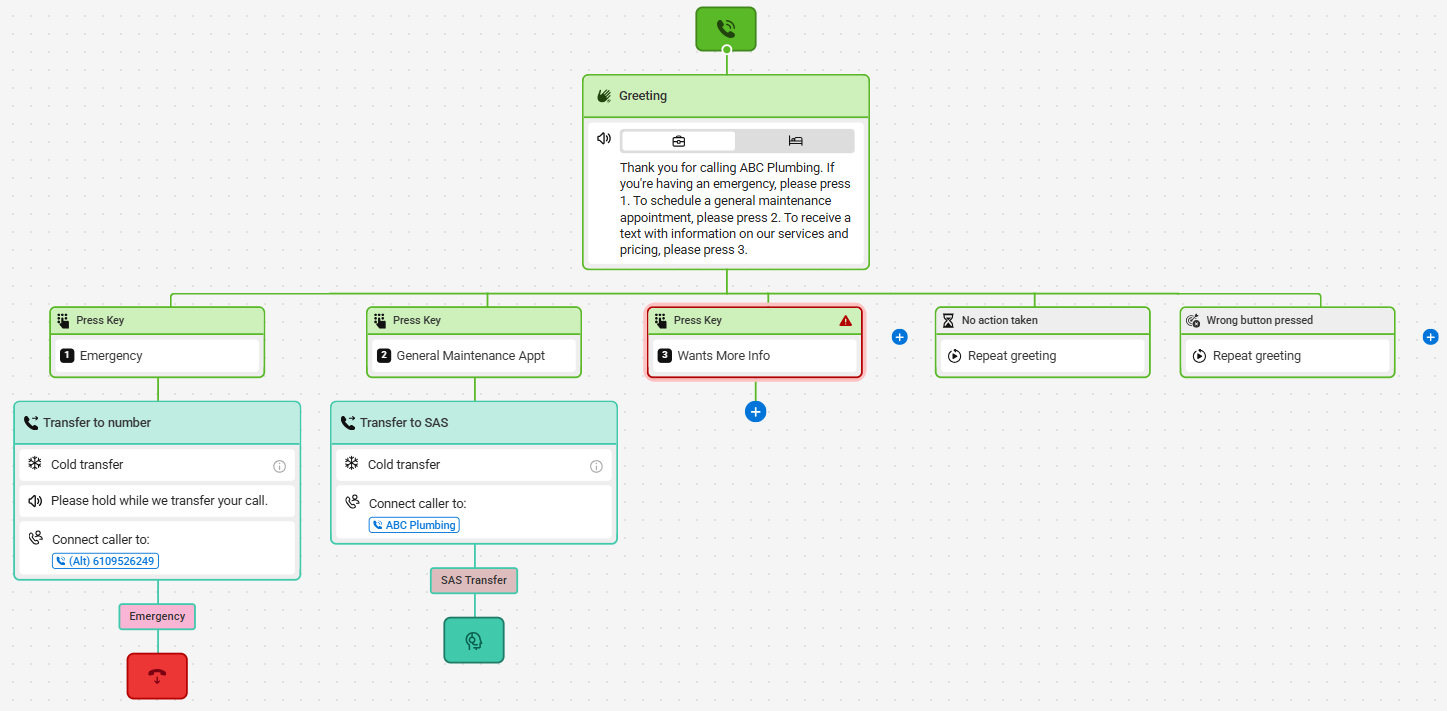
When you are finished, click Save. Your new workflow should look something like the image below.
Creating and Adding a Send SMS Option
In this section, we'll show you how to add a Send SMS option as it's own step within an IVR. This method should be used if you want a text to be sent in the middle of an IVR interaction, but still want to provide callers with subsequent options after the text is sent.
1
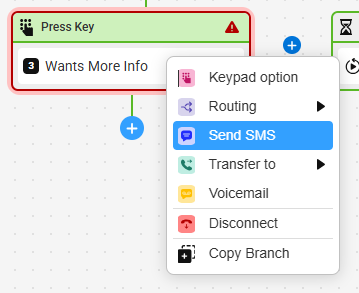
From the main IVR workflow, click the + node beneath the section you want to result in an SMS message. Then, select Send SMS.
2
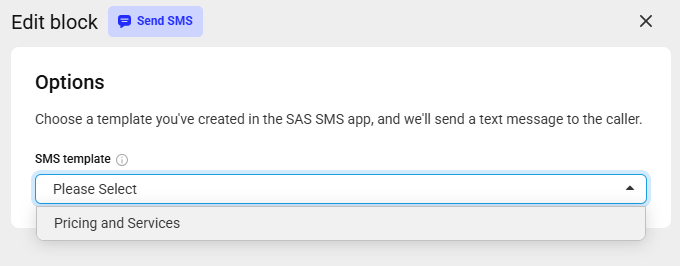
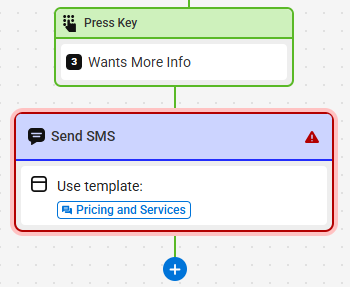
In the panel that appears on the right-hand side of your screen, select the SMS template you wish to send to callers. Then click Save.
3
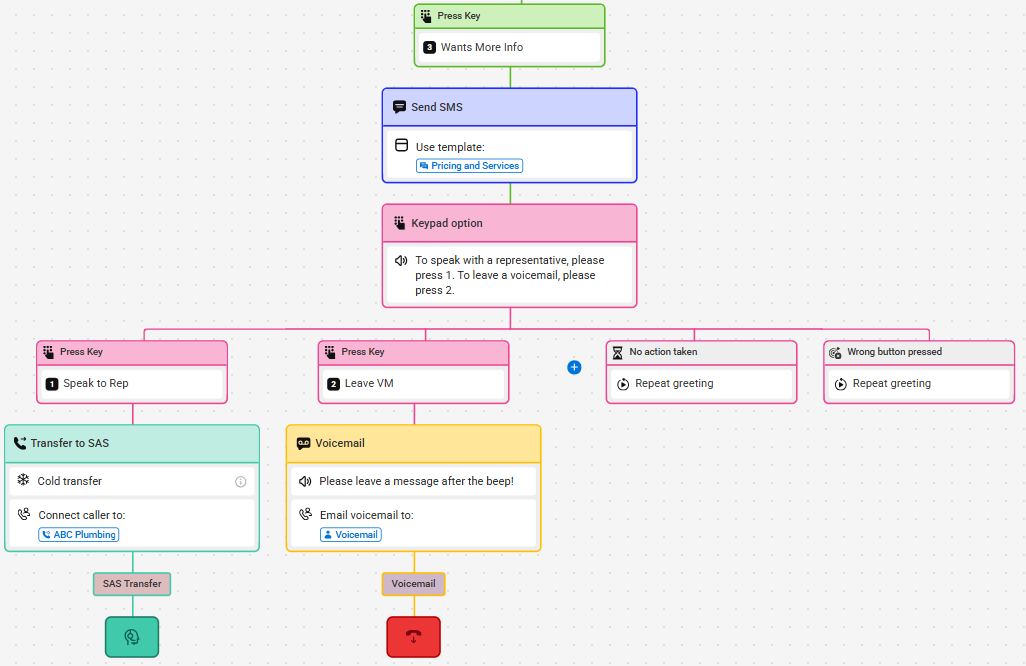
From here, you can continue building our your IVR by clicking + node and adding next steps. In our example, we'll add a Keypad option asking the caller if they need help with anything else, which will lead into subsequent options. However, you can configure your IVR based on your business's needs.
4
When you are finished upating your IVR, click Publish in the upper right-hand corner.
Adding a Send SMS Option within a Voicemail Block
In addition to creating and adding the Send SMS option in the middle of an IVR workflow, users can trigger an SMS to send at the end of an IVR interaction using the Voicemail block.
1
Within your IVR workflow, locate and open up your Voicemail block. If your IVR doesn't currently have a Voicemail block but you want to add one, check out these instructions.
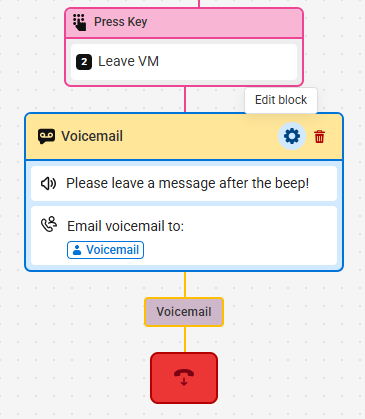
2
In the panel that appears on the right-hand side of your screen, we'll update the message letting callers know we'll be sending them a text with information.
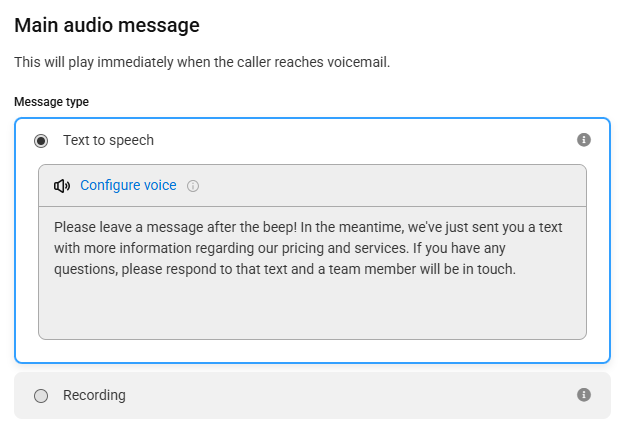
3
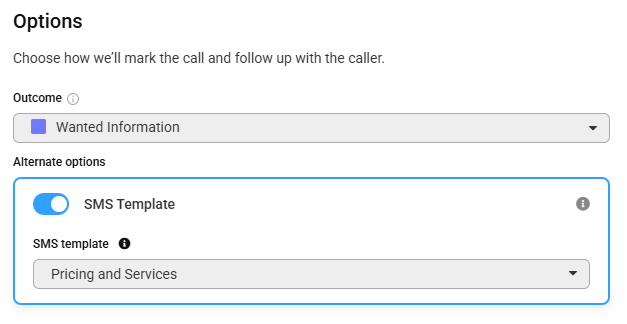
Next, scroll down to the Options section. Then, use the SMS Template toggle to enable SMS messages. Once enabled, select your template from the dropdown and click Save.
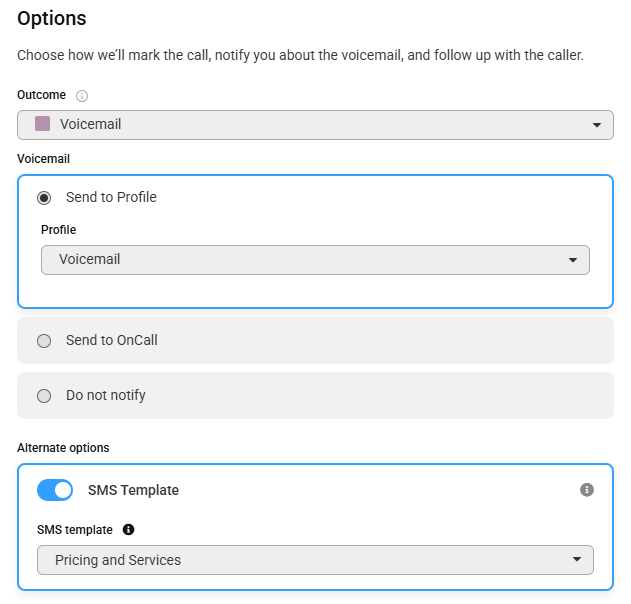
Adding a Send SMS Option within a Disconnect Block
In addition to creating and adding the Send SMS option in the middle of an IVR workflow, users can trigger an SMS to send at the end of an IVR interaction using the Disconnect block.
1
Within your IVR workflow, locate and open up your Disconnect block. If your IVR doesn't currently have a Disconnect block but you want to add one, check out these instructions.
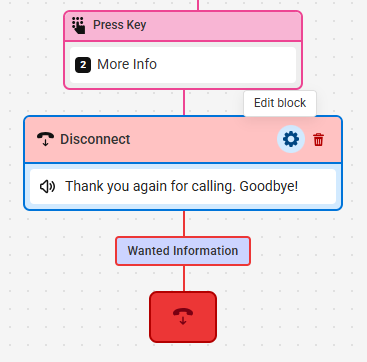
2
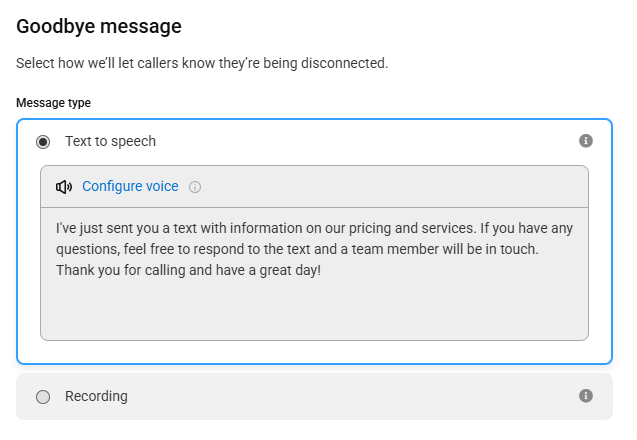
In the panel that appears on the right-hand side of your screen, we'll update the message letting callers know we'll be sending them a text with information.
3
Next, scroll down to the Options section. Then, use the SMS Template toggle to enable SMS messages. Once enabled, select your template from the dropdown and click Save.